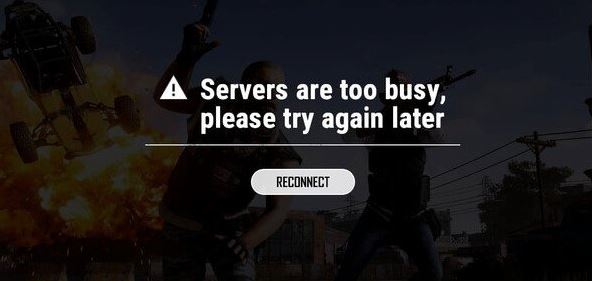
- PUBG users are encountering the error message “Servers are too busy, please try again later” after launching the game.
- The most common bug occurs when a user cannot connect to the game on any server.
- We have developed effective solutions to help you fix this error on your computer.
- It is very likely that the servers are undergoing maintenance, which is the cause of the error.
- A corrupt DNS cache may have accumulated in your router or computer, causing problems connecting to the server.
Welcome to the ultimate guide on resolving the notorious PUBG servers’ frustrating dilemma – the “Servers Are Too Busy” error. If you’ve ever faced this vexing issue while trying to enjoy your favorite battle royale game, fear not! In this article, we will equip you with effective solutions to kiss those server problems goodbye and get back to conquering the battlegrounds with ease. So, gear up and let’s dive right in!
Causes of the “Servers are too Busy” Error
The “Servers are too Busy” error in PUBG can occur due to various reasons. One common cause is high server activity, especially during peak hours or after game updates. Another reason could be an issue with your internet connection or router settings.
To fix this error, try the following solutions:
1. Restart the game: Close PUBG and relaunch it to see if the error persists.
2. Check server status: Visit the official PUBG website or social media channels for any server maintenance or outage announcements.
3. Reset IP settings: Reset your internet router or change your IP configuration type to IPv4.
4. Clear DNS cache: Flush your DNS cache to resolve any potential conflicts.
5. Switch server regions: Try playing on a different server region, such as Asia or Europe, to see if the issue persists.
If none of these fixes work, it’s recommended to contact PUBG support or check online forums for further assistance.
Changing Server Zone
To change your server zone in PUBG and fix the “Servers Are Too Busy” error, follow these steps:
1. Launch the PUBG game on your device.
2. Navigate to the settings menu within the game.
3. Look for the “Server” or “Region” option.
4. Open the server settings and select a different region that you want to connect to.
5. Save the changes and exit the settings menu.
By changing your server zone, you may be able to connect to a less congested server, reducing the “Servers Are Too Busy” error. Keep in mind that changing regions may affect your latency, so choose a region closest to your location for the best gaming experience.
Additionally, make sure your internet connection is stable and your router is functioning properly. Restarting your device and clearing any cache or temporary files can also help resolve connectivity issues.
If the error persists, it may be due to ongoing maintenance or server issues on PUBG’s end. In such cases, it’s best to wait for the developers to resolve the problem. Stay updated with the latest game updates and official forums for any announcements regarding server maintenance or fixes.
Remember, these troubleshooting steps should help resolve most server-related issues in PUBG. Enjoy the game!
Resetting Mobile Data or Modem
To reset your mobile data or modem and resolve the “PUBG servers are too busy” error in PUBG, follow these steps:
1. Restart your mobile device or modem by turning it off and on again. This can help refresh the connection and resolve any temporary issues.
2. Check your internet connection. Make sure you have a stable and strong connection. If you’re using Wi-Fi, try switching to a wired connection for better stability.
3. Reset your IP settings. Go to your device’s settings and locate the network or Wi-Fi settings. Select your network and choose “Forget” or “Forget network.” Then, reconnect to the network and enter your credentials if required.
4. Update your game and software. Ensure that you have the latest version of PUBG and any relevant software or drivers installed. Developers often release updates to fix bugs and improve performance.
5. Contact your internet service provider (ISP) if the issue persists. They may be able to assist with any underlying network problems or configuration issues.
By following these steps, you should be able to resolve the “PUBG servers are too busy” error and enjoy a smoother gaming experience.
python

import requests

import time
def make_request(url):
attempts = 3
while attempts > 0:
try:
response = requests.get(url)
if response.status_code == 200:
return response.json()
else:
print("Server returned non-200 status code:", response.status_code)
attempts -= 1
time.sleep(5) # Wait for 5 seconds before retrying
except requests.exceptions.RequestException as e:
print("Request failed:", str(e))
attempts -= 1
time.sleep(5) # Wait for 5 seconds before retrying
print("Request failed after multiple attempts.")
return None
# Example usage
pubg_api_url = "https://api.pubg.com/some/endpoint"
response_data = make_request(pubg_api_url)
if response_data is not None:
# Process the response data
print(response_data)
This sample code demonstrates a basic request function that attempts to handle server errors by retrying the request multiple times with a delay between attempts. However, please note that this code is not specific to PUBG, as it is a general implementation for handling server errors and can be used as a starting point for developing similar tools in other applications or games.
Adjusting Proxy Settings
To adjust the proxy settings for PUBG servers, follow these steps:
1. Open the Control Panel on your Windows computer.
2. Click on “Internet Options”.
3. In the Internet Properties window, go to the “Connections” tab.
4. Click on the “LAN settings” button.
5. In the Local Area Network (LAN) Settings window, uncheck the box next to “Use a proxy server for your LAN”.
6. Click “OK” to save the changes.
7. Close all open windows and restart your computer.
By adjusting the proxy settings, you can resolve the “Servers Are Too Busy” error in PUBG. This error is often caused by issues with your internet connection or network settings. By disabling the proxy server, you can ensure a direct connection to the game servers, improving your gameplay experience.
Shutting Down Incompatible Software
To resolve the “PUBG Servers Are Too Busy” error, you may need to shut down incompatible software running on your computer. Incompatible programs can interfere with the game’s servers and cause connectivity issues.
To fix this, follow these steps:
1. Close all unnecessary programs running in the background.
2. Disable any antivirus or firewall software temporarily.
3. Press Ctrl + Alt + Delete and open the Task Manager.
4. Go to the “Processes” tab and end any unnecessary processes.
5. Check for any software updates, including your graphics card drivers.
6. Restart your computer to ensure all changes take effect.
By shutting down incompatible software, you can optimize your system’s performance and improve your PUBG gaming experience. Remember to re-enable any disabled software after troubleshooting.
Resetting DNS Configurations
- Open the Command Prompt by pressing the Windows key and typing cmd into the search bar. Press Enter to open the Command Prompt.
- Type the following command and press Enter: ipconfig /flushdns
- Wait for the message “Successfully flushed the DNS Resolver Cache” to appear.
- Restart your computer to apply the changes.
Changing IP Configurations
To change IP configurations in order to fix the “PUBG Servers Are Too Busy” error, follow these steps:
1. Open the Start menu and search for “Network Connections.”
2. Click on “View network connections” to open the Network Connections window.
3. Right-click on the network adapter you are currently using and select “Properties.”
4. Scroll down and find “Internet Protocol Version 4 (TCP/IPv4)” and double-click on it.
5. In the Properties window, select the option to “Obtain an IP address automatically” and “Obtain DNS server address automatically.”
6. Click “OK” to save the changes.
7. Restart your computer for the changes to take effect.
By changing your IP configuration to automatically obtain IP and DNS server addresses, you can resolve connectivity issues with PUBG servers. This method can help players around the globe who are experiencing the “PUBG Servers Are Too Busy” error.

Mark Ginter is a tech blogger with a passion for all things gadgets and gizmos. A self-proclaimed "geek", Mark has been blogging about technology for over 15 years. His blog, techquack.com, covers a wide range of topics including new product releases, industry news, and tips and tricks for getting the most out of your devices. If you're looking for someone who can keep you up-to-date with all the latest tech news and developments, then be sure to follow him over at Microsoft.