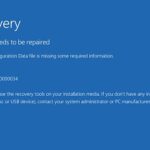
- When restoring a system in Windows, you may receive an error message that says, “System protection must be enabled on this drive” In this case, what do you need to do to solve this problem? Here are two useful ways that Techquack offers you, and the best way to restore your PC to its previous state.
Welcome to this article where we will explore the simple yet crucial process of enabling system protection on a drive, providing you with an effective fix to safeguard your valuable data.
Enabling System Protection via CMD or Control Panel
To enable system protection on a specific drive, you can use either the Command Prompt or the Control Panel. Here are the steps for both methods:
Using Command Prompt:
1. Press the Windows key + R to open the Run dialog box.
2. Type “rstrui.exe” and press Enter.
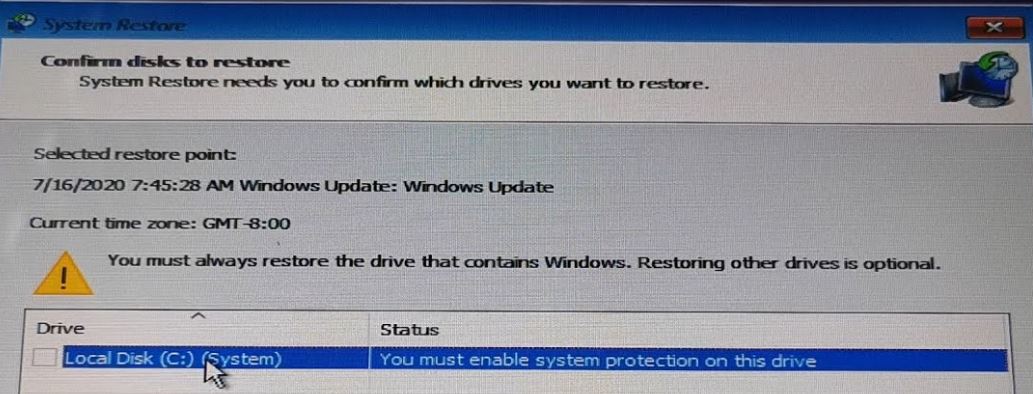
3. In the System Restore window, click “Next” and select the desired restore point.
4. Click “Finish” to enable system protection on the drive.
Using Control Panel:
1. Press the Windows key + X and select “System” from the menu.
2. In the System window, click on “System protection” in the left pane.
3. Select the desired drive and click “Configure”.
4. Check the box next to “Turn on system protection” and adjust the disk space usage if needed.
5. Click “OK” to enable system protection on the drive.
By following these steps, you can easily enable system protection on your Windows PC and protect your important files and settings.
Fixing the error by checking the Turn on System Protection setting in Windows
To fix errors related to System Protection on Windows, follow these steps:
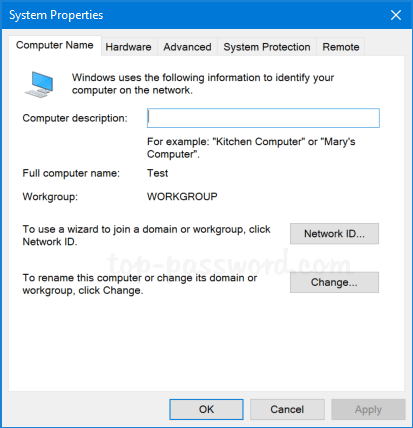
1. Open the Start menu and search for “System Protection” to find the System Properties window.
2. Click on “System Protection” to open the System Properties dialog box.
3. In the System Protection tab, select the drive that you want to enable System Protection for and click on “Configure.”
4. In the next window, select the “Turn on system protection” option and adjust the maximum disk space usage as desired.
5. Click “Apply” and then “OK” to save the changes.
By enabling System Protection, you can create restore points that allow you to revert your PC back to a previous working state if any issues arise. This can be useful for fixing errors and recovering lost files.
Remember, it is important to regularly create restore points to ensure you have recent backups in case of any problems.
powershell

# Function to enable system protection on a specific drive

function Enable-SystemProtection {

[CmdletBinding()]

param (

[Parameter(Mandatory = $true)]

[ValidateScript({Test-Path $_ -PathType 'Container'})]

[string]$Drive

)
$driveInfo = Get-PSDrive -Name $Drive -PSProvider 'FileSystem'
if ($driveInfo) {
$driveLetter = $driveInfo.Root
$currentProtection = Get-WmiObject -Class Win32_Volume -Filter "DriveLetter = '$driveLetter'"
if ($currentProtection.ProtectionStatus -ne 'On') {
# Enable system protection
try {
Enable-ComputerRestore -Drive $driveLetter -Confirm:$false
Write-Host "System protection enabled successfully on drive $driveLetter"
}
catch {
Write-Host "Failed to enable system protection on drive $driveLetter"
Write-Host $_.Exception.Message
}
}
else {
Write-Host "System protection is already enabled on drive $driveLetter"
}
}
else {
Write-Host "Drive $Drive not found"
}
}
# Usage example
Enable-SystemProtection -Drive 'C:'
This PowerShell code defines a function `Enable-SystemProtection` that takes a drive letter as input and attempts to enable system protection on that drive. It checks if the drive exists, verifies the current protection status, and enables it if not already enabled. The code utilizes the `Enable-ComputerRestore` cmdlet to enable system protection on the specified drive.
Renaming registry files for system protection
Step 1: Open the Windows OS registry editor. To do this, press the Windows key + R, type “regedit” and hit Enter.
Step 2: Locate the “HKEY_LOCAL_MACHINE\SOFTWARE\Microsoft\Windows NT\CurrentVersion\SystemRestore” key.
Step 3: Right-click on the “DisableSR” registry DWORD value and select “Rename”. Change the name to “DisableSR.old”.
Step 4: Right-click on the “DisableConfig” registry DWORD value and select “Rename”. Change the name to “DisableConfig.old”.
By renaming these registry files, you are allowing system protection to be enabled on your drive, which will help protect your system from any future issues. Remember to create restore points regularly for added protection.
For more solutions to PC system issues, check out our other articles or visit our Microsoft support website.
Restarting the System Protection Service for resolution
To restart the System Protection Service and resolve system protection issues, follow these steps:
Step 1: Press the Windows key + R to open the Run dialog box.
Step 2: Type “services.msc” and press Enter to open the Services window.
Step 3: Scroll down and locate the “System Protection Service” in the list.
Step 4: Right-click on the “System Protection Service” and select “Restart” from the context menu.
This will restart the service and potentially fix any issues with system protection. If you continue to experience problems, consider checking for any error messages or trying other solutions mentioned in our other articles.
Remember, enabling system protection on your drive is crucial for creating restore points and protecting your data. So, ensure that system protection settings are properly configured to avoid any potential loss of important files.
Feel free to explore more articles and tools related to system protection to enhance your Windows experience.
Better ways to protect and restore the system
- Open the Control Panel by clicking on the Start button and selecting Control Panel.
- In the Control Panel, click on System and Security.
- Under the System section, click on System to open the System Properties window.
- In the System Properties window, click on the System Protection tab.
- From the list of available drives, select the drive you want to enable system protection for.
- Click on the Configure button.
- In the System Protection settings, select the Turn on system protection option.
- Adjust the Max Usage slider to allocate the desired amount of disk space for system protection.
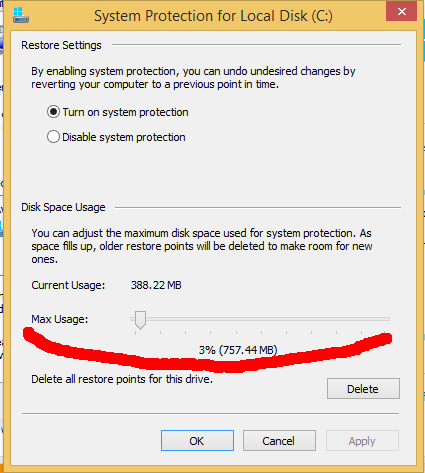
- Click on OK to save the changes.
- Click on Apply and then OK to close the System Properties window.

Mark Ginter is a tech blogger with a passion for all things gadgets and gizmos. A self-proclaimed "geek", Mark has been blogging about technology for over 15 years. His blog, techquack.com, covers a wide range of topics including new product releases, industry news, and tips and tricks for getting the most out of your devices. If you're looking for someone who can keep you up-to-date with all the latest tech news and developments, then be sure to follow him over at Microsoft.