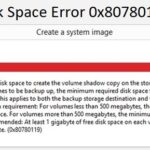
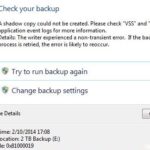
- When running the integrated backup software – Backup and Restore (Windows), you may encounter error 0x80780166.
- This post explains how to fix the Windows backup error.
- In addition to the Windows snapshot tool, you can use third-party software to back up your operating system.
Introducing a Simple Solution to Overcome System Image Backup Issues on Windows 10/11
Reasons for Failed System Image Backup
There are several reasons why you may encounter issues while trying to create a system image backup in Windows 10/11. One common problem is insufficient disk space on the target backup location. Make sure you have enough free space on the destination drive before proceeding.
Another potential issue could be related to security services like Cloudflare. In some cases, these services may interfere with the backup process and cause it to fail. If you suspect this is the case, try disabling any security services temporarily and see if that resolves the problem.
Additionally, errors related to the source partition or directory can also prevent the creation of a system image backup. Ensure that the source drive or partition is in a healthy state and accessible. If you encounter a “create directory error” message, make sure you have the necessary permissions to create directories on the target location.
Finally, it’s worth noting that certain programs or applications running in the background can interfere with the backup process. Try closing any unnecessary programs or performing the backup in Safe Mode to eliminate any potential conflicts.
By addressing these common issues, you should be able to create a successful system image backup in Windows 10/11.
Resolving Disk Space Issues for System Image Backup
If you are experiencing disk space issues while trying to create a system image backup on Windows 10 or 11, there are a few steps you can take to resolve the problem.
First, check the target backup location to ensure that it has enough free space to accommodate the backup. If necessary, free up disk space by deleting unnecessary files or moving them to another drive.
Next, make sure that you are using the built-in Backup tool in Windows. Third-party backup solutions may not work properly with the system image backup feature.
If you are still encountering issues, try running the backup tool as an administrator. Right-click on the backup tool and select “Run as administrator” to see if this resolves the problem.
Additionally, check if any security solutions or firewall settings are interfering with the backup process. Temporarily disabling these tools or adding an exception for the backup tool may help.
By following these steps, you should be able to resolve any disk space issues and successfully create a system image backup on Windows 10 or 11.
Troubleshooting Windows 10 Backup Problems
If you’re experiencing issues with creating a system image backup on Windows 10 or Windows 11, here are some troubleshooting steps to help resolve the problem.
1. Check the source drive and destination volume: Make sure the source drive has enough space to create the backup and that the destination volume is accessible and writable.
2. Run the backup tool with administrative privileges: Right-click on the backup tool and select “Run as administrator” to ensure proper permissions.
3. Restart the Volume Shadow Copy service: Press Win + R, type “services.msc”, and hit Enter. Locate the “Volume Shadow Copy” service, right-click it, and select “Restart”.
4. Disable security software: Temporarily disable any security solutions, such as antivirus or firewall programs, as they may interfere with the backup process.
5. Use an alternative backup tool: If the built-in Windows backup tool continues to cause problems, consider using third-party backup software like Vembu Backup or Wondershare Filmora.
Remember to consult Microsoft’s support documentation or visit reputable forums like tenforums.com for additional assistance if needed.
Steps to Fix System Backup Problems
1. Check for Errors: Run a scan to identify and fix any errors on your system that may be causing issues with the backup. Use the Windows Error Checking tool or a third-party disk utility.
2. Disable Antivirus: Temporarily disable your antivirus software as it may interfere with the backup process. Remember to re-enable it once the backup is complete.
3. Clear Temporary Files: Delete temporary files that may be taking up space on your system and causing backup errors. Use the Disk Cleanup tool to remove unnecessary files.
4. Check Available Storage Space: Ensure that you have enough free space on your backup destination. Delete unnecessary files or transfer them to an external storage device to free up space.
5. Restart Windows Backup Service: Sometimes, restarting the Windows Backup service can resolve backup errors. Open the Services console, locate the Windows Backup service, and restart it.
6. Update Device Drivers: Outdated or incompatible device drivers can cause backup problems. Update your drivers using Device Manager or download the latest versions from the manufacturer’s website.
7. Use System File Checker: Run the System File Checker tool to scan and repair any corrupted system files that may be causing backup issues. Open Command Prompt as an administrator and type “sfc /scannow“.
8. Reset Windows Backup Settings: Resetting your Windows Backup settings can fix any configuration issues. Open the Control Panel, go to “Backup and Restore”, and click on “Change settings”.
Remember to follow these steps carefully and consult the official Microsoft support documentation for more detailed instructions if needed.
Managing System Protection for Better Backup
To ensure a successful system image backup on Windows 10 or 11, it is important to manage your system protection settings effectively. Follow these steps to optimize your backup process:
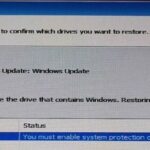
1. Enable System Protection: Open the Control Panel and navigate to “System and Security” > “System.” Click on “System Protection” and select the system drive. Enable protection by clicking on the “Configure” button and choosing “Turn on system protection.” Adjust the disk space usage according to your needs.
2. Create a Restore Point: Before proceeding with the backup, create a restore point to safeguard your system. Open the System Protection tab and click on “Create.” Enter a description for the restore point and click “Create.”
3. Disable Non-Essential Services: To avoid potential conflicts during the backup process, temporarily disable unnecessary services and applications running in the background. Open the Task Manager, navigate to the “Services” or “Startup” tab, and disable any non-essential items.
4. Use Vembu Backup: Consider using Vembu Backup, a reliable and comprehensive backup solution that supports bare-metal recovery and instant VM recovery. This software ensures the integrity and security of your data during the backup process.
By following these steps and utilizing a trusted backup solution like Vembu Backup, you can effectively manage system protection for a better backup experience.
Alternative Tools for System Image Backup
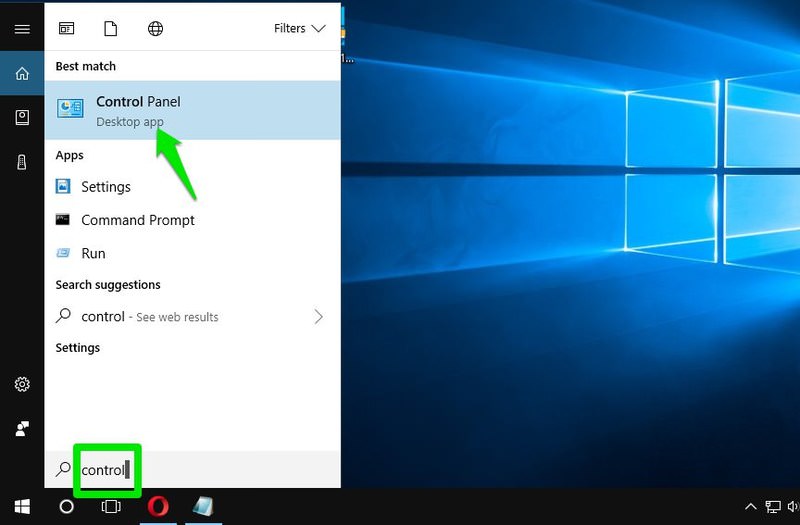
- Open the Control Panel by pressing the Windows key + X and selecting Control Panel from the menu.
- Click on System and Security in the Control Panel window.
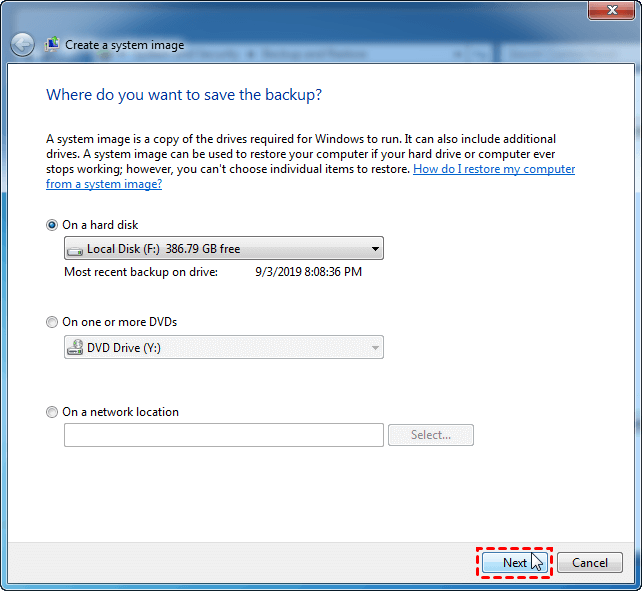
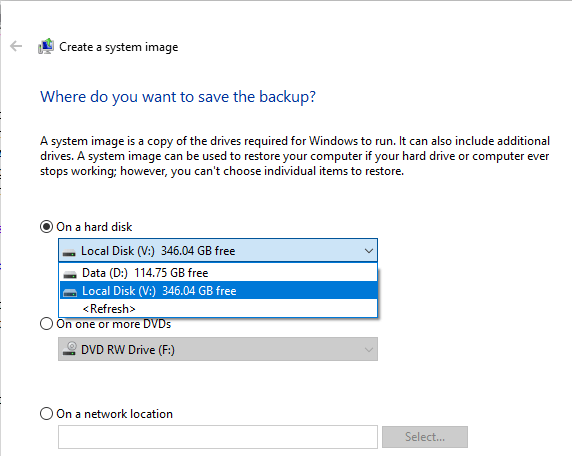
- Under the Backup and Restore (Windows 7) section, click on Create a system image.
- Choose the location where you want to save the system image backup, such as an external hard drive or a network location.
- Select the drives you want to include in the system image backup.
- Click on Start backup to initiate the system image backup process.
Repair Method 2: Use third-party backup software
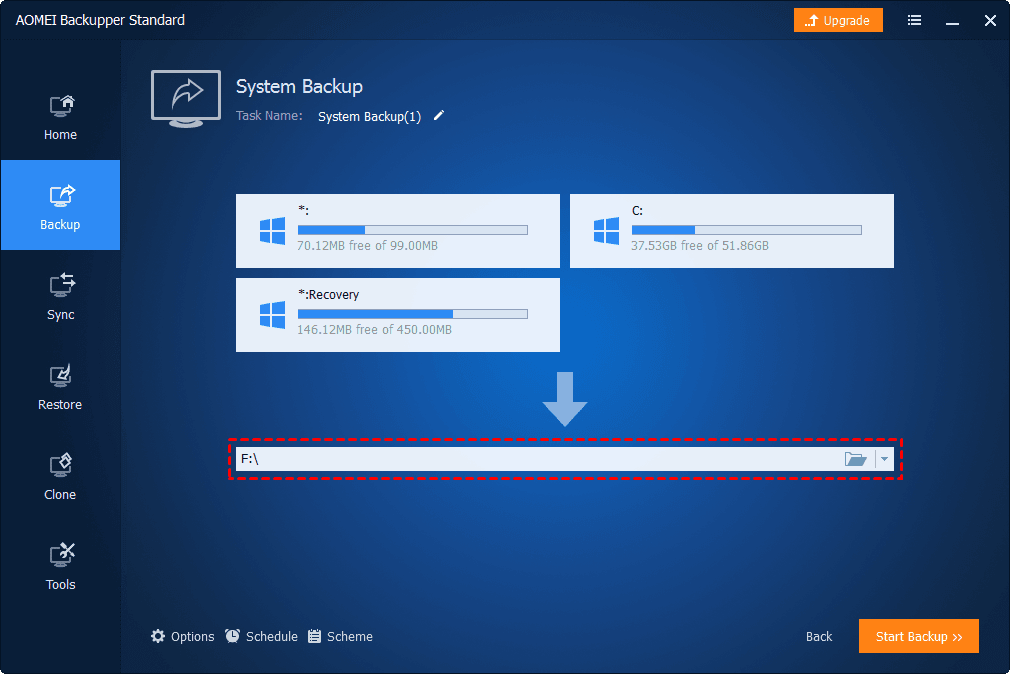
- Research and choose a reliable third-party backup software that supports system image backups.
- Download and install the selected third-party backup software on your Windows 10/11 computer.
- Open the backup software and locate the option to create a system image backup.
- Select the drives you want to include in the system image backup.
- Choose the destination where you want to save the system image backup, such as an external hard drive or a network location.
- Follow the software’s instructions to start the system image backup process.
Repair Method 3: Use Windows PowerShell
- Open the Start menu and search for PowerShell.
- Right-click on Windows PowerShell in the search results and select Run as administrator.
- In the PowerShell window, type the following command and press Enter: wbAdmin start backup -backupTarget:”[destination]” -include:[drive letter]
- Replace “[destination]” with the path where you want to save the system image backup, such as “D:\Backup”.
![In the PowerShell window, type the following command and press Enter: wbAdmin start backup -backupTarget:"[destination]" -include:[drive letter]
Replace "[destination]" with the path where you want to save the system image backup, such as "D:\Backup".](/posts/in-the-powershell-window-type-the-following.png)
- Replace “[drive letter]” with the drive letter of the drive you want to include in the system image backup, such as “C:”.
- Wait for the system image backup process to complete.
![Replace "[drive letter]" with the drive letter of the drive you want to include in the system image backup, such as "C:".
Wait for the system image backup process to complete.](/posts/replace-drive-letter-with-the-drive-letter.png)
Resolving Access Issues with tenforums.com
If you’re experiencing access issues with tenforums.com while trying to create a system image backup on Windows 10/11, follow these steps to resolve the problem:
1. Clear your browser’s cache and cookies to ensure a fresh connection to the website.
2. Disable any security services or software that might be blocking your access to the site.
3. Check if other users are experiencing similar issues by visiting the tenforums.com homepage or support page.
4. If the issue persists, contact the site owner or administrator for further assistance.
5. Make sure you have enough free space on your system partition or external storage device to create the backup.
6. If you encounter an error while creating the backup, check the Windows Event Viewer for any related error messages.
7. Consider using alternative backup solutions like Windows System Image or third-party software that supports bare-metal recovery and instant VM recovery.
8. If you’re still unable to create a system image backup, reinstalling Windows or restoring from a system restore point might be necessary.
By following these steps, you should be able to resolve access issues and successfully create a system image backup on Windows 10/11.

Mark Ginter is a tech blogger with a passion for all things gadgets and gizmos. A self-proclaimed "geek", Mark has been blogging about technology for over 15 years. His blog, techquack.com, covers a wide range of topics including new product releases, industry news, and tips and tricks for getting the most out of your devices. If you're looking for someone who can keep you up-to-date with all the latest tech news and developments, then be sure to follow him over at Microsoft.