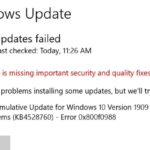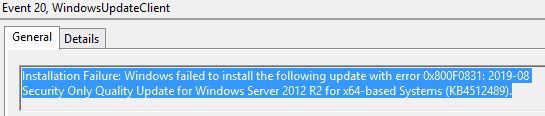
- The 0x800F0831 error is a common problem with Windows updates.
- It’s hard for users to find specific reasons for this error.
- To fix this problem, you either need to scan and repair corrupted files using the DISM utility or run the troubleshooter.
Unlocking the Solution: Troubleshooting Error 0x800f0831 During Windows Updates
Symptom and Cause of 0x800f0831 Installation Failure
The error code 0x800f0831 typically occurs when updating Windows 10. This error is usually caused by a missing or corrupted package in the Windows Update folder. It can also be due to issues with the Windows Update service, device settings, or other installation errors.
To fix this error, you can try the following steps:
1. Run the Windows Update Troubleshooter utility to identify and resolve any issues with the Windows Update service.
2. Check if any pending updates are causing the error and install them manually.
3. Reset the Windows Update components by following these steps:
a. Open a Command Prompt as an administrator.
b. Type “net stop wuauserv” and press Enter.
c. Type “net stop cryptSvc” and press Enter.
d. Type “net stop bits” and press Enter.
e. Type “net stop msiserver” and press Enter.
f. Type “ren C:\Windows\SoftwareDistribution SoftwareDistribution.old” and press Enter.
g. Type “ren C:\Windows\System32\catroot2 catroot2.old” and press Enter.
h. Type “net start wuauserv” and press Enter.
i. Type “net start cryptSvc” and press Enter.
j. Type “net start bits” and press Enter.
k. Type “net start msiserver” and press Enter.
4. If the error persists, you may need to perform an in-place upgrade or contact Microsoft Support for further assistance.
Remember to create a backup of your important files before attempting any troubleshooting steps.
Resolution Methods for 0x800f0831 Installation Failure
- Perform a System File Checker (SFC) scan
- Open the Command Prompt as an administrator by pressing Windows key + X and selecting Command Prompt (Admin)

- Type sfc /scannow and press Enter
- Wait for the scan to complete and restart your computer
- Run the Windows Update Troubleshooter
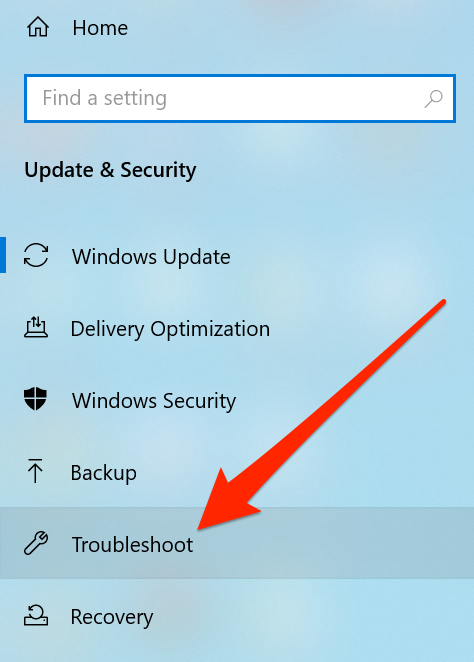
- Press Windows key + I to open Settings
- Select Update & Security
- Click on Troubleshoot in the left sidebar
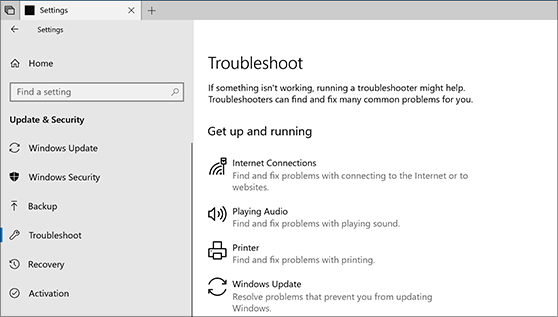
- Scroll down and click on Windows Update
- Click on Run the troubleshooter and follow the on-screen instructions
- Restart your computer and check for updates again
- Reset Windows Update components
- Open the Command Prompt as an administrator
- Type the following commands and press Enter after each one:
- net stop wuauserv
- net stop cryptSvc
- net stop bits
- net stop msiserver
- Type ren C:\Windows\SoftwareDistribution SoftwareDistribution.old and press Enter
- Type ren C:\Windows\System32\catroot2 catroot2.old and press Enter
- Type the following commands and press Enter after each one:
- net start wuauserv
- net start cryptSvc
- net start bits
- net start msiserver
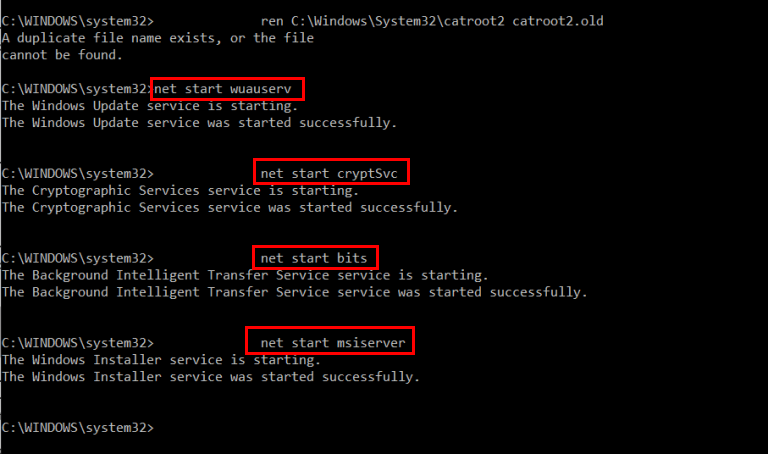
- Restart your computer and check for updates again
- Manually install the update
- Visit the Microsoft Update Catalog website
- Search for the specific update using its KB number
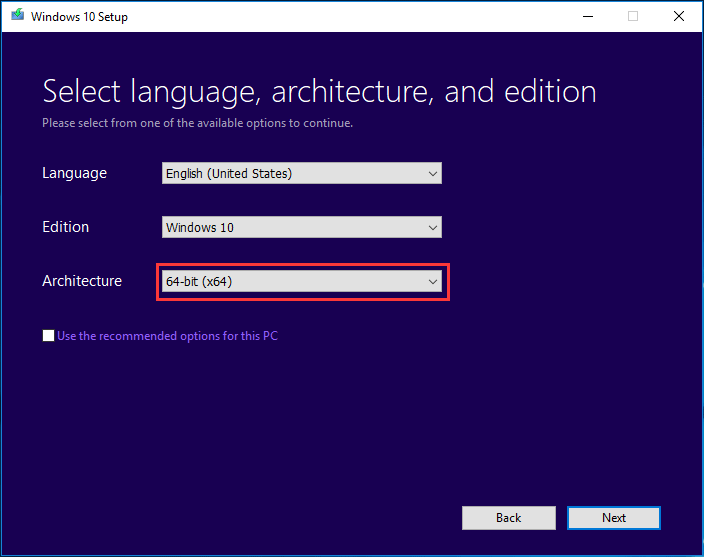
- Download the update that matches your system architecture (32-bit or 64-bit)
- Double-click on the downloaded file to install the update
- Follow the on-screen instructions and restart your computer if prompted
Repairing the Component Store with DISM Commands
To fix Error 0x800f0831 when updating Windows, you can repair the Component Store using DISM commands. Follow these steps:
1. Open Command Prompt as an administrator.
2. Type “dism /online /cleanup-image /restorehealth” and press Enter.
3. Wait for the process to complete. It may take some time.
4. Once it’s done, restart your PC.
If the error persists, try these additional steps:
1. Open Command Prompt as an administrator.
2. Type “dism /online /cleanup-image /startcomponentcleanup” and press Enter.
3. Wait for the process to complete.
4. Restart your PC.
These commands will repair any corrupted files in the Component Store, which can often cause update errors. After following these steps, try updating Windows again.
Manually Repairing with Partially Installed Component Payload
To manually repair an error 0x800f0831 when updating Windows, follow these steps:
1. Open the Command Prompt as an administrator.
2. Type “DISM /Online /Cleanup-Image /ScanHealth” and press Enter to scan the Windows image for any corruption.
3. If corruption is found, type “DISM /Online /Cleanup-Image /RestoreHealth” and press Enter to restore the Windows image.
4. After the restoration process is completed, restart your device.
5. Open the Command Prompt as an administrator again.
6. Type “sfc /scannow” and press Enter to scan for any system file corruption.
7. If corruption is found, type “sfc /scannow” and press Enter to repair the system files.
8. Once the repair is finished, restart your device again.
9. Try updating Windows once more to see if the error 0x800f0831 is resolved.
These steps should help fix the error and allow you to successfully update Windows.
Downloading Missing KB Package
To download the missing KB package and fix error 0x800f0831 when updating Windows, follow these steps:
1. Open the Windows Update Catalog website.
2. Search for the specific KB package that is missing.
3. Once you find the package, click on the Download button.
4. Choose the appropriate version for your operating system (OS) and click on the Download button again.
5. Save the package to a location on your computer.
Note: If you’re unsure which version to download, refer to the article or guide you’re following for more information.
6. After the download is complete, locate the saved package and double-click on it to run the installation.
Note: If you receive any error messages during the installation process, refer to the article or guide for troubleshooting steps.
7. Follow the prompts to complete the installation.
By downloading and installing the missing KB package, you should be able to fix the error 0x800f0831 and successfully update your Windows system.
Running Windows Update Troubleshooter
To fix Error 0x800f0831 when updating Windows, you can try running the Windows Update Troubleshooter. Here’s how:
1. Press the Windows key + X on your keyboard and select “Settings” from the menu that appears.
2. In the Settings window, click on “Update & Security.”
3. Select “Troubleshoot” from the left-hand menu.
4. Scroll down and click on “Windows Update” under the “Get up and running” section.
5. Click on the “Run the troubleshooter” button.
6. Wait for the troubleshooter to detect and fix any issues with Windows Update.
7. Restart your computer and try updating Windows again.
If the troubleshooter doesn’t resolve the issue, you may need to try other solutions or seek further assistance.
Performing SFC and DISM Scans, Resetting Windows Update Components
How to Fix Error 0x800f0831 When Updating Windows
When updating Windows, you may encounter the error code 0x800f0831. This error usually indicates that there is a problem with the Windows Update components. Here are the steps to fix this error:
| Step | Description |
|---|---|
| Step 1 | Perform SFC Scan |
| Step 2 | Perform DISM Scan |
| Step 3 | Reset Windows Update Components |
Step 1: Perform SFC Scan
The System File Checker (SFC) scan is a built-in Windows tool that helps to repair corrupted system files. Follow these steps:
- Open Command Prompt as an administrator.
- Type
sfc /scannowand press Enter.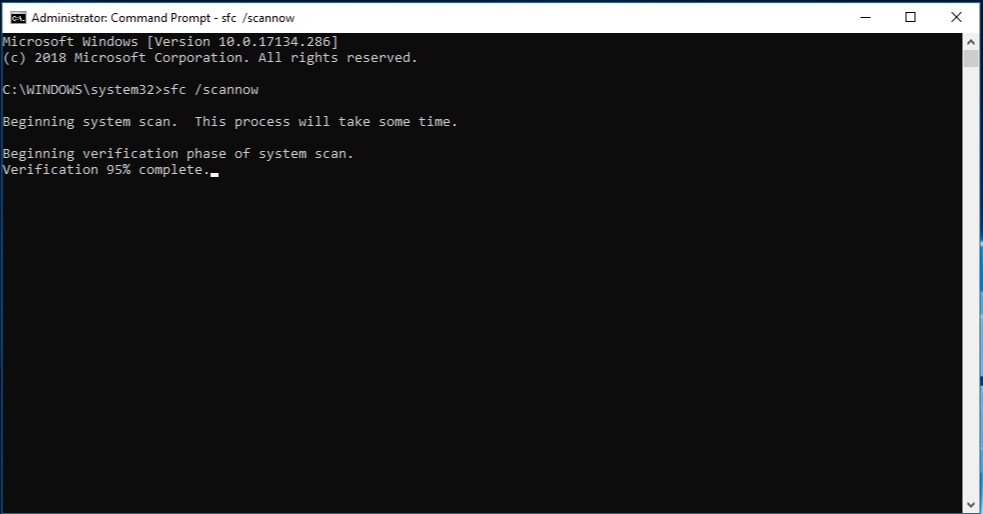
- Wait for the scan to complete.
- If any issues are found, the tool will attempt to repair them automatically.
Step 2: Perform DISM Scan
The Deployment Image Servicing and Management (DISM) tool helps to fix issues with Windows image files and Windows Update. Follow these steps:
- Open Command Prompt as an administrator.
- Type
dism /online /cleanup-image /restorehealthand press Enter. - Wait for the scan to complete.
- If any issues are found, the tool will attempt to repair them.
Step 3: Reset Windows Update Components
If the previous steps didn’t resolve the error, you can try resetting the Windows Update components. Follow these steps:
- Open Command Prompt as an administrator.
- Type the following commands one by one, pressing Enter after each command:
net stop wuauserv
net stop cryptSvc
net stop bits
net stop msiserver
ren C:\Windows\SoftwareDistribution SoftwareDistribution.old
ren C:\Windows\System32\catroot2 catroot2.old
net start wuauserv
net start cryptSvc
net start bits
net start msiserver - Close Command Prompt and restart your computer.
After following these steps, try updating Windows again. The error 0x800f0831 should now be resolved.

Mark Ginter is a tech blogger with a passion for all things gadgets and gizmos. A self-proclaimed "geek", Mark has been blogging about technology for over 15 years. His blog, techquack.com, covers a wide range of topics including new product releases, industry news, and tips and tricks for getting the most out of your devices. If you're looking for someone who can keep you up-to-date with all the latest tech news and developments, then be sure to follow him over at Microsoft.