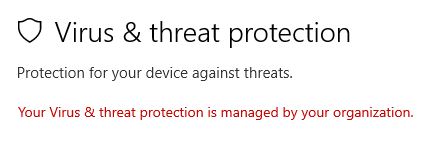
- Some users have reported that when they start or turn on Windows Defender, they encounter an error message that your virus and threat protection is managed by your organization.
- This Techquack post will show you the answers to the question.
- There are several possible causes for this error, such as a virus or malware interferes with Windows Defender or a problem that is not working properly.
Protecting your computer from viruses and online threats has become more crucial than ever. However, encountering issues with the virus and threat protection managed by your organization can be frustrating. In this article, we will guide you through simple and effective solutions to fix these problems, ensuring your device remains secure and your peace of mind intact.
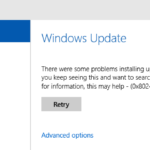
Install Windows Updates and Reset Security Settings
To install Windows updates and reset security settings on your Windows 10 or Windows 11 computer, follow these steps:
1. Open Windows Security: Click on the Start menu, type “Windows Security,” and select the app from the search results.
2. Check for updates: In Windows Security, click on “Virus & threat protection” in the left-hand menu. Then, click on “Check for updates” under the “Virus & threat protection updates” section. This will ensure that your antivirus definitions are up to date.
3. Reset security settings: In Windows Security, click on “App & browser control” in the left-hand menu. Under the “App & browser control settings,” click on “Reputation-based protection settings.” Then, click on “Reset settings” to restore the default security settings.
4. Run a full scan: To scan your computer for viruses and threats, go back to the “Virus & threat protection” section in Windows Security. Click on “Quick scan” or “Full scan” to start the scan. Follow the on-screen instructions to complete the scan.
Remove Third-Party Antivirus Software
If your Virus and Threat Protection is managed by an organization and you want to remove third-party antivirus software, follow these steps:
1. Press the Windows key + R to open the Run dialog box.
2. Type “appwiz.cpl” and press Enter. This will open the Programs and Features window.
3. Look for any third-party antivirus software in the list of installed programs.
4. Right-click on the antivirus software and select Uninstall.
5. Follow the on-screen prompts to complete the uninstallation process.
6. Once the software is uninstalled, restart your computer for the changes to take effect.
7. After the restart, Windows Defender Antivirus will automatically enable itself as the default antivirus protection.
By removing third-party antivirus software and relying on Windows Defender Antivirus, you can ensure that your system is protected from malware and other threats.
Edit Registry and Group Policy Settings
To edit Registry and Group Policy settings for fixing the issue of “Your Virus and Threat Protection is Managed by Organization,” follow these steps:
1. Press the Windows key + R to open the Run dialog box.
2. Type “regedit” and press Enter to open the Registry Editor.
3. Navigate to the following path: HKEY_LOCAL_MACHINE\SOFTWARE\Policies\Microsoft\Windows Defender
4. Look for a key named “DisableAntiSpyware” on the right-hand side.
5. Double-click on the key and change its value to “1” to disable the organization’s management.
6. Close the Registry Editor.
To edit Group Policy settings:
1. Press the Windows key + R to open the Run dialog box.
2. Type “gpedit.msc” and press Enter to open the Local Group Policy Editor.
3. Navigate to the following path: Computer Configuration\Administrative Templates\Windows Components\Windows Defender Antivirus
4. Double-click on the “Turn off Windows Defender Antivirus” policy.
5. Select the “Enabled” option to disable the organization’s management.
6. Click Apply and then OK.
7. Close the Local Group Policy Editor.
Once you have made these changes, restart your computer to apply the new settings. Your Virus and Threat Protection should no longer be managed by the organization, and you can now use your preferred antivirus provider or perform a virus scan with Windows Defender.
Reinstall Windows Security and Restart Protection
To fix the issue of your Virus and Threat Protection being managed by an organization, you can try reinstalling Windows Security and restarting the protection. Follow these steps:
1. Press the Windows key + R to open the Run dialog box.
2. Type “CMD” and press Enter to open the Command Prompt.
3. In the Command Prompt, type “ms-settings:windowsdefender” and press Enter.
4. This will open the Windows Security settings.
5. Click on “Virus & threat protection” in the left-hand menu.
6. Scroll down and click on “Manage providers” under the “Virus & threat protection settings” section.
7. Click on your antivirus provider and select “Remove” to uninstall it.
8. Restart your computer.
9. After the restart, go back to the Windows Security settings.
10. Click on “Virus & threat protection” and select “Manage providers” again.
11. Click on “Add or remove exclusions” and then click on “Add an exclusion”.
12. Select “Folder” and browse to the location of your antivirus software.
13. Click “OK” to add the exclusion.
14. Close the Windows Security settings.
15. Reinstall your antivirus software from the official website of your antivirus provider.
16. Run a virus scan to ensure your system is protected.
Troubleshoot Windows Defender Not Opening
If Windows Defender is not opening on your Windows 10 or Windows 11 computer and you are seeing the message “Your Virus and Threat Protection is managed by your organization,” there are a few troubleshooting steps you can try.
First, make sure you are logged in as an administrator on your computer. Only administrators have the necessary permissions to access and modify certain settings, including Windows Defender.
If you are already logged in as an administrator and the issue persists, you can try resetting Windows Defender to its default settings. To do this, open the Command Prompt as an administrator and run the following command: setx /M MP_FORCE_USE_DEFENDER 1. This command forces Windows to use Windows Defender as the default anti-virus program.
If resetting Windows Defender doesn’t resolve the issue, you may need to check if there are any third-party anti-virus or anti-malware programs installed on your computer that may be conflicting with Windows Defender. Disable or uninstall any such programs and then try opening Windows Defender again.
If none of these steps work, you may need to contact your system administrator or IT department for further assistance. They may have implemented additional security measures that prevent you from accessing Windows Defender.
Remember to always keep your computer protected by using an anti-virus or anti-malware program, even if Windows Defender is not working. There are many reputable third-party options available that can provide the necessary defense against viruses and threats.
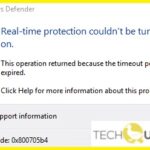
Enable Real-Time Protection and Disable Third-Party Antivirus
To fix the issue of your virus and threat protection being managed by an organization, you need to enable real-time protection and disable any third-party antivirus software. Follow these steps:
1. Open Windows Security by clicking on the Start menu, selecting Settings, and then choosing Update & Security, followed by Windows Security.
2. In Windows Security, click on the Virus & threat protection tab.
3. Under Virus & threat protection settings, click on Manage settings.
4. Make sure the Real-time protection toggle switch is turned on. This will enable real-time scanning to protect your computer from threats as they occur.
5. Next, scroll down to the Exclusions section and click on Add or remove exclusions.
6. Remove any third-party antivirus software from the list of exclusions.
7. Close the Windows Security window.
By enabling real-time protection and disabling third-party antivirus software, you can ensure that your computer is protected by the built-in Windows Security service. This will resolve the issue of your virus and threat protection being managed by an organization.
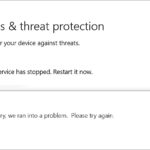
Repair System Files and Restart Security Center Service
To repair system files and restart the Security Center service for your virus and threat protection managed by organization issue, follow these steps:
1. Open the Command Prompt as an administrator by pressing the Windows key + X and selecting “Command Prompt (Admin)”.
2. In the Command Prompt window, type sfc /scannow and press Enter. This command will scan and repair any corrupted system files that may be causing the issue.
3. After the scan is complete, type net start wscsvc and press Enter. This command will restart the Security Center service.
4. Close the Command Prompt window and check if the issue is resolved.
If the problem persists, it is recommended to contact your system administrator or IT support for further assistance.
Enable Windows Defender Using Registry Editor and Update Windows
To enable Windows Defender using the Registry Editor and update Windows, follow these steps:
1. Open the Registry Editor by pressing the Windows key + R, then typing “regedit” and pressing Enter.
2. In the Registry Editor, navigate to the following path: HKEY_LOCAL_MACHINE\SOFTWARE\Policies\Microsoft\Windows Defender
3. If you see a registry key named “DisableAntiSpyware”, double-click on it and change its value to “0”. If the key doesn’t exist, right-click on an empty space in the right pane, select New > DWORD (32-bit) Value, and name it “DisableAntiSpyware”. Then, double-click on it and set its value to “0”.
4. Close the Registry Editor.
5. Open the Windows Security app by searching for it in the Start menu.
6. In the Windows Security app, click on “Virus & threat protection”.
7. Under “Virus & threat protection settings”, click on “Manage settings”.
8. Make sure the “Real-time protection” toggle is turned on.
9. Click on “Windows Update” in the left sidebar of the Windows Security app.
10. Click on “Check for updates” and follow the prompts to install any available updates.
By following these steps, you can enable Windows Defender and ensure that your computer is protected against viruses and threats.

Mark Ginter is a tech blogger with a passion for all things gadgets and gizmos. A self-proclaimed "geek", Mark has been blogging about technology for over 15 years. His blog, techquack.com, covers a wide range of topics including new product releases, industry news, and tips and tricks for getting the most out of your devices. If you're looking for someone who can keep you up-to-date with all the latest tech news and developments, then be sure to follow him over at Microsoft.