- Users can often encounter problems even if the Chrome browser is updated.
- When using Chrome, users may encounter the “Component not updated” error.
- This error occurs when Chrome components are not updated regularly.
- To update any or all of the components, click “Check for Updates” button for each component.
- Then we need to restart Chrome.
- If you haven’t updated these components, you may get a “Partial Not Updated’ error when using the Chrome feature.
Keeping your web browser up to date is crucial for a seamless online experience. However, encountering the frustrating “Google Chrome Component Not Updated” error can disrupt your browsing activities. In this article, we will explore effective solutions to fix this issue and ensure that your Chrome browser functions smoothly.
Understanding the “Chrome Component not Updated” Error
If you’re encountering the “Chrome Component not Updated” error in Google Chrome, here are some steps you can take to fix it.
1. Clear the Component Cache: To do this, open Google Chrome and type “chrome://components” in the address bar. Then, click on the “Check for Update” button next to the component that is not updating.
2. Flush DNS and Reset TCP/IP: Open Command Prompt as an administrator and type “ipconfig /flushdns” followed by “netsh int ip reset”.
3. Disable Extensions: Some extensions may interfere with Chrome’s updates. Go to “chrome://extensions” and disable all extensions temporarily.
4. Update Adobe Flash Player: Ensure you have the latest version of Adobe Flash Player installed on your computer. Visit the official Adobe website to download and install the latest version.
5. Check for Viruses: Run a full scan with your antivirus software to check for any viruses or malware that could be causing the issue.
By following these steps, you should be able to resolve the “Chrome Component not Updated” error and keep your browser up to date.
Clearing Cache and Updating Flash Player Component
To clear the cache and update the Flash Player component in Google Chrome to fix the “Component Not Updated” error, follow these steps:
1. Close Google Chrome and any other web browsers you have open.
2. Press the Windows key + R on your keyboard to open the Run dialog.
3. Type “%localappdata%\Google\Chrome\User Data” (without quotes) and press Enter. This will open the Chrome user data folder.
4. Locate the “Default” folder within the user data folder.
5. Rename the “Default” folder to “Default.old“.
6. Open Google Chrome again. It will create a new “Default” folder.
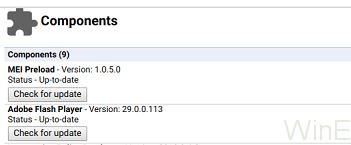
7. Type “chrome://components” (without quotes) in the address bar and press Enter.
8. Scroll down to the Flash Player component and click the “Check for update” button next to it.
9. If there are any DNS errors, flush the DNS cache by opening the Command Prompt as an administrator and typing “ipconfig /flushdns” (without quotes) and pressing Enter.
10. Restart your computer and try updating the Flash Player component again.
These steps should help resolve the “Component Not Updated” error in Google Chrome. If you continue to experience issues, consider disabling any antivirus software temporarily or reaching out to Google Chrome support for further assistance.
Updating Other Components and Reviewing System Requirements
To fix the “Google Chrome Component Not Updated” error, you may need to update other components and review system requirements. Here’s how:
1. Update Other Components: Ensure that all related components are up to date. Open Chrome and enter “chrome://components” in the address bar. Look for any components that require updates and click “Check for update” next to them.
2. Review System Requirements: Make sure your PC meets the system requirements for Chrome. Visit the Chrome support page to verify compatibility with your operating system (OS) version.
3. Flush DNS Cache: In some cases, clearing the DNS cache can resolve update problems. Open the command prompt by pressing Windows + R and type “cmd”. Then, enter the command “ipconfig /flushdns” and press Enter.
4. Update Server Jump: Change the update server to resolve update issues. Open Chrome and go to “chrome://settings”. Scroll down and click “Advanced”, then click “Change” under “Update” and select a different server.
If you’re still experiencing the error, consider reaching out to Google support for further assistance.
javascript

// This is a sample code snippet demonstrating error handling in a browser extension or web application
// Function to check if a Chrome component is updated
function checkComponentUpdated(componentName) {
// Perform necessary checks or operations to verify if the component is updated
// For the sake of this example, let's assume we have a function to check the component's version
const componentVersion = getComponentVersion(componentName);
if (componentVersion) {
console.log(`Component '${componentName}' is updated. Version: ${componentVersion}`);
} else {
console.error(`Component '${componentName}' is not updated.`);
}
}
// Function to get the version of a Chrome component
function getComponentVersion(componentName) {
// Code to retrieve the component's version from Chrome's internal data or API
// This code is just a placeholder and won't work as is
// You need to find the correct approach for your specific use case
const componentVersion = chrome.getComponentVersion(componentName);
return componentVersion;
}
// Usage example
checkComponentUpdated('exampleComponent');
Please note that the above code is a simplified example and may not directly fix the “component not updated” error in Chrome. It is meant to demonstrate error handling and provide a starting point for your own tool development. You would need to adapt and extend this code based on your specific requirements and the actual methods available in the Chrome API or extension architecture.
Checking for Malware and Removing Unnecessary Programs
To check for malware and remove unnecessary programs in order to fix the Google Chrome Component Not Updated Error, follow these steps:
1. Run a malware scan on your PC using a reliable antivirus software. This will help identify and remove any potential threats that may be affecting Chrome’s components. Make sure to keep your antivirus software up to date to ensure optimal protection.
2. Uninstall any unnecessary programs or extensions that you no longer use or that could be causing conflicts with Chrome. Go to the Control Panel on your PC, select “Programs,” and then “Uninstall a program” to remove them.
3. Clear your browser cache and cookies to eliminate any stored data that could be causing issues with Chrome’s components. In Chrome, go to Settings > Privacy and Security > Clear browsing data to do this.
4. Reset your DNS cache by opening the Command Prompt as an administrator and typing “ipconfig /flushdns“. This can help resolve any DNS-related problems that might be affecting Chrome’s update process.
If you’re still experiencing the Google Chrome Component Not Updated Error after trying these solutions, consider seeking further assistance from Google support or the Chrome community.
Resolving Windows “No Longer Supported” Error
If you encounter the “No Longer Supported” error on Windows while trying to update Google Chrome’s components, there are a few steps you can take to resolve it. First, make sure you are using the latest version of Google Chrome. If not, update it and try again.
If the error persists, you can try clearing the cache folder associated with Google Chrome. To do this, open the Run dialog by pressing Windows key + R. Type “%localappdata%\Google\Chrome\User Data\Default\Cache” and click OK. Delete all the files in the cache folder.
Additionally, you can try flushing the DNS cache. Open the Command Prompt by pressing Windows key + R and typing “cmd“. In the Command Prompt window, type “ipconfig /flushdns” and press Enter.
By following these steps, you should be able to resolve the “No Longer Supported” error and update Google Chrome’s components successfully.
Troubleshooting Internet Connection and DNS Cache
If you are experiencing the “Google Chrome Component Not Updated Error”, there are a few steps you can take to fix the issue.
First, check your internet connection. Ensure that you are connected to a stable network and that there are no connectivity issues. If your internet connection is fine, you may need to clear your DNS cache.
To clear your DNS cache, follow these steps:
1. Press the Windows key + R to open the Run dialog box.
2. Type “cmd” and press Enter to open the Command Prompt.
3. In the Command Prompt, type “ipconfig /flushdns” and press Enter.
This will clear your DNS cache and may resolve the update error. If the issue persists, you can also try updating Chrome manually by downloading the latest version from the official website.
Remember to always keep your web browsers and operating system up to date to avoid any compatibility issues or bugs that may interfere with Chrome updates.
If you continue to experience the error, it is recommended to seek further assistance from Google Chrome support or consult with a technical professional.
Restarting Google Update Services and Resetting Chrome
To fix the “Google Chrome Component Not Updated Error,” you can try restarting the Google Update Services and resetting Chrome.
First, let’s restart the Google Update Services. Open the Run dialog by pressing Windows Key + R, then type “services.msc” and hit Enter. In the Services window, locate the “Google Update Services” and right-click on it. Select “Restart” from the context menu.
Next, let’s reset Chrome. Open Chrome and type “chrome://settings/reset” in the address bar. Press Enter to access the reset settings page. Click on the “Reset settings” button and confirm the action when prompted.
If you’re still experiencing the error, you can also try clearing your DNS cache. Open the Command Prompt as an administrator and type “ipconfig /flushdns” followed by Enter.
These steps should help resolve the “Google Chrome Component Not Updated Error.” If you continue to encounter the issue, please refer to the official Google Chrome support documentation or reach out to their support team for further assistance.
Fixing Update Failures on Mac, Android, and iOS
If you’re experiencing update failures on your Mac, Android, or iOS device when trying to update Google Chrome, we have some helpful steps to resolve the issue.
First, make sure you have a stable internet connection. Update problems can often be caused by a weak or unreliable connection.
Next, try clearing your DNS cache by following these steps: 1. Open a command prompt (Terminal on Mac) and type “ipconfig /flushdns” (without quotes) and press Enter. This will flush the DNS cache and can help resolve any connection issues.
If you’re still encountering the update error, try updating Google Chrome manually. 1. Open Chrome and click on the three dots in the top right corner. 2. Go to Help > About Google Chrome. 3. Chrome will automatically check for updates and install any available updates.
If the error persists, it could be due to a bug or compatibility issue. In this case, try uninstalling and reinstalling Google Chrome.
Remember to back up any important data before uninstalling Chrome. Once you’ve reinstalled it, try updating again.
By following these steps, you should be able to resolve the Google Chrome Component Not Updated Error and keep your browser running smoothly.
Uninstalling Suspicious Software and Play Store Updates
To uninstall suspicious software or fix Play Store update issues in Google Chrome, follow these steps:
1. Open Chrome and click on the three-dot menu in the top-right corner.
2. Select “Settings” from the drop-down menu.
3. Scroll down and click on “Advanced” to expand the advanced settings.
4. Under the “Reset and clean up” section, click on “Clean up computer”.
5. Click on the “Find” button to start scanning for suspicious software.
6. Follow the on-screen instructions to remove any detected threats.
If you’re experiencing the “Google Chrome component not updated” error, try the following:
1. Close Chrome completely.
2. Press the Windows key + R to open the Run dialog box.
3. Type “cmd” and press Enter to open the Command Prompt.
4. In the Command Prompt, type “ipconfig /flushdns” and press Enter.
5. Open Chrome again and try updating. If the error persists, you may need to reinstall Chrome.
Remember to always keep your software up to date and run regular antivirus scans to ensure a smooth browsing experience.

Mark Ginter is a tech blogger with a passion for all things gadgets and gizmos. A self-proclaimed "geek", Mark has been blogging about technology for over 15 years. His blog, techquack.com, covers a wide range of topics including new product releases, industry news, and tips and tricks for getting the most out of your devices. If you're looking for someone who can keep you up-to-date with all the latest tech news and developments, then be sure to follow him over at Microsoft.