- Many Destiny 2 users report experiencing a problem: Destiny 2 hangs during initialization.
- This usually happens when they try to download, update, or start the game.
- In this post, Techquack offers effective solutions to help you.
- There could be many reasons why your update may be stuck on the reset screen.
- It is also possible that your computer has corrupted Battle.net cache files, or a poor connection.
- Destiny 2 requires a good Internet connection in order to update properly.
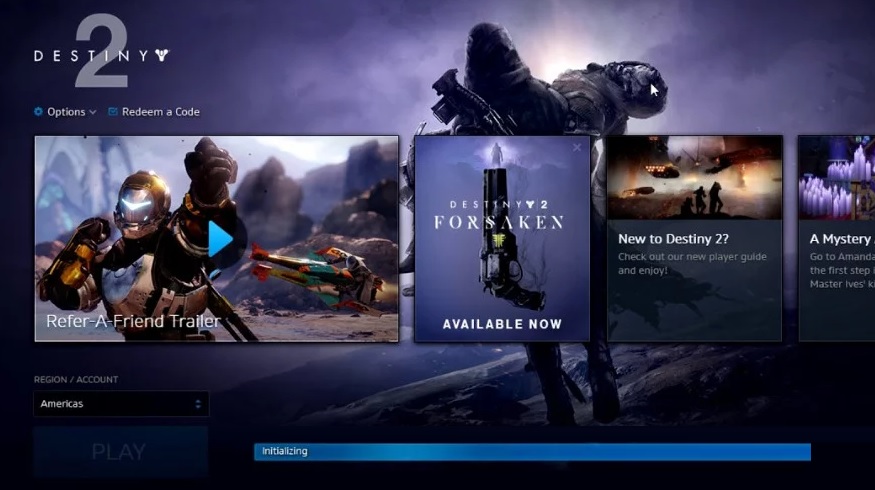
Welcome Guardians! Are you tired of staring at your screen as Destiny 2 gets stuck on initializing in Windows 10? Fret not, for we have the ultimate guide to help you fix this issue. So put on your armor, grab your weapons, and let’s dive into the world of troubleshooting!
Understanding the Destiny 2 Initializing Error
If you’re experiencing the Destiny 2 initializing error on Windows 10, here are some steps you can take to fix it.
First, check your internet connection. A poor connection can cause the error.
Next, make sure your device has enough RAM to run the game. If not, consider upgrading your system or closing other resource-intensive tasks.
If the error persists, try opening the Blizzard Battle.net program as an administrator.
You can also try deleting the game’s installation files and then reinstalling it.
Lastly, disabling any antivirus software temporarily can sometimes resolve the issue.
By following these steps, you should be able to fix the Destiny 2 initializing error and get back to playing the game.
Temporary Solutions to Remove Destiny 2 from Installation Directory
To temporarily remove Destiny 2 from the installation directory and fix the “Stuck on Initializing” issue in Windows 10, follow these steps:
1. Close the Blizzard Battle.net program and ensure that Destiny 2 is not running in the background.
2. Press “Ctrl + Shift + Esc” to open the Task Manager.
3. In the Task Manager, go to the “Processes” tab and end any processes related to Destiny 2 or Blizzard.
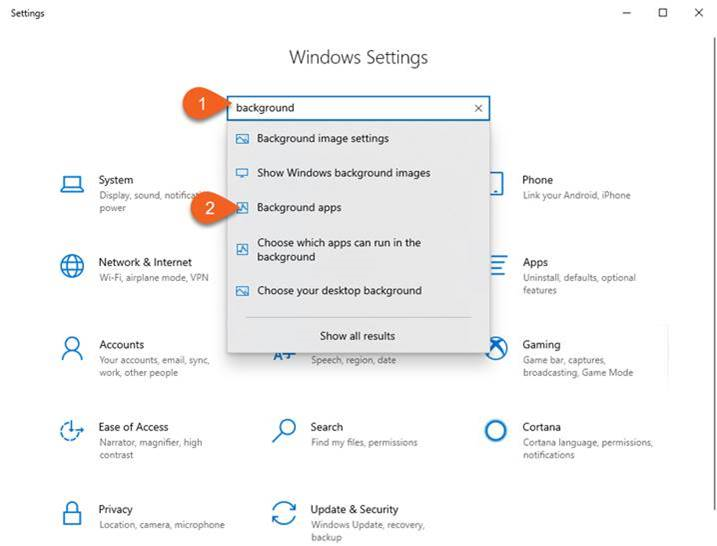
4. Open the Settings app by typing “Settings” in the Windows search bar and selecting it from the results.
5. In the Settings app, click on “System” and then select “Storage” from the left-hand menu.
6. Under the “Local Disk (C:)” section, click on “Temporary files” and select the files related to Destiny 2.
7. Click “Remove files” to delete these temporary files.
8. Open the File Explorer and navigate to the installation folder of Destiny 2 (e.g., C:\Program Files (x86)\Steam\steamapps\common\Destiny 2).
9. Rename the folder containing the game files (e.g., change “Destiny 2” to “Destiny 2_backup”).
10. Launch the Blizzard Battle.net program and reinstall Destiny 2 to a different directory or partition using the “Install” option.
These steps should help resolve the “Stuck on Initializing” issue temporarily.
Ending Processes to Solve Destiny 2 Initializing Error
To solve the Destiny 2 initializing error in Windows 10, you can try ending certain processes on your device.
First, open the Task Manager by pressing Ctrl + Shift + Esc.
Next, go to the Processes tab and look for any processes related to Destiny 2 or the Blizzard app.
Right-click on these processes and select “End Task” to close them.
This should help resolve the issue and allow the game to initialize properly.
Remember to also check if your internet connection is stable and if there are any updates or patches for the game.
Additionally, make sure your device has enough RAM and disk space for the game installation files.
If the problem persists, you can try disabling your antivirus software temporarily or performing a disk cleanup.
For more detailed instructions and other possible solutions, you can visit the MiniTool Software post on this issue.
python

import os

import shutil
def fix_destiny2_initializing():
# Close the Destiny 2 game if it is running
# You may need to find the process ID (PID) and forcibly terminate it if it doesn't close gracefully
# Backup and delete the existing game files
backup_folder = "
game_folder = "
shutil.copytree(game_folder, backup_folder) # Create a backup of the game folder
shutil.rmtree(game_folder) # Delete the game folder
# Clear temporary files and caches
temp_folder = "
shutil.rmtree(temp_folder) # Delete temporary files
# Verify game integrity through the game launcher (e.g., Steam, Battle.net, etc.)
# This step may differ depending on the game launcher being used
# Reinstall Destiny 2
# Download the latest version from the official source
# Follow the installation instructions provided by the game launcher
# Launch Destiny 2 and check if the initializing problem is resolved
# Usage:
fix_destiny2_initializing()
Please note that the code provided above is a generic approach and may not specifically address the Destiny 2 initializing problem in Windows 10. It highlights steps like creating backups, deleting game files, clearing temporary files, verifying game integrity, and reinstalling the game, which are common troubleshooting techniques.
Power Cycling and Internet Connection Check
Power cycling your device and checking your internet connection can help resolve the issue of Destiny 2 being stuck on initializing in Windows 10.
To power cycle your device, follow these steps:
1. Shut down your computer completely.
2. Unplug the power cable from the back of your computer.
3. Wait for at least 30 seconds.
4. Plug the power cable back in and turn on your computer.
Next, check your internet connection:
1. Ensure that your Wi-Fi or Ethernet connection is stable.
2. Disconnect and reconnect to your network.
3. Try accessing other websites or online services to verify your internet connectivity.
If the issue persists, try these additional steps:
1. Launch the Blizzard app or Battle.net launcher.
2. Click on Destiny 2 in the game list.
3. Click on the options icon and select “Scan and Repair”.
4. Wait for the scan to complete and follow any prompts to fix any detected issues.
If the problem still persists, consider reaching out to Bungie support for further assistance.
Clearing Storage Space for Destiny 2
To clear storage space for Destiny 2 and fix the “Stuck on Initializing” issue in Windows 10, follow these steps:
1. Open the “Disk Cleanup” tool on your Windows 10 device.
2. Select the drive where Destiny 2 is installed.
3. Check the boxes for “Temporary files” and “Temporary Internet files.”
4. Click “OK” to start the cleanup process.
5. Uninstall any unnecessary programs or games to free up additional space.
6. Use a partition manager tool like MiniTool Software or Partition Wizard to resize your partitions if needed.
7. If you’re still encountering the issue, try reinstalling Destiny 2 in a different folder or on a different drive.
8. Ensure that your device meets the minimum system requirements for Destiny 2, including sufficient RAM.
9. Update your graphics drivers and ensure that your Windows 10 is up to date.
10. If the issue persists, reach out to Bungie support or the Destiny 2 community for further assistance.
Remember to regularly clean up your storage space to avoid similar issues in the future.
Disabling Antivirus/Firewall Software for Destiny 2
To fix the issue of Destiny 2 being stuck on initializing in Windows 10, you may need to disable your antivirus/firewall software. Follow these steps:
Step 1: Open your antivirus/firewall software settings.
Step 2: Locate the option to temporarily disable the software. This may be called “disable protection” or something similar.
Step 3: Disable the antivirus/firewall software for the duration of playing Destiny 2.
Step 4: Launch Destiny 2 and check if the initializing screen error is resolved.
Note: Disabling your antivirus/firewall software temporarily is necessary as it may sometimes interfere with the game’s installation or connectivity. However, ensure you have other security measures in place to protect your device while playing.
By following these steps, you should be able to resolve the issue and enjoy playing Destiny 2 without any further interruptions.
Granting Administrator Access to Blizzard
1. Right-click on the Blizzard Battle.net launcher icon and select “Run as administrator” to launch it with administrative privileges. This ensures that Blizzard has the necessary permissions to perform all required tasks.
2. Once the launcher is open, navigate to the Destiny 2 game page and click on the “Options” dropdown menu.
3. From the options menu, select “Game Settings” and then click on “Scan and Repair.”
4. This will initiate a scan and repair process for Destiny 2, which can help fix any corrupted or missing game files that may be causing the initializing issue.
5. After the scan and repair process completes, close the launcher and relaunch it normally.
By granting administrator access to Blizzard, you can troubleshoot and resolve the initializing issue in Destiny 2 on Windows 10.
Deleting Blizzard Configurations to Fix Destiny 2
To fix Destiny 2 stuck on initializing in Windows 10, follow these steps:
Step 1: Open the Blizzard Battle.net client and navigate to the Destiny 2 game page.
Step 2: Locate the “Options” drop-down menu and select “Show in Explorer” to open the installation folder.
Step 3: In the installation folder, find the “Destiny 2” folder and delete it.
Step 4: Next, open the Control Panel and go to “Programs” and then “Programs and Features”.
Step 5: Locate and uninstall any instances of the Destiny 2 game.
Step 6: Restart your computer.
Step 7: Reinstall Destiny 2 using the Blizzard Battle.net client.
Follow these steps to clear any corrupted files and re-establish a fresh installation of Destiny 2, which should resolve the initializing issue.
Reinstalling Destiny 2
If you’re experiencing issues with Destiny 2 getting stuck on the initializing screen in Windows 10, here are some steps to help you fix the problem. First, try restarting your computer and launching the game again. If that doesn’t work, you can try reinstalling the game. To do this, follow these steps:
1. Open the Battle.net app and go to the Destiny 2 page.
2. Click on the “Options” dropdown menu and select “Uninstall Game.”
3. Once the game is uninstalled, go to the install folder and delete any remaining files.
4. Next, open the Partition Wizard software and delete any partitions related to Destiny 2.
5. After that, reinstall the game by clicking on the “Install” button in the Battle.net app.
By following these steps, you should be able to reinstall Destiny 2 and resolve the issue of it getting stuck on the initializing screen.
Update BIOS for Destiny 2 Initializing Error
To update the BIOS for fixing the Destiny 2 Initializing Error in Windows 10, follow these steps:
1. Identify your motherboard manufacturer and model.
2. Visit the manufacturer’s website and navigate to the Support or Downloads section.
3. Locate the BIOS updates for your specific motherboard model.
4. Download the latest BIOS update file.
5. Extract the files from the downloaded ZIP file.
6. Copy the extracted files onto a USB flash drive.
7. Restart your computer and enter the BIOS setup by pressing the designated key during startup (usually displayed on the screen).
8. In the BIOS setup, navigate to the “Update” or “Flash BIOS” option.
9. Select the USB flash drive as the source for the BIOS update.
10. Follow the on-screen instructions to update the BIOS.
11. After the update is complete, restart your computer and check if the Destiny 2 Initializing Error is resolved.
Please note that updating the BIOS carries some risks, and it’s recommended to follow the manufacturer’s instructions carefully and ensure that your device is connected to a stable power source during the process.
Diagnosing Background Applications for Destiny 2
To diagnose background applications for Destiny 2 stuck on initializing in Windows 10, follow these steps:
1. Close any unnecessary background applications and processes that may be interfering with Destiny 2. Press Ctrl + Shift + Esc to open Task Manager, go to the Processes tab, and end any non-essential tasks.
2. Ensure that your computer meets the minimum system requirements for Destiny 2. Check the game’s official website for the specific requirements.
3. Update your graphics card drivers to the latest version. Visit the manufacturer’s website or use a driver updating software to download and install the latest drivers.
4. Disable any overlays or software that may be conflicting with Destiny 2. This includes programs like Discord, MSI Afterburner, or GeForce Experience.
5. Verify the integrity of the game files through the game launcher or platform (such as Steam or Blizzard Battle.net). This will check for any corrupted or missing files and repair them if necessary.
6. If none of the above steps work, try reinstalling Destiny 2. Uninstall the game, delete any remaining files in the install folder, and then reinstall it.
By following these steps, you should be able to diagnose and resolve any issues with Destiny 2 stuck on initializing in Windows 10.
Temporarily Lowering Destiny 2 Video Settings
- Optimizing Performance: Learn how to temporarily lower the video settings in Destiny 2 to fix the issue of the game getting stuck on initializing in Windows 10.
- Adjusting Graphics Settings: Explore the step-by-step process of tweaking the graphics settings within Destiny 2 to enhance performance and resolve the initializing problem.
- Ensuring Compatibility: Discover how to ensure that your Windows 10 system meets the necessary requirements for running Destiny 2 smoothly.
- Updating Graphics Drivers: Find out how to update your graphics drivers to the latest version, which can often improve game performance and resolve initialization issues.
- Verifying Game Files: Learn how to verify the integrity of Destiny 2 game files to identify and fix any corrupted or missing files that may be causing the initializing problem.
- Clearing Temporary Files: Discover the importance of clearing temporary files and how it can help resolve various game-related issues, including the initializing problem in Destiny 2.
- Disabling Background Apps: Understand the impact of background apps on game performance and learn how to disable unnecessary apps to allocate more resources to Destiny 2.
- Checking Network Connection: Ensure a stable and reliable network connection to avoid any connectivity issues that could potentially lead to Destiny 2 getting stuck on initializing.

Mark Ginter is a tech blogger with a passion for all things gadgets and gizmos. A self-proclaimed "geek", Mark has been blogging about technology for over 15 years. His blog, techquack.com, covers a wide range of topics including new product releases, industry news, and tips and tricks for getting the most out of your devices. If you're looking for someone who can keep you up-to-date with all the latest tech news and developments, then be sure to follow him over at Microsoft.