- The Google Play Store is one of the most important applications pre-installed on almost all Android cell phones.
- It contains thousands of apps that users can download and install on their phones.
- Recently, there have been reports of users being unable to update apps on their Android phones.
- In this article, we will discuss some causes of this error and inform you about effective solutions to fix it.
- Follow the instructions carefully in the order in which they are presented to you in order to avoid the error.
Introducing a Hassle-free Solution to Resolve Google Play Store Error Checking Updates
Check Internet Connection
If you’re encountering the Google Play Store error when checking for updates, it could be due to a problem with your internet connection. To fix this issue, follow these steps:
1. Check your internet connection: Make sure you have a stable network connection on your device. You can do this by opening your device’s browser and navigating to a website to see if it loads properly.
2. Clear the Play Store cache: Go to your device’s Settings, then Apps or Application Manager. Find the Google Play Store app and tap on it. Select Storage, then Clear cache. This will clear any temporary data that may be causing the error.
3. Restart your device: Sometimes, a simple restart can resolve the issue. Press and hold the power button on your device, then choose Restart or Reboot.
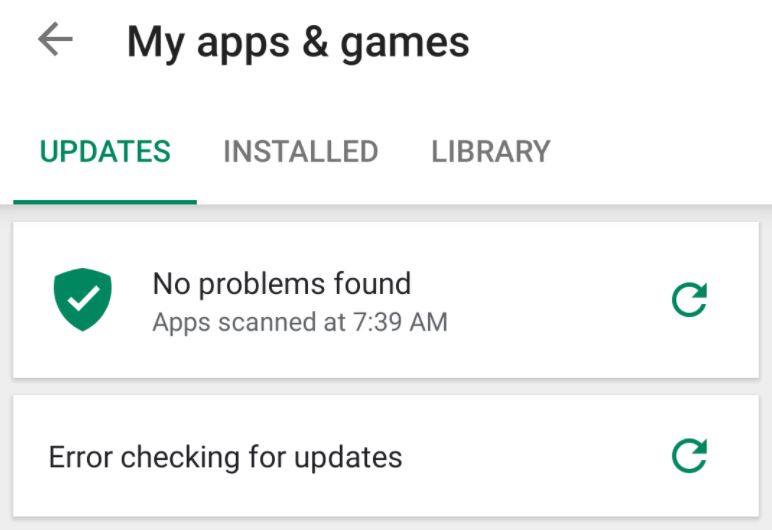
4. Check for app updates: Open the Play Store app, tap on the menu icon (three horizontal lines), then choose My apps & games. Tap on the Updates tab to see if there are any available updates for your installed apps. Update any apps that have pending updates.
Check App Updates Preference
To check app updates preferences on your Android device, follow these steps:
1. Open the Google Play Store app on your phone.
2. Tap on the three horizontal lines in the top-left corner to open the menu.
3. Scroll down and select “Settings.”
4. Under the “General” section, tap on “Auto-update apps.”
5. Here, you can choose between three options: “Do not auto-update apps,” “Auto-update apps at any time,” or “Auto-update apps over Wi-Fi only.”
6. Select the option that suits your preference.
By adjusting these settings, you can ensure that your apps are always up to date without any hassle or ado. Remember to check your internet connection, as slow network speeds can sometimes cause errors when checking for updates. Additionally, clearing the Google Play Store cache can also help resolve any issues. If you encounter any further problems, uninstalling updates for the Google Play Store app may be a solution.
Clear Play Store Cache and Data
To fix the Google Play Store error checking updates, you can try clearing the Play Store cache and data. This solution can resolve various issues related to app updates and error messages.
To clear the Play Store cache, follow these steps:
1. Go to your device’s home screen.
2. Open the Settings app.
3. Scroll down and tap on “Apps” or “Applications”.
4. Find and tap on “Google Play Store” in the list of installed apps.
5. Tap on “Storage”.
6. Tap on “Clear cache”.
To clear the Play Store data, follow these steps:
1. Go to the “Google Play Store” app in your device’s settings as mentioned above.
2. Tap on “Storage”.
3. Tap on “Clear data” or “Clear storage”.
Remember, clearing data can lead to the loss of some app settings and preferences, so proceed with caution.
java

import android.content.pm.PackageManager;

import android.content.pm.PackageInfo;
public class ErrorChecker {
public static void main(String[] args) {
String packageName = "com.example.app"; // Replace with your app's package name
PackageManager packageManager = getPackageManager();
// Fetch package info for the specified package name
try {
PackageInfo packageInfo = packageManager.getPackageInfo(packageName, PackageManager.GET_ACTIVITIES);
// Check if the app has any error flags set
if (packageInfo.applicationInfo.flags & ApplicationInfo.FLAG_DEBUGGABLE != 0) {
System.out.println("App has debuggable flag set.");
}
// Add more error checking conditions as per your requirements
} catch (PackageManager.NameNotFoundException e) {
System.out.println("Package not found: " + packageName);
}
}
}
Please note that this code snippet only demonstrates a basic error check by checking if the app has the debuggable flag set. You can extend this code to include additional error checks based on your specific requirements.
It’s important to understand that this code snippet does not directly interact with the Google Play Store but rather performs error checking on an installed Android app using the PackageManager class.
Give Google Play Store Unrestricted Data Usage
To fix the Google Play Store error checking updates, you can give the Play Store unrestricted data usage by following these steps:
1. Open the Google Play Store app on your Android phone.
2. Tap on the three horizontal lines in the top-left corner to open the menu.
3. Scroll down and select “Settings.”
4. In the Settings menu, tap on “App download preference.”
5. Change the preference to “Over any network” to allow unrestricted data usage for downloading app updates.
6. Go back to the Settings menu and tap on “Auto-update apps.”
7. Select “Over any network” here as well to ensure that app updates are automatically downloaded and installed using any available network connection.
By giving the Play Store unrestricted data usage, you can ensure that app updates are not hindered by any data restrictions. This should help resolve the error checking updates issue and allow you to update your applications without any problems.
Disable Google Play Store
To disable the Google Play Store on your Android phone, follow these steps:
1. Open the Settings app on your device.
2. Scroll down and tap on “Apps” or “Applications” in the device menu.
3. Look for “Google Play Store” in the list of apps and tap on it.
4. Tap on the three-dot menu in the top-right corner and select “Uninstall updates.”
5. Confirm the action when prompted.
Disabling the Google Play Store can be helpful if you’re experiencing errors or issues with app updates. Keep in mind that this will revert the Play Store to its default version and remove any updates you’ve installed.
If you encounter any problems with the Play Store, it’s recommended to clear the app cache and free up storage space on your device. Additionally, ensure that your internet speed is stable and check for any pending software updates.
Reset App Preferences
To fix the Google Play Store error checking updates, you can try resetting your app preferences. This can help resolve any conflicts or issues that may be causing the error message.
Here’s how to reset your app preferences:
1. Open the Settings app on your mobile device.
2. Scroll down and tap on “Apps” or “Applications”.
3. In the app list, tap the three-dot menu icon at the top right corner.
4. Select “Reset app preferences” from the drop-down menu.
5. A confirmation pop-up will appear, click on “Reset apps” to proceed.
Resetting app preferences will not delete any of your personal data or app settings. It simply restores the default settings for all your apps, which can help resolve various issues.
After resetting the app preferences, try checking for updates on the Google Play Store again. This should hopefully fix the error checking updates problem. If the issue persists, you may need to explore other solutions or seek further assistance.
Uninstall Play Store Updates
If you’re experiencing the Google Play Store Error Checking Updates, uninstalling Play Store updates can help resolve the issue. Follow these steps to uninstall updates on your Android device:
1. Open the Settings app on your mobile phone.
2. Scroll down and tap on “Apps” or “Applications”.
3. In the Apps menu, tap on “Google Play Store”.
4. Look for the three-dot menu icon in the top right corner and tap on it.
5. From the drop-down menu, select “Uninstall updates”.
6. A confirmation message will appear. Tap “OK” to proceed.
7. Once the updates are uninstalled, restart your device.
This process will revert the Play Store app to its original version. You can then try checking for updates again. Remember to also check your internet connection and ensure you have sufficient storage space on your device. If the error persists, you may need to explore other solutions.
Why Is It Displaying the Error Message?
If you’re encountering an error message when checking for updates on the Google Play Store, there can be several reasons behind it. Firstly, make sure your internet connection is stable and your mobile’s internet speed is sufficient for downloading updates.
If the error persists, try clearing the Google Play Store cache. To do this, go to your device’s Settings, then Apps or Application Manager. Find and select Google Play Store, then tap on “Clear Cache.”
Another solution is to check if there are any pending updates for the Google Play Store itself. To do this, go to the Play Store app, tap on the three horizontal lines in the top-left corner, then select “My apps & games.” If an update is available, tap on the “Update” button next to the Google Play Store.
If none of these methods work, consider uninstalling and reinstalling the updates for the Google Play Store. This can be done by going to the device menu, selecting “Settings,” then “Apps” or “Application Manager.” Find and select Google Play Store, then tap on the three dots at the top-right corner and choose “Uninstall updates.”
How to Fix the Error Checking for Updates on the Play Store
If you’re encountering an error while checking for updates on the Play Store, here’s a quick fix:
1. Clear the Play Store cache: Go to Settings > Apps > Google Play Store > Storage > Clear Cache. This can resolve minor issues with the update process.
2. Reset Play Store preferences: Head to Settings > Apps > Google Play Store > Storage > Clear Data. This will reset the Play Store settings and can help resolve update errors.
3. Check your internet connection: Ensure that you have a stable internet connection, either through Wi-Fi or mobile data.
4. Restart your device: Sometimes a simple restart can solve temporary glitches and allow the Play Store to check for updates properly.
Remember, these steps can help resolve common update errors on the Play Store. If the issue persists, consider reaching out to Google support for further assistance.
Check Network Connection
If you’re encountering the Google Play Store Error Checking Updates, it may be due to a poor network connection. To fix this issue, follow these steps:
1. Check your network connection: Ensure that you have a stable internet connection on your mobile device. Connect to a reliable Wi-Fi network or enable mobile data.
2. Restart your device: Sometimes, a simple restart can resolve network-related problems. Power off your device, wait a few seconds, and then turn it back on.
3. Clear Play Store cache and data: Go to your device’s Settings, select Apps or Application Manager, locate Google Play Store, and tap on it. Clear the cache and data to refresh the app.
4. Try updating using a different network: If the issue persists, switch to a different Wi-Fi network or try using mobile data.
5. Check for software updates: Ensure that your device is running the latest software version. Go to Settings, select System or Software Update, and check for any available updates.
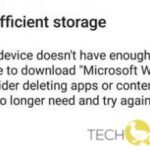
Check if You Are Low on Storage
If you’re experiencing issues with updating apps on the Google Play Store, it could be due to low storage on your device. To check if you are low on storage, follow these steps:
1. Open the Settings app on your mobile device.
2. Navigate to the “Storage” or “Storage & USB” section.
3. Look for the available storage space displayed. If it’s close to full, you may be low on storage.
To free up space and fix the error, try these tips:
1. Delete unnecessary files, such as old photos or videos.
2. Uninstall unused apps.
3. Clear app cache and data for apps you no longer use.
4. Move files to an external storage device or cloud storage.
By clearing up storage space, you can ensure that your device has enough room for app updates. Remember to regularly check your storage to prevent future update issues.
Update the Android OS
To fix the Google Play Store error checking updates on your Android OS, follow these steps:
1. Clear the cache and data of the Google Play Store app. Go to Settings > Apps > Google Play Store > Storage > Clear cache and Clear data.
2. Ensure that your device is connected to a stable internet connection. Wi-Fi is recommended for faster and more reliable downloads.
3. Check if your device has enough storage space for the app update. Delete unnecessary files or move them to an external storage device if needed.
4. Restart your device to refresh the system and clear any temporary glitches.
5. If the issue persists, try updating the app using a different network connection or by using mobile data instead of Wi-Fi.
6. If none of the above steps work, uninstall the app and reinstall it from the Google Play Store.
Remember to always keep your Android OS and apps updated to benefit from the latest features and security enhancements.
(Note: These instructions may vary slightly depending on your device model and Android version. Refer to your device’s user manual or contact the manufacturer for specific instructions.)
Grant All the Required Permissions to Google Play Store and Services
Granting all the required permissions to Google Play Store and Services is essential for fixing the error related to checking updates. To do this, follow these steps:
1. Open the Settings app on your mobile device.
2. Scroll down and tap on “Apps” or “Applications.”
3. Look for Google Play Store and tap on it.
4. Go to the “Permissions” section.
5. Enable all the necessary permissions by toggling the switches or checkboxes.
6. Repeat the same process for Google Play Services.
By granting the required permissions, you ensure that the Play Store and Services function properly, allowing you to check for updates seamlessly. This can resolve issues like update messages not appearing or updates getting stuck. Granting permissions also helps enhance the overall performance and stability of these essential components.
Remember, granting permissions may vary slightly depending on your device’s manufacturer or Android version, but the general steps remain the same. Following these instructions should help you fix the error and ensure a smooth update experience for your apps.

Mark Ginter is a tech blogger with a passion for all things gadgets and gizmos. A self-proclaimed "geek", Mark has been blogging about technology for over 15 years. His blog, techquack.com, covers a wide range of topics including new product releases, industry news, and tips and tricks for getting the most out of your devices. If you're looking for someone who can keep you up-to-date with all the latest tech news and developments, then be sure to follow him over at Microsoft.