- “Synchronization is unavailable for your account” is an error message that appears on PCs, laptops, tablets, and other Windows 10 devices.
- It’s a well-known Windows bug that has bothered users since Windows 10 was released in 2017.
- It can also occur when you try to connect your Windows device to a Wi-Fi network, an access point, or one of two Internet access points.
Unlocking the seamless synchronization of your accounts on Windows 11 can be a game-changer, but encountering the frustrating “Sync Is Not Available for Your Account” error can be a roadblock. In this article, we delve into effective solutions to help you fix this issue and regain the sync functionality you desire.
Removing work or school accounts
To remove work or school accounts in Windows 11, follow these steps:
1. Open the Settings app by pressing Windows key + I.
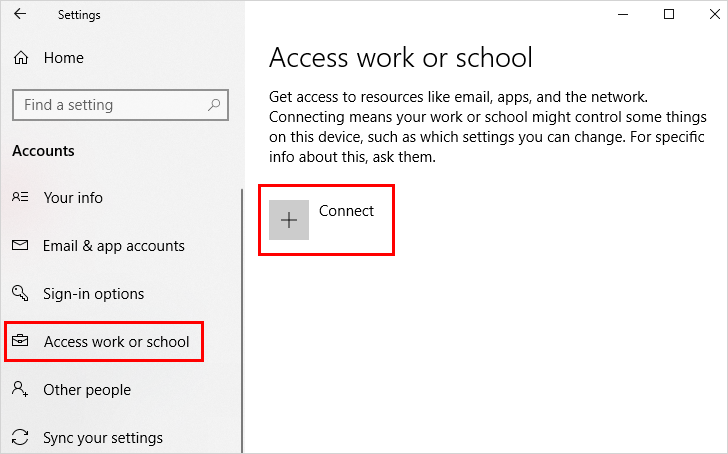
2. Go to the “Accounts” section.
3. Click on “Access work or school” on the left sidebar.
4. Select the account you want to remove.
5. Click the “Disconnect” button.
By following these steps, you can remove any work or school accounts from your Windows 11 computer. This can be useful if you no longer need access to these accounts or if you are experiencing syncing issues.
Note: Removing a work or school account will also remove any associated data or settings synced to your computer.
If you encounter any issues during the process, make sure to double-check the account settings and verify that you have the necessary permissions to remove the account.
Verifying your Microsoft account
To verify your Microsoft account and fix the “Sync Is Not Available for Your Account Error” in Windows 11, follow these steps:
1. Open a web browser and go to the Microsoft account verification page.
2. Sign in with your Microsoft account credentials.
3. Follow the on-screen instructions to complete the verification process.
4. Once verified, go back to your Windows 11 device.
5. Press the Windows key + I to open the Settings app.
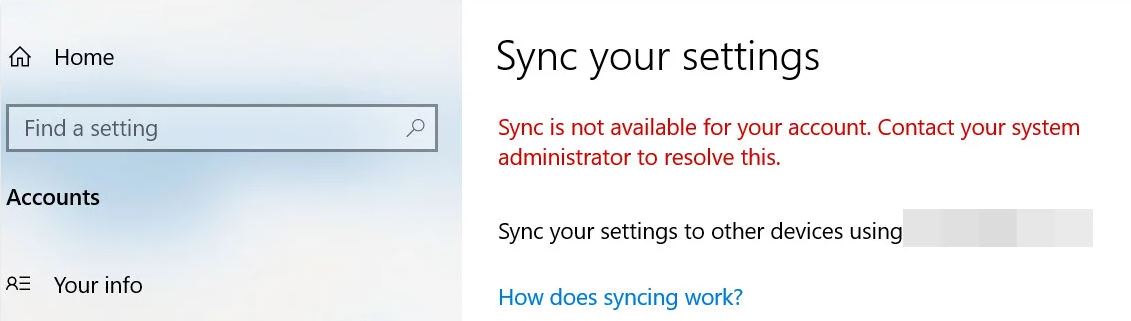
6. Click on “Accounts” and then select “Sync your settings.”
7. Make sure the “Sync settings” toggle is turned on.
8. Scroll down and click on “Sync now” to manually sync your settings.
9. Restart your computer to apply the changes.
By completing these steps, you should be able to verify your Microsoft account and resolve the “Sync Is Not Available for Your Account Error” in Windows 11. If you continue to experience issues, consider checking for any system file corruption or contacting your system administrator for further assistance.
Enabling Microsoft account via Registry Editor
To enable your Microsoft account via Registry Editor and fix the “Sync Is Not Available for Your Account” error in Windows 11, follow these steps:
1. Press the Windows key + R to open the Run dialog box.
2. Type “regedit” and press Enter to open Registry Editor.
3. In the left pane, navigate to the following location:
HKEY_CURRENT_USER\Software\Microsoft\Windows\CurrentVersion\SettingSync\Groups
4. Right-click on the “Groups” folder and select “Export” to create a backup of the folder.
5. Delete the “Groups” folder from the registry.
6. Restart your computer.
7. After restarting, open the Settings app and go to Accounts > Sync your settings.
8. Toggle the “Sync settings” switch to enable syncing for your Microsoft account.
9. Sign in with your Microsoft account credentials if prompted.
Enabling Syncing from Azure Active Directory
- Open the Settings app in Windows 11 by clicking on the Start button and selecting Settings.
- In the Settings window, click on Accounts.
- On the left-hand side, select Access work or school.
- Under the “Connect to work or school” section, locate your Azure Active Directory account and click on it.
- Click on the Sync button to enable syncing with Azure Active Directory.
- If prompted, enter your Azure Active Directory credentials to authenticate the sync process.
- Wait for the syncing process to complete. This may take some time depending on the size of your Azure Active Directory.
- Once the syncing is complete, restart your computer for the changes to take effect.
Performing a repair install
To fix the “Sync Is Not Available for Your Account” error in Windows 11, you can try performing a repair install. This will help resolve any issues with your system files and settings, allowing you to sync your account properly.
Here’s how to perform a repair install:
1. Press the Windows key + X and select “Windows PowerShell (Admin)” to open an elevated PowerShell window.
2. In the PowerShell window, type “sfc /scannow” and press Enter. This will scan your system for any corrupted or missing files and repair them automatically.
3. After the scan is complete, restart your computer and check if the error is resolved.
If the error persists, you can also try running the DISM tool to repair the Windows image. In the same elevated PowerShell window, type “DISM /Online /Cleanup-Image /RestoreHealth” and press Enter. This will scan for any issues with the Windows image and repair them.
Once the repair is complete, restart your computer and check if the error is resolved.
Work or School Account Connectivity Issue
If you’re experiencing a work or school account connectivity issue on Windows 11, there are some steps you can take to fix the “Sync Is Not Available for Your Account” error.
First, check your internet connection and make sure it’s stable. If you’re using a VPN, try disabling it temporarily to see if that resolves the issue.
Next, clear your browser cookies and cache. This can help refresh your connection to the website or service you’re trying to access.
If you’re using Cloudflare as a security service, there may be actions you can take to unblock the connection. Visit the Cloudflare website for more information.
Additionally, it’s worth checking your system files for any issues. Run a system file check by opening the Command Prompt as an administrator and typing “sfc /scannow“. This will scan and repair any corrupted system files.
If you’re still experiencing issues, reach out to your system administrator for further assistance. They may be able to provide additional solutions specific to your work or school account.
Microsoft Account Verification Issue
If you are experiencing a Microsoft account verification issue while trying to sync your account in Windows 11, there are a few simple steps you can take to resolve it.
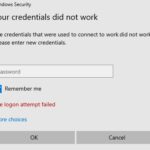
First, ensure that your internet connection is stable and reliable. Next, check your system settings and make sure that cookies are enabled. If you are using a work PC, it’s possible that your Registry policy may be blocking account syncing. In this case, you will need to contact your IT department for assistance.
If the issue persists, try signing out of your Microsoft account and then signing back in. This can often resolve synchronization errors. Additionally, make sure that you are using the latest version of Windows 11 and that all updates are installed.
If none of these steps fix the problem, it may be necessary to contact Microsoft support for further assistance. They can provide more advanced troubleshooting strategies tailored to your specific scenario.
Registry Setting and Azure Active Directory Blocking
| Registry Setting | Azure Active Directory Blocking |
|---|---|
| Registry Key: HKEY_LOCAL_MACHINE\SOFTWARE\Policies\Microsoft\Windows\WorkplaceJoin | By default, Azure Active Directory (AAD) blocking is disabled. |
| Registry Value: BlockAADWorkplaceJoin (DWORD) | To enable AAD blocking, set the value of BlockAADWorkplaceJoin to 1. |
| To disable AAD blocking, set the value of BlockAADWorkplaceJoin to 0. | |
| Enabling AAD blocking prevents the device from joining Azure Active Directory. | |
| This can help resolve the “Sync is not available for your account” error in Windows 11. |

Mark Ginter is a tech blogger with a passion for all things gadgets and gizmos. A self-proclaimed "geek", Mark has been blogging about technology for over 15 years. His blog, techquack.com, covers a wide range of topics including new product releases, industry news, and tips and tricks for getting the most out of your devices. If you're looking for someone who can keep you up-to-date with all the latest tech news and developments, then be sure to follow him over at Microsoft.