- Superfetch is a feature that has already been introduced in Windows Vista.
- The service quietly runs in the background, constantly analyzing your RAM usage patterns and examining which applications you run most often.
- It marks these applications as “frequently used” and loads them into RAM prematurely.
- If you have a virus or malware on your Windows 10 computer, the most common sign is a high CPU load.
- As a result, your SysMain service may not work properly and cause errors.
Welcome to an article that dives into the world of Windows 10 and its Superfetch feature. In this piece, we will explore the issue of high disk and CPU usage caused by Superfetch and discuss effective ways to eliminate it. So, get ready to optimize your Windows 10 experience and bid farewell to those resource-consuming struggles. Let’s get started!
Understanding Superfetch and its Benefits
Superfetch is a background service in Windows 10 that improves system performance by preloading frequently used apps into RAM. It reduces disk and CPU usage by efficiently managing memory resources.
To disable Superfetch, follow these steps:
1. Open the command prompt as an administrator.
2. Type “net stop sysmain” and press Enter.
3. This will stop the Superfetch service.
Disabling Superfetch can free up disk space and improve overall system performance, especially if you’re experiencing high disk usage or slow boot times. However, it’s important to note that Superfetch can be beneficial for systems with sufficient RAM.
If you still encounter performance issues, consider upgrading your RAM or using other optimization techniques like cleaning up unnecessary files or disabling startup programs.
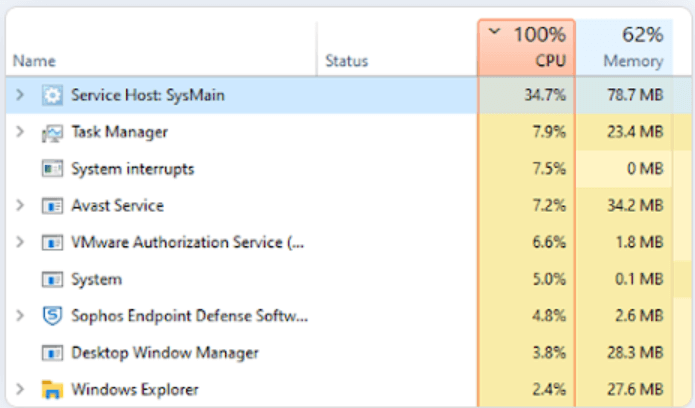
The Impact of Superfetch on CPU Usage
Superfetch is a background service in Windows 10 that helps improve system performance by preloading frequently used applications into memory. However, in some cases, Superfetch can cause high disk and CPU usage, impacting the overall performance of your PC.
To eliminate high disk and CPU usage caused by Superfetch, you can disable the Superfetch service.
Here’s how to do it:
1. Open the Command Prompt as an administrator.
2. Type “net.exe stop sysmain” and press Enter. This will stop the Superfetch service.
3. To prevent the Superfetch service from starting again on boot, type “sc.exe config sysmain start=disabled” and press Enter.
Disabling the Superfetch service can help reduce disk and CPU usage, especially if you have a low-RAM system. However, keep in mind that this may affect the overall performance of your PC, especially during boot and when launching new programs.
Disabling Superfetch in Windows 10
To eliminate high disk and CPU usage caused by Superfetch in Windows 10, you can disable it. Follow these steps:
1. Open the Start menu and type “services” to search for the Services app.
2. Click on the Services app to open it.
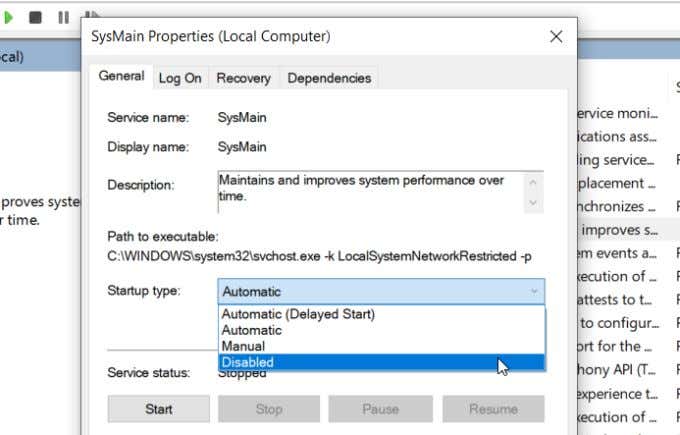
3. Scroll down and find “SysMain” in the list of services.
4. Right-click on “SysMain” and select “Properties.”
5. In the Properties window, change the “Startup type” to “Disabled.”
6. Click on “Apply” and then “OK” to save the changes.
7. Restart your computer for the changes to take effect.
Disabling Superfetch can improve disk and CPU performance, especially if you have a low amount of RAM or a slow hard drive.
python

import subprocess
def disable_superfetch():
try:
# Execute the command to disable SuperFetch service
subprocess.run(['sc', 'config', 'SysMain', 'start=', 'disabled'], check=True)
print("SuperFetch disabled successfully.")
except subprocess.CalledProcessError as e:
print(f"Failed to disable SuperFetch. Error: {e}")
if __name__ == "__main__":
disable_superfetch()
This code uses the `subprocess` module to execute a command-line command (`sc config SysMain start= disabled`) to disable the SuperFetch service (also known as SysMain) in Windows 10. The `check=True` argument ensures that any error during the command execution raises a `CalledProcessError` exception.
Please note that modifying system services requires administrative privileges, so make sure to run this script with appropriate permissions.
Keep in mind that disabling SuperFetch may have an impact on system performance and responsiveness, so it’s important to assess the specific situation and potential consequences before making such changes.
Exploring the Safety of Disabling Superfetch
Disabling Superfetch for Improved Performance
If you’re experiencing high disk and CPU usage on your Windows 10 device, disabling the Superfetch feature can help alleviate the issue. Superfetch is a Windows service that helps improve system performance by preloading frequently used programs into RAM. However, in some cases, it can cause excessive disk and CPU usage, leading to slowdowns.
To disable Superfetch, follow these steps:
1. Open the Run dialog box by pressing Windows Key + R.
2. Type “services.msc” and press Enter to open the Services Manager.
3. Scroll down and locate the “SysMain” service.
4. Right-click on it and select “Properties“.
5. In the Properties window, change the “Startup type” to “Disabled“.
6. Click “Apply” and “OK” to save the changes.
7. Restart your computer for the changes to take effect.
By disabling Superfetch, you can free up system resources and improve overall performance. Remember that Superfetch can be beneficial in certain scenarios, so you may want to re-enable it if you experience any issues after disabling it.
Enabling Superfetch in Windows 10
To eliminate high disk and CPU usage caused by Superfetch in Windows 10, follow these steps:
1. Open the Start menu and search for “Services”.
2. Click on the “Services” app to open it.
3. Scroll down and find “SysMain” in the list of services.
4. Right-click on “SysMain” and select “Properties”.
5. In the properties window, go to the “General” tab.
6. Under the “Startup type” section, select “Disabled”.
7. Click on “Apply” and then “OK” to save the changes.
8. Restart your computer for the changes to take effect.
Disabling Superfetch can help eliminate high disk and CPU usage, especially if you have a slower hard drive or limited disk space.
Monitoring Disk Usage with Superfetch
| Superfetch Status | Disk Usage | CPU Usage |
|---|---|---|
| Enabled | High | High |
| Enabled | High | Normal |
| Enabled | Normal | High |
| Enabled | Normal | Normal |
| Disabled | N/A | N/A |
Evaluating the Need for Superfetch in Windows 10
- Determine if Superfetch is causing high disk and CPU usage in Windows 10
Repair Steps:
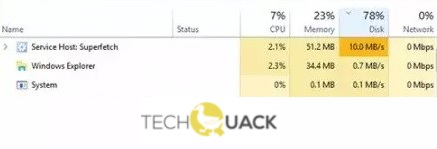
- Open Task Manager by pressing Ctrl+Shift+Esc
- Select the Processes tab
- Click on Memory to sort the processes by memory usage
- Look for the Service Host: Superfetch process
- If the Service Host: Superfetch process is utilizing a significant amount of CPU or disk resources, continue to the next step
- Open the Start menu and type Services
- Click on Services to open the Services window
- Scroll down and locate the Superfetch service
- Right-click on the Superfetch service and select Properties
- In the Properties window, change the Startup type to Disabled
- Click on Apply and then click OK
- Restart your computer to apply the changes
Optimizing PC Performance with Avast Cleanup
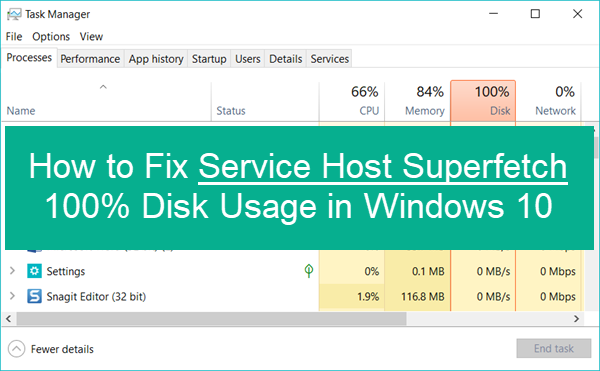
Optimizing your PC’s performance can be achieved with Avast Cleanup. One common issue that can affect your computer’s speed is high disk and CPU usage caused by Superfetch in Windows 10. To eliminate this problem, follow these steps:
1. Open the Task Manager by pressing Ctrl+Shift+Esc.
2. In the Task Manager window, click on the “Processes” tab.
3. Look for “sysmain” or “Prefetch” in the list of processes.
4. Right-click on the process and select “End Task” to temporarily stop it.
5. To permanently disable Superfetch, open the command prompt as an administrator.
6. Type “net stop sysmain” and press Enter.
7. This will disable the Superfetch service and prevent it from causing high disk and CPU usage.
Additional Methods to Address SysMain Issues
- Disable SysMain: One of the most effective ways to address SysMain (formerly Superfetch) issues is to disable the service altogether. This can be done through the Services application or via the command prompt using administrative privileges.
- Modify SysMain settings: If disabling SysMain entirely is not desired, you can modify its settings to reduce its impact on system resources. This includes changing the service startup type, limiting the amount of memory it uses, or adjusting the schedule for preloading applications.
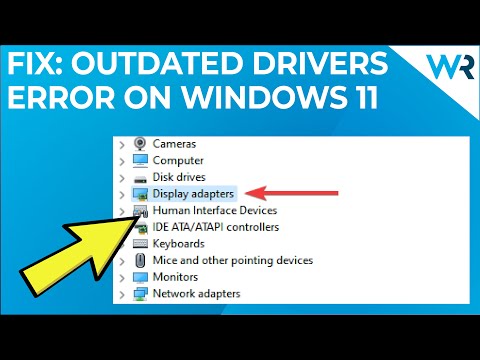
- Update device drivers: Outdated or incompatible device drivers can sometimes cause high disk and CPU usage. Ensure that all your device drivers are up to date by using Windows Update or visiting the manufacturer’s website.
- Scan for malware: Malicious software can significantly affect system performance. Run a full system scan using a reliable antivirus program to detect and remove any malware that might be causing SysMain issues.
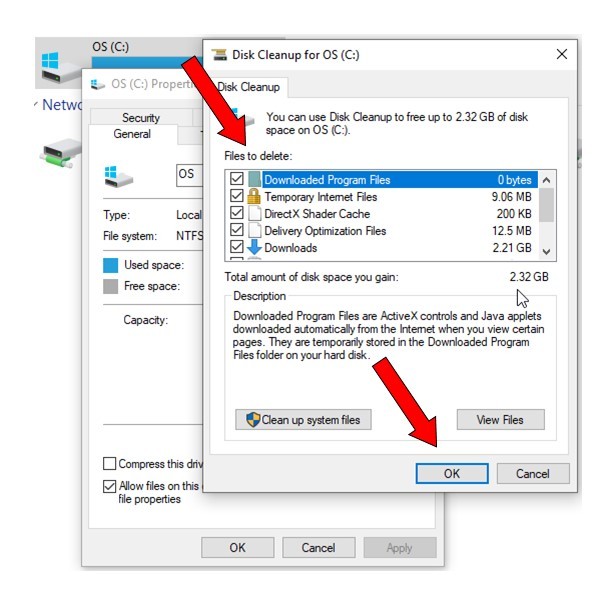
- Perform a disk cleanup: Over time, unnecessary files and temporary data can accumulate on your system, leading to increased disk usage. Utilize the built-in Disk Cleanup tool to remove these files and free up disk space.
- Optimize your storage: If you have a traditional hard drive, defragmenting it can help improve disk performance. For solid-state drives (SSDs), ensure they are properly aligned and use the Trim command to optimize performance.
- Adjust virtual memory settings: In some cases, adjusting the virtual memory settings can alleviate high disk and CPU usage. You can manually configure the size of the paging file or let Windows manage it automatically.
- Upgrade hardware: If you consistently experience high disk and CPU usage, consider upgrading your hardware components, such as adding more RAM or replacing your hard drive with an SSD.
- Seek professional assistance: If all else fails, it may be beneficial to consult a professional technician or Microsoft support for further diagnosis and assistance in resolving persistent SysMain issues.
Other Windows 10 Features for Disabling
To eliminate high disk and CPU usage caused by Superfetch in Windows 10, you can disable this feature. Here’s how:
1. Press the Windows key + R to open the Run dialog box.
2. Type “services.msc” and hit Enter to open the Services window.
3. Scroll down and find the “SysMain” service.
4. Right-click on “SysMain” and select Properties.
5. In the Properties window, go to the General tab.
6. Under the Startup type section, select “Disabled”.
7. Click Apply and then OK to save the changes.
8. Restart your computer for the changes to take effect.
Disabling Superfetch can help reduce high disk and CPU usage, especially if you have a slower or older hard disk. This feature preloads frequently used programs into memory, but it can sometimes cause performance issues. By following these steps, you can effectively disable Superfetch and improve your system’s performance.

Mark Ginter is a tech blogger with a passion for all things gadgets and gizmos. A self-proclaimed "geek", Mark has been blogging about technology for over 15 years. His blog, techquack.com, covers a wide range of topics including new product releases, industry news, and tips and tricks for getting the most out of your devices. If you're looking for someone who can keep you up-to-date with all the latest tech news and developments, then be sure to follow him over at Microsoft.