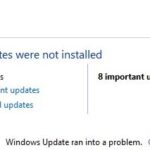
- A common problem among computer owners is getting the 0x8007371c error code while trying to install Windows 10.
- If you are having trouble installing Windows 10, it could be because of a third-party application blocking the Windows update process.
- To resolve this issue, follow the steps listed below: Restart the PC in Safe Mode.
- If none of the fixes above resolves the error, manually installing a standalone package should fix the error.
Welcome to this article where we delve into the realm of troubleshooting and fixing the notorious Windows 10 Update Error 0x8007371c. Join us as we navigate the intricate paths of this error code, providing you with effective solutions to bid it a permanent farewell.
Troubleshoot Windows update error 0x8007371c
If you’re encountering Windows update error 0x8007371c, there are a few troubleshooting steps you can try to fix the issue.
First, run the Windows Update Troubleshooter to automatically detect and resolve any problems with your Windows update. To do this, follow these steps:
1. Press the Windows key + I to open the Settings app.
2. Go to Update & Security.
3. Click on Troubleshoot in the left-hand menu.
4. Select Windows Update and click on Run the troubleshooter.
If the troubleshooter doesn’t fix the issue, you can manually reset the Windows Update components. To do this, follow these steps:
1. Press the Windows key + X and select Command Prompt (Admin).
2. Type the following commands, pressing Enter after each one:
– net stop wuauserv
– net stop cryptSvc
– net stop bits
– net stop msiserver
3. Type the following command to rename the SoftwareDistribution and Catroot2 folders:
– ren C:\Windows\SoftwareDistribution SoftwareDistribution.old
– ren C:\Windows\System32\catroot2 Catroot2.old
4. Type the following commands to restart the previously stopped services:
– net start wuauserv
– net start cryptSvc
– net start bits
– net start msiserver
5. Close the Command Prompt and restart your computer.
These steps should help resolve the Windows update error 0x8007371c and allow you to successfully install the updates.
Restart relevant services and check for updates
To troubleshoot and fix the Windows 10 update error 0x8007371c, follow these steps:
1. Restart relevant services: Open the Services app by typing “services.msc” in the Windows search bar. Look for the following services: Windows Update, Cryptographic Services, Background Intelligent Transfer Service (BITS), and Windows Modules Installer. Right-click on each service, select “Restart,” and close the Services app.
2. Check for updates: Go to Settings > Update & Security > Windows Update. Click on “Check for updates” and let Windows search for the latest updates. If any updates are found, click “Install now” to download and install them.
3. Run Windows Update troubleshooter: Search for “troubleshoot” in the Windows search bar and open the Troubleshoot settings. Select “Windows Update” under “Get up and running” and click on “Run the troubleshooter.” Follow the on-screen instructions to detect and fix any update-related issues.
4. Use the System File Checker (SFC) tool: Open the Command Prompt as an administrator and type “sfc /scannow” to scan and repair any corrupted system files.
5. Reset Windows Update components: Open the Command Prompt as an administrator and run the following commands one by one:
– net stop wuauserv
– net stop cryptSvc
– net stop bits
– net stop msiserver
– ren C:\Windows\SoftwareDistribution SoftwareDistribution.old
– ren C:\Windows\System32\catroot2 catroot2.old
– net start wuauserv
– net start cryptSvc
– net start bits
– net start msiserver
6. Install the latest servicing stack update: Visit the Microsoft Update Catalog website and search for the latest servicing stack update for your Windows version. Download and install it manually.
If these steps do not resolve the error, it is recommended to seek further assistance from Microsoft support or consult online forums for additional solutions.
Uninstall security software temporarily
To troubleshoot and fix Windows 10 Update Error 0x8007371c, you may need to temporarily uninstall your security software. This error code can be caused by conflicts between the software and the update process.
To uninstall your security software, follow these steps:
1. Press the Windows key + R to open the Run dialog box.
2. Type “appwiz.cpl” and press Enter to open the Programs and Features window.
3. Locate your security software in the list of installed programs.
4. Right-click on the software and select Uninstall.
5. Follow the on-screen prompts to complete the uninstallation process.
Once the security software is uninstalled, restart your computer and attempt the Windows 10 update again. Remember to reinstall your security software once the update is successful.
For more detailed instructions and additional troubleshooting steps, refer to our support post on howtoedge.com.
Note: This solution is applicable to various scenarios and Windows versions.
net stop wuauserv

net stop cryptSvc

net stop bits

net stop msiserver

ren C:\Windows\SoftwareDistribution SoftwareDistribution.old

ren C:\Windows\System32\catroot2 catroot2.old

net start wuauserv

net start cryptSvc

net start bits

net start msiserver
- After executing these commands, restart your computer and try running Windows Update again.
3. Use the DISM tool:
The Deployment Image Servicing and Management (DISM) tool can repair corrupted system files and help resolve update-related issues. Here's how you can use it:
- Open Command Prompt as an administrator.
- Type the following command and press Enter:
DISM.exe /Online /Cleanup-image /Restorehealth
– Wait for the process to complete. It may take some time.
– Once finished, restart your computer and try installing the Windows updates again.
Please note that these steps are general recommendations and may not specifically address the 0x8007371c error on your system. It’s always advisable to create a system restore point or backup your important data before making any changes to your computer.
If the error persists after trying these steps, I recommend seeking assistance from Microsoft Support or visiting relevant forums where experts can provide more specific guidance based on your system configuration and error logs.
Manually install the failing update
To manually install the failing update and resolve Windows 10 Update Error 0x8007371c, follow these steps:
1. Open the Windows Update Troubleshooter to identify and fix any issues with the update process.
2. If the troubleshooter doesn’t solve the problem, you can manually download the update package from the Microsoft Update Catalog.
3. Visit the Microsoft Update Catalog website and search for the specific update using its KB number.
4. Download the update package that matches your operating system and build version.
5. Once downloaded, double-click the package to start the installation process.
6. Follow the on-screen instructions to complete the installation.
7. Restart your computer after the installation is finished.
8. Check if the error has been resolved by running Windows Update again.
By manually installing the update, you can bypass any potential glitches or corruption that may have occurred during the automatic update process. This solution is particularly useful in scenarios where Windows Components or other system folders have been affected.
Run SFC and DISM scans to repair errors
To eliminate Windows 10 Update Error 0x8007371c, you can try running SFC and DISM scans to repair any errors. These scans help identify and fix issues with your Windows operating system.
Here’s how you can perform these scans:
1. Open the Command Prompt as an administrator by right-clicking on the Start button and selecting “Command Prompt (Admin).”
2. In the Command Prompt window, type “sfc /scannow” and press Enter. This command will initiate the System File Checker (SFC) scan, which will scan for and repair any corrupt system files.
3. Once the SFC scan is complete, type “dism /online /cleanup-image /restorehealth” and press Enter. This command will initiate the Deployment Image Servicing and Management (DISM) scan, which will check for component store corruption and repair it if necessary.
4. After the DISM scan is finished, restart your computer and check if the error has been resolved.
Performing these scans can help resolve common update errors like 0x8007371c. If the issue persists, you can also try other repair strategies or seek further assistance from Microsoft support or online forums.
Reset Windows update components and dependencies
If you’re encountering Windows 10 Update Error 0x8007371c, don’t worry, there are ways to troubleshoot and fix it. One possible cause of this error is a glitch in Windows Components. To resolve this issue, you can reset the Windows Update (WU) components and their dependencies.
Here’s how:
1. Open the Command Prompt as an administrator.
2. Type the following commands, pressing Enter after each one:
– net stop wuauserv
– net stop cryptSvc
– net stop bits
– net stop msiserver
3. Now, rename the SoftwareDistribution and Catroot2 folders. Type the following commands, pressing Enter after each one:
– ren C:\Windows\SoftwareDistribution SoftwareDistribution.old
– ren C:\Windows\System32\catroot2 Catroot2.old
4. Finally, restart the services you stopped earlier. Type the following commands, pressing Enter after each one:
– net start wuauserv
– net start cryptSvc
– net start bits
– net start msiserver
This should help resolve the update error 0x8007371c. If the issue persists, you may need to explore other repair strategies or consult Microsoft support.
Use System Restore or Safe Mode for Windows update
To troubleshoot and fix Windows 10 Update Error 0x8007371c, you have a few options. One way is to use System Restore or Safe Mode. Here’s how:
1. System Restore: This feature allows you to revert your system back to a previous state when it was functioning properly. To use System Restore, follow these steps:
a. Press the Windows key + R to open the Run dialog box.
b. Type “rstrui” and press Enter to open System Restore.
c. Follow the on-screen instructions to select a restore point and restore your system.
2. Safe Mode: Booting into Safe Mode can help you troubleshoot and fix update errors. To enter Safe Mode, do the following:
a. Press the Windows key + I to open the Settings app.
b. Go to Update & Security > Recovery.
c. Under Advanced startup, click Restart now.
d. Select Troubleshoot > Advanced options > Startup Settings > Restart.
e. Press F4 or 4 to enter Safe Mode.
By using System Restore or Safe Mode, you can eliminate Windows 10 Update Error 0x8007371c and get your system back on track. For more detailed instructions and additional troubleshooting methods, refer to howtoedge.com or other reliable sources.
Utilize System Backup or Clean Install as a solution
To troubleshoot and fix the Windows 10 Update Error 0x8007371c, you can utilize two solutions: System Backup or Clean Install.
System Backup: Creating a system backup allows you to revert your computer to a previous state before the error occurred. This can help eliminate any issues that may be causing the error. To create a system backup:
1. Open the Start menu and search for “Backup” to access the Backup settings.
2. Select “Backup and Restore (Windows 7)” and click on “Create a system image” on the left-hand side.
3. Follow the on-screen instructions to create a system backup.
Clean Install: A clean install involves reinstalling Windows 10 on your computer, which can help resolve any underlying issues causing the error. To perform a clean install:
1. Download the Windows 10 installation media from Microsoft’s website.
2. Insert the installation media and restart your computer.
3. Follow the on-screen instructions to reinstall Windows 10, making sure to select the “Custom” installation option.
Remember to backup your important files before performing a clean install, as it will erase all data on your computer.
By utilizing either of these solutions, you can troubleshoot and fix the Windows 10 Update Error 0x8007371c.

Mark Ginter is a tech blogger with a passion for all things gadgets and gizmos. A self-proclaimed "geek", Mark has been blogging about technology for over 15 years. His blog, techquack.com, covers a wide range of topics including new product releases, industry news, and tips and tricks for getting the most out of your devices. If you're looking for someone who can keep you up-to-date with all the latest tech news and developments, then be sure to follow him over at Microsoft.