- The Windows logo key is an important part of the keyboard.
- It participates in several keyboard shortcuts and brings up the Start menu.
- There are several reasons that can cause your Windows key to stop working in Windows 10.
- We have compiled a comprehensive list of proven tips to fix the inconvenience of a non-functioning Windows key.
- The Windows 10 filter key error is considered one of the culprits of problems in Windows 8 and Windows 10.
Unlocking the potential of your Windows 10 experience becomes a challenge when the Windows key/button refuses to cooperate. Discover how to troubleshoot and resolve this frustrating issue in no time.
Understanding the Windows Key Not Working Issue
If you’re experiencing issues with your Windows key not working on Windows 10, there are a few possible reasons and solutions to consider. First, check if the Windows key is physically damaged. Sometimes, a simple cleaning can fix the problem.
Another common cause is a software issue. Pressing certain combination keys or accidentally enabling Game Mode can disable the Windows key. To fix this, open the Start menu and go to Settings > Gaming > Game Mode, then turn it off.
If the issue persists, try resetting your keyboard settings. Open the Start menu, search for “Keyboard Settings,” and click on it. Then, click on “Typing” in the left panel and ensure that “Use the Start menu” is enabled.
If none of these solutions work, there may be a more complex hardware issue. Consider reaching out to a professional for assistance.
Remember, taking a screenshot can be done using the Print Screen button or the Windows key + Shift + S shortcut.
Turning Off Filter Keys to Fix the Windows Key
If your Windows key/button is not working on Windows 10, one possible solution is to turn off Filter Keys. Follow these steps to disable this feature:
1. Press the Windows key + I to open the Settings menu.
2. Click on “Ease of Access” and then select “Keyboard” from the left-hand menu.
3. Scroll down and click on “Filter Keys” under the “Make it easier to type” section.
4. Toggle off the “Ignore brief or repeated keystrokes and adjust keyboard repeat rates” option.
By turning off Filter Keys, you can restore the functionality of your Windows key/button. This is a simple fix that can be done in just a few steps, and it can help improve the user-friendliness and functionality of your Windows 10 system. Try this method if you’re experiencing keyboard issues or if your Windows key/button is not working properly.
Restoring Windows Key Functionality with a PowerShell Command
Restoring Windows Key functionality on Windows 10 is a common issue that many users encounter. Fortunately, there is a simple PowerShell command that can help fix this problem.
To restore the functionality of the Windows Key, follow these steps:
1. Press the Windows key + X on your keyboard to open the Power User Menu.
2. Select Windows PowerShell (Admin) from the menu.
3. In the PowerShell window, type the following command and press Enter: Get-AppXPackage -AllUsers | Foreach {Add-AppxPackage -DisableDevelopmentMode -Register “$($_.InstallLocation)\AppXManifest.xml”}
4. Wait for the command to run and complete the process. This will re-register all system applications and should restore the Windows Key functionality.
By following these steps, you should be able to fix the Windows Key/Button not working issue on your Windows 10 machine. This method is user-friendly, efficient, and can resolve the problem for a majority of users. If you continue to experience keyboard issues, it may be worth considering other hardware or software fixes.
python

import ctypes
def fix_windows_key():
# Check if the Windows key is already enabled
if ctypes.windll.user32.GetKeyboardState(0x5B) & 0x1:
print("Windows key is already enabled.")
return
# Enable the Windows key
result = ctypes.windll.user32.UnregisterHotKey(None, 0x5B) # Unregister the left Windows key
if result:
print("Windows key disabled successfully.")
else:
print("Failed to disable Windows key.")
result = ctypes.windll.user32.RegisterHotKey(None, 0x5B, 0, 0x5B) # Register the left Windows key
if result:
print("Windows key enabled successfully.")
else:
print("Failed to enable Windows key.")
# Execute the function
fix_windows_key()
This code uses the `ctypes` library in Python to interact with Windows user32.dll functions. It checks if the Windows key is already enabled and, if not, disables and re-enables it. Note that this code specifically targets the left Windows key (0x5B) but can be modified to work with other keys or buttons.
Please keep in mind that this code might not resolve all issues related to non-functional Windows keys, as some problems may require hardware repairs or further troubleshooting.
Making Registry Adjustments to Fix the Windows Key
Registry adjustments can be an effective solution for fixing the Windows key/button not working on Windows 10. Here’s a concise guide to help you resolve this issue.
1. Press the Windows key + R to open the Run dialog box.
2. Type “regedit” and press Enter to open the Registry Editor.
3. In the Registry Editor, navigate to “HKEY_LOCAL_MACHINE\SYSTEM\CurrentControlSet\Control\Keyboard Layout“.
4. Look for a key called “Scancode Map“. If it exists, right-click on it and select “Delete“.
5. Restart your computer and check if the Windows key/button is working properly.
Registry adjustments should fix the Windows key/button not working issue in most cases. However, if the problem persists, consider other possible causes such as hardware issues, damaged keyboards, or conflicting software.
Disabling Game Mode to Resolve the Windows Key Issue
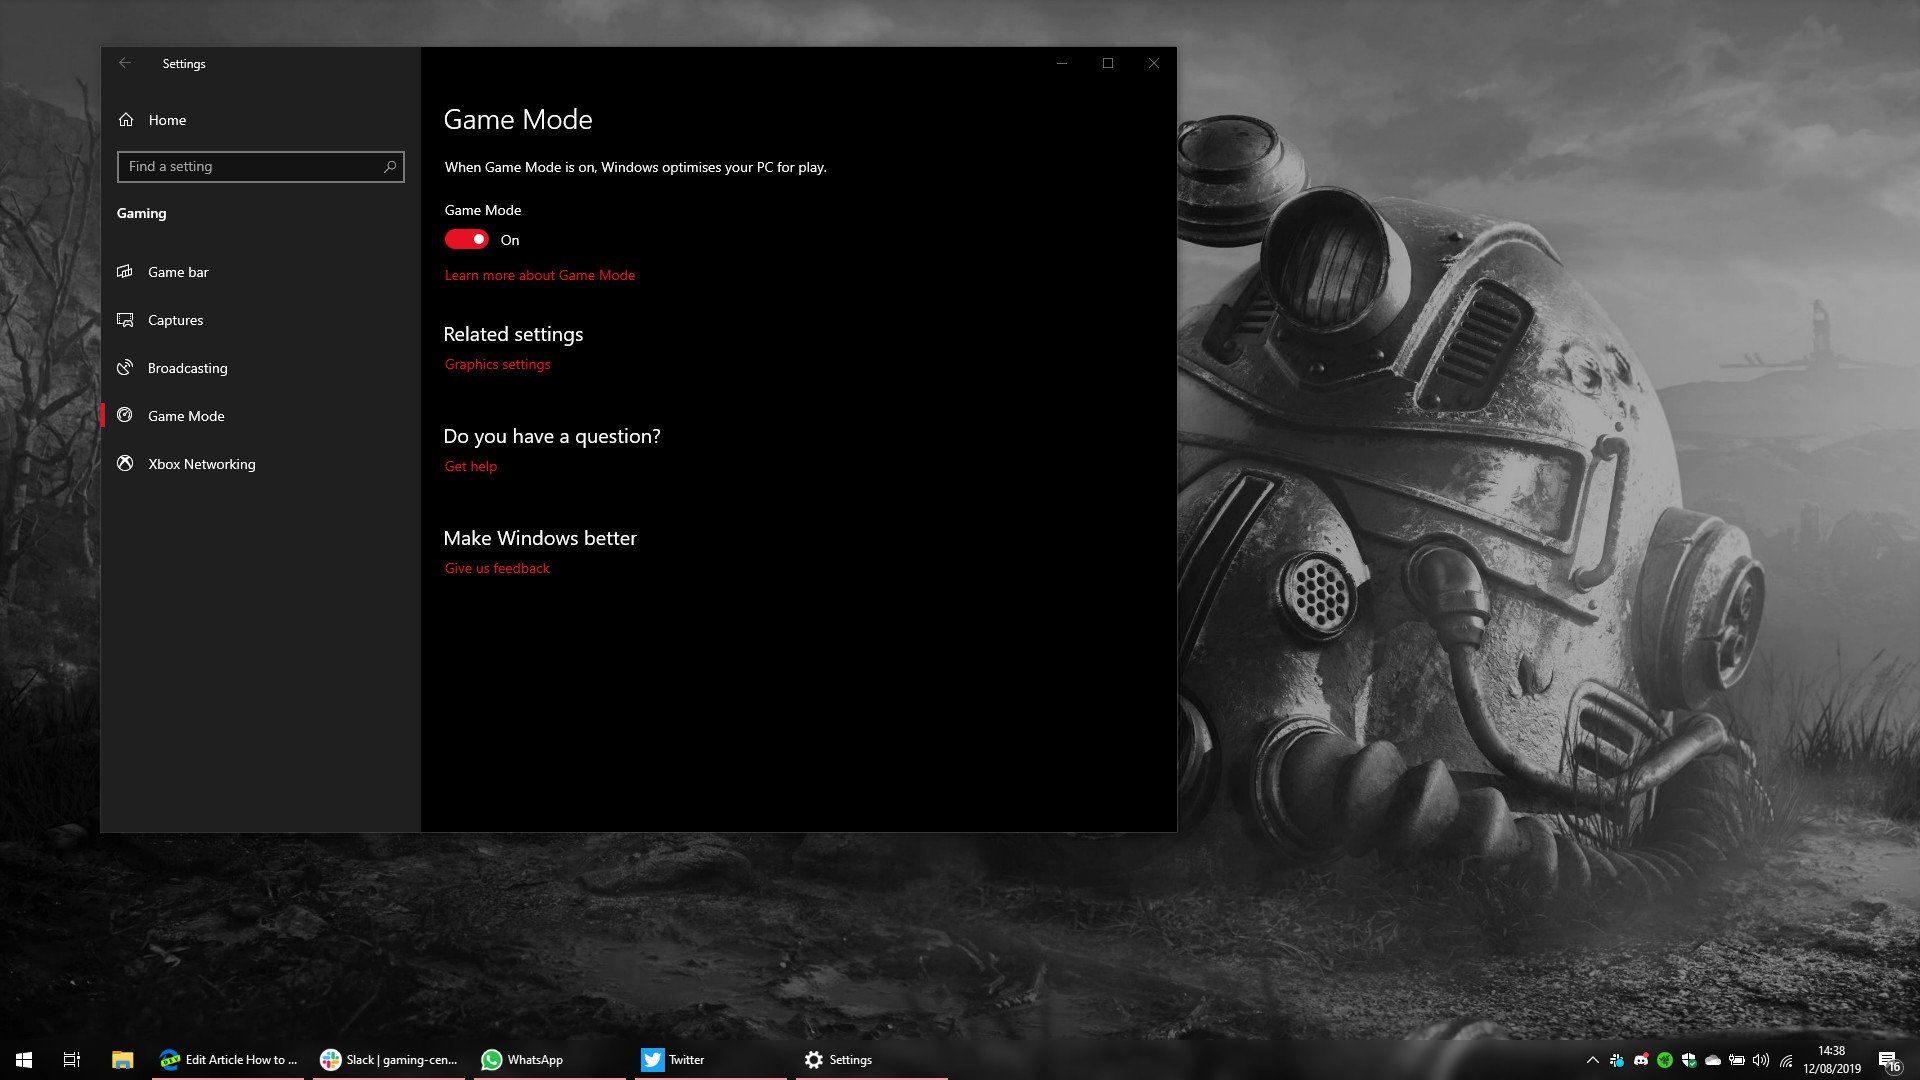
To fix the issue of the Windows key/button not working on Windows 10, one potential solution is to disable Game Mode. Game Mode is a feature that optimizes the system for gaming, but it can sometimes cause conflicts with the Windows key/button. To disable Game Mode, follow these steps:
1. Press the Windows key + I to open the Windows Settings.
2. Select “Gaming” from the options.
3. In the left sidebar, click on “Game Mode.”
4. Toggle off the “Use Game Mode” option.
Disabling Game Mode should resolve the issue with the Windows key/button not working. This simple solution can help improve the user-friendliness of your Windows machine, allowing you to use the Windows key/button for its primary functions without any trouble. Remember, this fix applies to both gaming and non-gaming keyboards.
Creating a New User Account to Fix the Windows Key
To create a new user account and fix the Windows key/button issue on Windows 10, follow these steps:
1. Open the Start menu and go to Settings by clicking on the gear icon.
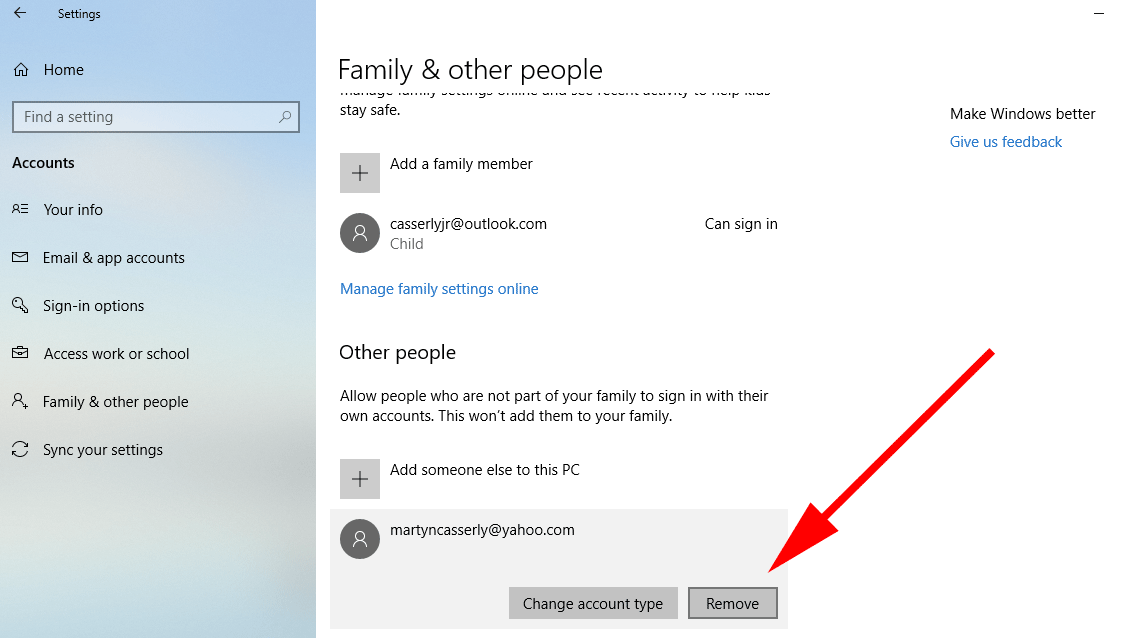
2. In the Settings window, click on “Accounts” and then select “Family & other users” from the left-hand side menu.
3. Under the “Other users” section, click on “Add someone else to this PC” to create a new user account.
4. Follow the on-screen instructions to set up a new user account. Make sure to choose the account type as “Administrator” if you want full access to your system.
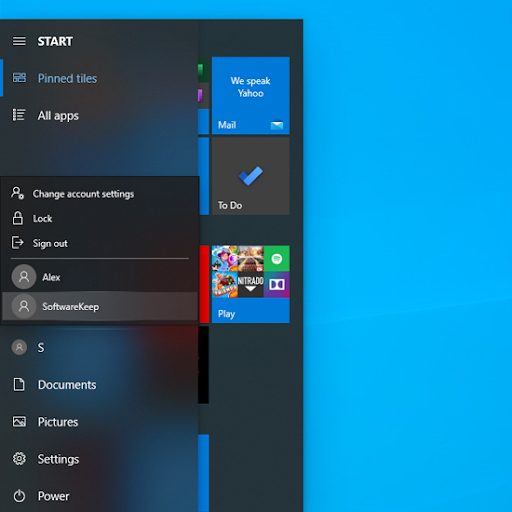
5. Once the new user account is created, sign out of your current account and sign in to the new account.
6. Test if the Windows key/button is working properly in the new user account. If it works, the issue may be specific to your original user account.
7. If the Windows key/button still doesn’t work in the new account, further troubleshooting may be required. Consider checking for any hardware issues with your keyboard or trying other fixes mentioned in the article.
Remember to regularly switch between user accounts by clicking on your profile picture in the bottom left corner of the screen and selecting the desired account. This way, you can ensure a smooth workflow without interrupting your primary user account.
Performing a System File Checker Scan for Windows Key Repair
Performing a System File Checker (SFC) scan can help fix issues with the Windows key/button not working on Windows 10. The SFC scan is a built-in Windows tool that checks for corrupted system files and repairs them if necessary. To perform the scan:
1. Press the Windows key + X on your keyboard to open the Power User menu.
2. Select “Command Prompt (Admin)” to open an elevated command prompt.
3. In the command prompt window, type “sfc /scannow” and press Enter.
4. Wait for the scan to complete. It may take some time.
5. If any corrupted files are found, the SFC scan will automatically repair them.
Once the scan is finished, restart your computer and check if the Windows key/button is working properly. This simple troubleshooting step can often resolve issues related to the Windows key/button not functioning correctly.
Using DISM from the Command Prompt to Fix the Windows Key
To fix the Windows key/button not working on Windows 10, you can use DISM from the Command Prompt. Follow these steps:
1. Open the Command Prompt as an administrator.
2. Type “dism /online /cleanup-image /restorehealth” and press Enter to run the DISM tool. This command will scan and fix any issues with the Windows image.
3. Wait for the process to complete, which may take some time.
4. Once the process is finished, restart your computer.
5. Test if the Windows key/button is now working properly.
By using DISM from the Command Prompt, you can troubleshoot and fix any underlying issues that may be causing the Windows key/button to malfunction. Remember to run the Command Prompt as an administrator for the best results.
If you continue to experience trouble with the Windows key/button, there may be a hardware issue with your keyboard. Consider checking for any physical damage or trying a different keyboard to see if the issue persists.
Checking for Malware to Restore the Windows Key
To check for malware and restore the Windows key/button on Windows 10, follow these steps:
1. Open Windows Security by clicking on the Windows Start button and typing “Windows Security” in the search bar. Press Enter.
2. In Windows Security, click on “Virus & threat protection” in the left-hand menu.
3. Click on “Quick scan” to scan your system for malware. This scan will check the most common places where malware hides.
4. If any malware is detected, follow the recommended actions to remove it from your system.
5. Once the scan is complete and your system is clean, you can restore the functionality of the Windows key/button.
6. Press the left Shift key five times in a row to open the Sticky Keys menu.
7. Click on “Yes” to enable Sticky Keys.
8. Press the Windows key to check if it is working properly now.
This method can help resolve issues with the Windows key/button not working on your Windows 10 machine.
Turning Off Game Mode to Fix the Windows Key
To fix the issue of the Windows key/button not working on Windows 10, one possible solution is to turn off Game Mode. Game Mode is a feature in Windows 10 that optimizes gaming performance by allocating system resources accordingly. However, it can sometimes interfere with the functionality of the Windows key/button.
To turn off Game Mode, follow these steps:
1. Press the Windows key + I to open the Settings app.
2. Click on the Gaming category.
3. In the left sidebar, click on Game Mode.
4. Toggle the Game Mode switch to the off position.
Once Game Mode is disabled, the Windows key/button should start working again. This simple fix can help ensure a seamless workflow on your Windows machine without any disruptions to your keyboard shortcuts or system operations.
Note: If the issue persists, there may be other reasons causing the problem. Consider referring to our comprehensive guide on fixing the Windows key/button not working issue for more options and troubleshooting steps.
Updating Keyboard Drivers to Fix the Windows Key
To fix the Windows key/button not working on Windows 10, you may need to update your keyboard drivers.
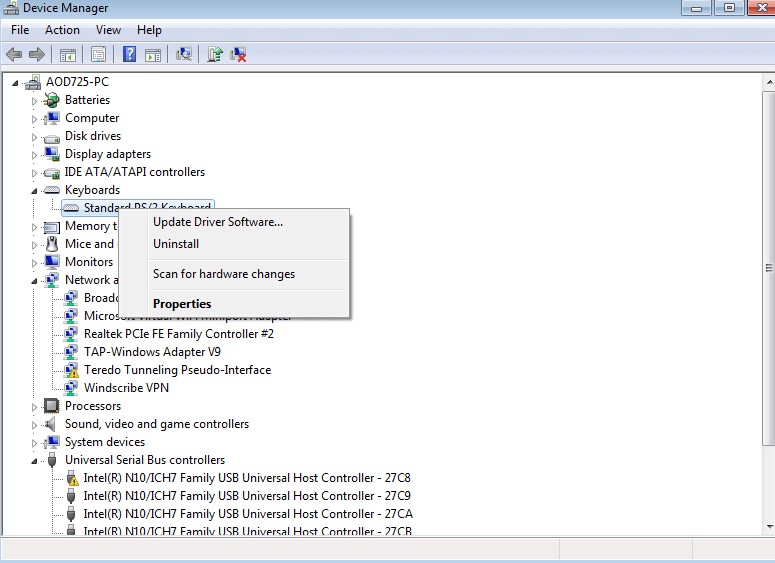
First, open the Device Manager by pressing the Windows key + X and selecting “Device Manager” from the menu.
Next, expand the “Keyboards” section and right-click on your keyboard device.
Choose “Update driver” and select the option to search automatically for updated driver software.
If Windows finds an updated driver, follow the on-screen instructions to install it.
If Windows doesn’t find an updated driver or if the issue persists, you can try downloading the latest driver from the manufacturer’s website.
Make sure to restart your PC after updating the drivers for the changes to take effect.
If the problem still persists, it may be a hardware issue and you may need to consider replacing your keyboard.
Tips for Fixing the Windows Key and Final Thoughts
-
Check for physical damage:
- Inspect the Windows key/button for any physical damage or debris that may be causing it to malfunction.
- Clean the key/button using a soft cloth and a small amount of rubbing alcohol if necessary.

-
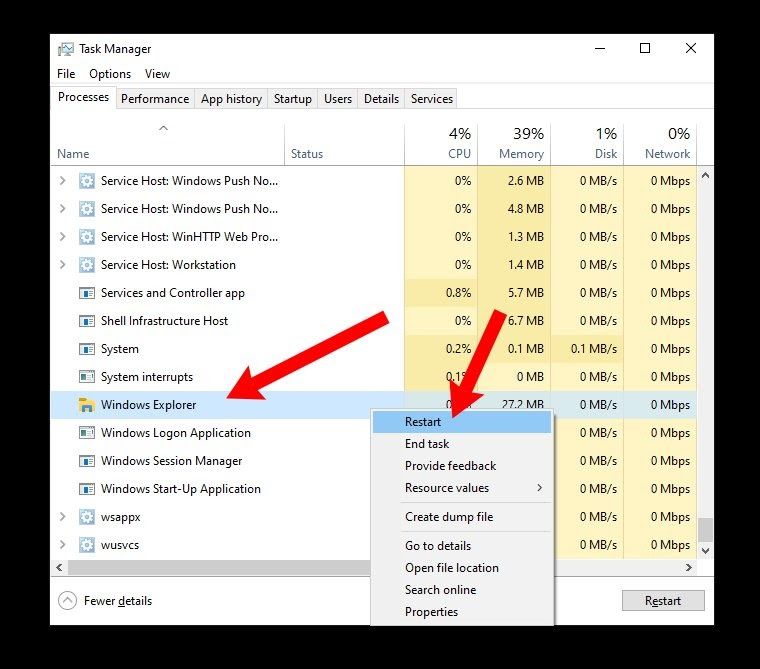
Restart your computer:
- Click on the Start button, then select Restart to reboot your computer.
- After the restart, check if the Windows key/button is functioning properly.
-
Update keyboard drivers:
- Open Device Manager by pressing Windows key + X and selecting Device Manager from the menu.
- Expand the Keyboards category.
- Right-click on your keyboard driver and select Update driver.
- Follow the on-screen instructions to update the driver.
- Restart your computer and check if the Windows key/button is now working.
-
Run the Keyboard Troubleshooter:
- Press Windows key + I to open the Settings app.
- Click on Update & Security.
- Select Troubleshoot from the left panel.
- Scroll down and click on Keyboard under the Find and fix other problems section.
- Click on Run the troubleshooter and follow the prompts to fix any issues.
-
Disable gaming mode or shortcut conflicts:
- If you have gaming software installed, open it and disable any gaming mode that may be affecting the Windows key/button.
- Check for any conflicting keyboard shortcuts assigned to other applications and remove or modify them as necessary.
- Restart your computer and check if the Windows key/button is functioning correctly.
-
Perform a system file check:
- Open Command Prompt as an administrator by pressing Windows key + X and selecting Command Prompt (Admin).
- Type sfc /scannow and press Enter to start the system file check.

- Wait for the scan to complete and follow any instructions provided.
- Restart your computer and check if the Windows key/button is now working.
-
Create a new user account:
- Open Settings by pressing Windows key + I.
- Click on Accounts.
- Select Family & other users from the left panel.
- Click on Add someone else to this PC under Other users.
- Follow the on-screen instructions to create a new user account.
- Login to the new user account and check if the Windows key/button is working.
-
Perform a system restore:
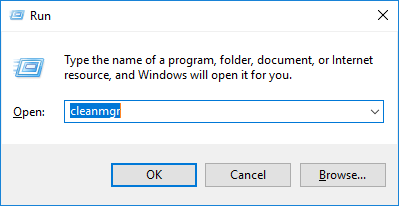
- Press Windows key + R to open the Run dialog box.
- Type rstrui and press Enter to open the System Restore window.
- Follow the on-screen instructions to select a restore point and restore your system to a previous state.
- After the restore process is complete, check if the Windows key/button is functioning properly.

Mark Ginter is a tech blogger with a passion for all things gadgets and gizmos. A self-proclaimed "geek", Mark has been blogging about technology for over 15 years. His blog, techquack.com, covers a wide range of topics including new product releases, industry news, and tips and tricks for getting the most out of your devices. If you're looking for someone who can keep you up-to-date with all the latest tech news and developments, then be sure to follow him over at Microsoft.