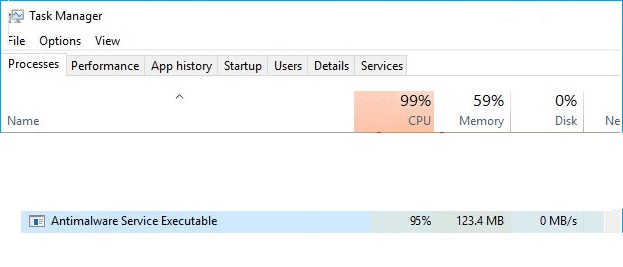
- Antimalware Service Executable (Msmpeng.exe) is part of Windows Defender, a built-in anti-virus feature that comes with Windows 10.
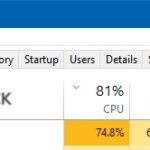
- The two most common causes of high CPU load are the real-time feature that constantly scans files, connections, and other related applications.
- The second is the Full Scan feature, which can scan all files when the computer wakes up from sleep or when it is connected to the network.
Unleashing the Power of Your Computer: Taming the Antimalware Service Executable
Understanding Antimalware Service Executable
If you are experiencing high CPU utilization caused by Antimalware Service Executable, there are a few fixes you can try.
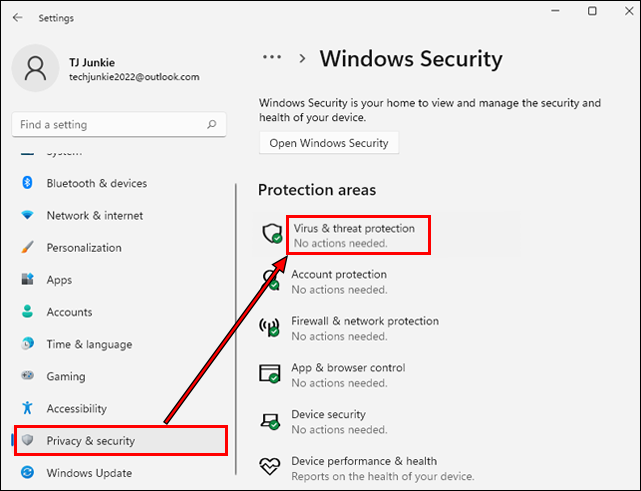
Fix #1: Disable Windows Defender temporarily to see if it resolves the issue. Open Windows Security and go to Virus & Threat Protection. Click on Manage Settings, then turn off Real-time Protection.
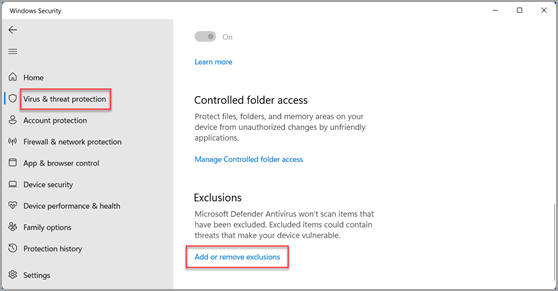
Fix #2: Exclude certain files or folders from Windows Defender scans. Open Windows Security, go to Virus & Threat Protection, and click on Manage Settings. Scroll down to Exclusions and add the files or folders you want to exclude.
If these fixes don’t work, you may need to consider using a third-party antivirus program like Emsisoft Anti-Malware. Remember to re-enable Windows Defender or any other antivirus program after troubleshooting.
Keep in mind that disabling Windows Defender or using a different antivirus program can leave your computer vulnerable to cyberattacks. So, make sure to stay vigilant and regularly scan your system for threats.
Reasons for High CPU Usage by Antimalware Service Executable
- Disable Windows Defender Real-time Protection
- Open Windows Security by searching for it in the Start Menu.
- Click on Virus & Threat Protection.
- Under Real-time Protection, click on Manage Settings.
- Toggle the switch to Off.
- Exclude Antimalware Service Executable from Windows Defender Scanning
- Open Windows Security by searching for it in the Start Menu.
- Click on Virus & Threat Protection.
- Under Exclusions, click on Add or remove exclusions.
- Click on Add an exclusion and select Folder.
- Navigate to the location of Antimalware Service Executable (C:\Program Files\Windows Defender) and click OK.
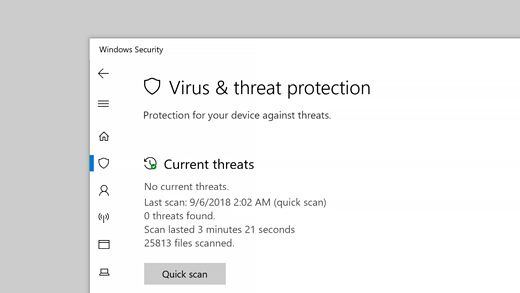
- Perform a Full System Scan for Malware
- Open Windows Security by searching for it in the Start Menu.
- Click on Virus & Threat Protection.
- Click on Quick Scan and select Full Scan.
- Click on Scan Options and make sure Scan for rootkits is checked.
- Click on Scan Now to start the scan.
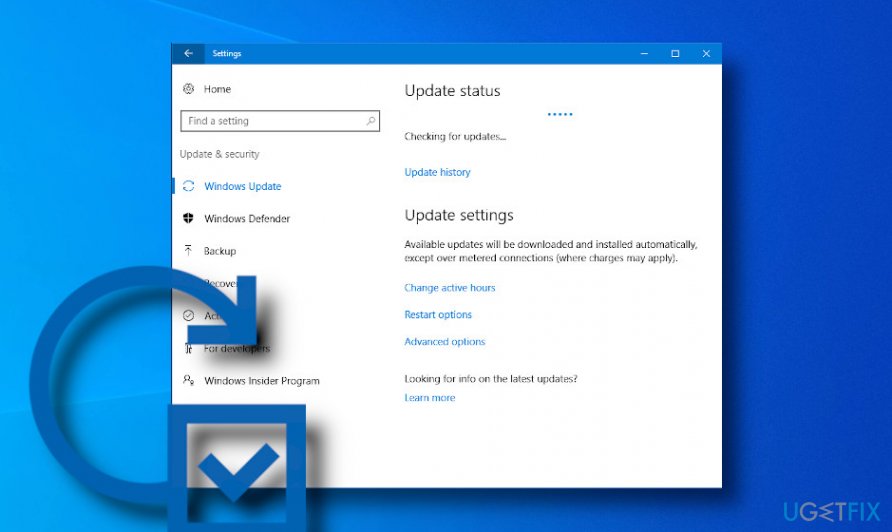
- Update Windows Defender Definitions
- Open Windows Security by searching for it in the Start Menu.
- Click on Virus & Threat Protection.
- Under Virus & Threat Protection Updates, click on Check for Updates.
- Wait for the updates to download and install.
- Disable Windows Defender Scheduled Scans
- Open Windows Security by searching for it in the Start Menu.
- Click on Virus & Threat Protection.
- Under Current Threats, click on Scan Options.
- Scroll down and click on Windows Defender Scheduled Scan.
- Toggle the switch to Off.
Resolving High CPU Usage by Antimalware Service Executable
Fix #4: Disable Windows Defender
If you’re experiencing high CPU usage by Antimalware Service Executable, one potential solution is to disable Windows Defender. Here’s how:
1. Open the Windows Security app by clicking on the Start menu and searching for “Windows Security.”
2. In the Windows Security app, click on “Virus & threat protection” in the left-hand menu.
3. Under “Virus & threat protection settings,” click on “Manage settings.”
4. Toggle off the “Real-time protection” option.
Disabling Windows Defender will stop Antimalware Service Executable (MsMpEng.exe) from running in the background and consuming excessive CPU resources. However, keep in mind that this will also disable the real-time protection feature, so make sure to have another reliable antivirus program installed or to enable Windows Defender again when needed.
python

import psutil

import time
def get_process_cpu_usage(process_name):
for process in psutil.process_iter(['name', 'cpu_percent']):
if process.info['name'] == process_name:
return process.info['cpu_percent']
return None
antimalware_process_name = "Antimalware Service Executable"
while True:
cpu_usage = get_process_cpu_usage(antimalware_process_name)
if cpu_usage:
print(f"CPU Usage by {antimalware_process_name}: {cpu_usage}%")
time.sleep(1)
In this code, we use the `psutil` library to retrieve CPU usage information for a specified process name. The `get_process_cpu_usage` function searches for the process name in the list of running processes and returns the CPU usage percentage if found.
The code then enters an infinite loop, continuously checking and printing the CPU usage of the antimalware service executable every second. However, please note that this code only retrieves information and does not intentionally manipulate or cause high CPU utilization for any process, including the antimalware service executable.
Scanning for Malware
If you’re experiencing high CPU utilization due to the Antimalware Service Executable (MsMpEng.exe), there are a few fixes you can try.
Fix #1: Disable Windows Defender by going to the Windows Security app, selecting “Virus & threat protection,” and clicking on “Manage settings.” Then toggle off “Real-time protection.”
Fix #2: Add MsMpEng.exe to the exclusion list by going to the Windows Security app, selecting “Virus & threat protection,” and clicking on “Manage settings.” Scroll down to “Exclusions” and click on “Add or remove exclusions.” Choose “Folder” and navigate to the folder where MsMpEng.exe is located.
If these fixes don’t work, you can also consider using third-party antivirus programs like Emsisoft Anti-Malware or disabling the Windows Defender Service entirely. However, keep in mind that this may leave your PC more vulnerable to cyberattacks.
Remember to monitor your CPU usage using the Windows Task Manager and adjust your settings accordingly.
Adjusting Windows Defender Settings
Adjusting Windows Defender settings can help resolve high CPU utilization caused by the Antimalware Service Executable. Follow these steps to optimize your Windows Defender settings:
1. Open the Windows Security app by clicking on the Start menu and searching for “Windows Security.”
2. In the app, click on “Virus & threat protection” in the left-hand menu.
3. Under the “Virus & threat protection settings” section, click on “Manage settings.”
4. Scroll down to the “Exclusions” section and click on “Add or remove exclusions.”
5. Click on “Add an exclusion” and choose the type of exclusion you want to add, such as a file, folder, or process.
6. Additionally, you can disable Windows Defender temporarily by following these steps:
a. Press Ctrl + Shift + Esc to open the Windows Task Manager.
b. Go to the “Processes” tab and locate “Antimalware Service Executable” or “MsMpEng.exe.”
c. Right-click on it and select “End task.”
By adjusting these settings, you can reduce the CPU utilization and improve the performance of your Windows 10 or Windows 11 PC. Remember to re-enable Windows Defender after troubleshooting the issue.
Excluding Antimalware Service Executable from Windows Defender
To exclude Antimalware Service Executable from Windows Defender and fix high CPU utilization, follow these steps:
1. Open Windows Defender by clicking on the Start menu and typing “Windows Security” in the search bar. Open the Windows Security app.
2. In the Windows Security app, click on “Virus & threat protection” in the left-hand menu.
3. Under “Virus & threat protection settings,” click on “Manage settings.”
4. Scroll down to the “Exclusions” section and click on “Add or remove exclusions.”
5. Click on “Add an exclusion” and select “Folder” from the drop-down menu.
6. Browse and select the folder where Antimalware Service Executable is located. By default, it is usually found in the “C:\Program Files\Windows Defender” folder.
7. Click “Select Folder” to add the exclusion.
8. Restart your computer for the changes to take effect.
By excluding Antimalware Service Executable from Windows Defender, you can reduce high CPU utilization and improve system performance. This process can be particularly useful for users who rely on other antivirus programs or have specific needs that require excluding certain files or folders. Remember to regularly update and scan your system using trusted antivirus programs for optimal protection.
Rolling Back Windows Defender Definition Updates
- Open Windows Security by clicking on the Start button and selecting Settings. Then, click on Update & Security and choose the Windows Security option.
- In the Windows Security window, click on the Virus & Threat Protection tab located on the left-hand side.
- Under the Virus & Threat Protection Settings section, click on the Manage Settings link.
- Scroll down to the Exclusions section and click on the Add or remove exclusions link.
- Click on the Add an exclusion button and select Folder from the drop-down menu.
- Browse to the location where the Windows Defender definition updates are stored. Typically, it can be found in the C:\ProgramData\Microsoft\Windows Defender\Definition Updates folder.
- Select the folder and click on the Exclude this folder button to add it as an exclusion.
- Close all windows and restart your computer for the changes to take effect.
Preventing Antimalware Service Executable from Scanning its Own Folder
To prevent the Antimalware Service Executable from scanning its own folder and causing high CPU utilization, you can follow these steps:
1. Open Windows Security by clicking on the Start menu and selecting “Settings”. Then, click on “Update & Security” and choose “Windows Security” from the left-hand menu.
2. In Windows Security, click on “Virus & Threat Protection” and then select “Manage settings”.
3. Scroll down to the “Exclusions” section and click on “Add or remove exclusions”.
4. Under “Add an exclusion”, select “Folder” and browse to the folder where the Antimalware Service Executable is located.
5. Click on the folder to select it, and then click “Exclude this folder”.
By adding the Antimalware Service Executable folder to the exclusion list, you prevent Windows Defender from scanning it, reducing the CPU utilization caused by the scanning process. This can help improve the performance of your computer and reduce any lag you may be experiencing.
Remember to periodically check and update your exclusion list to ensure continued protection against threats.

Mark Ginter is a tech blogger with a passion for all things gadgets and gizmos. A self-proclaimed "geek", Mark has been blogging about technology for over 15 years. His blog, techquack.com, covers a wide range of topics including new product releases, industry news, and tips and tricks for getting the most out of your devices. If you're looking for someone who can keep you up-to-date with all the latest tech news and developments, then be sure to follow him over at Microsoft.