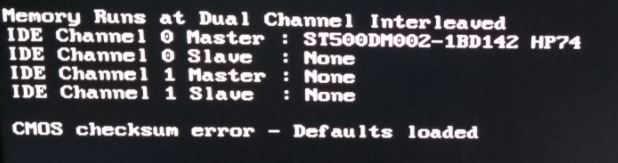
- The CMOS checksum error is essentially a conflict between the CMOS and the BIOS that occurs when the PC starts up.
- When the computer shuts down, the PC writes a number that should match the number that the PC generates when the computer reboots.
- This is an error detection mechanism called a “checksum,” also known as a redundancy check to detect errors in the data.
- If your computer’s battery is physically damaged, this can lead to this CMOS error.
Unveiling the Key Solution to Windows CMOS Checksum Error
Causes and Fixes for CMOS Checksum Errors
1. CMOS Checksum Error: This error occurs when the CMOS memory value doesn’t match the expected value. It can be caused by a weak CMOS battery, power surges, or BIOS updates.
2. Fixing CMOS Checksum Error:
– Reset CMOS: Power off your computer, unplug it from the power outlet, and remove the CMOS battery for a few minutes. Then, reinsert the battery and power on your computer.
– Replace CMOS Battery: If the error persists, replace the CMOS battery with a new one.
– Check Hardware Connections: Make sure all hardware components are properly connected to the motherboard.
– Update BIOS: If the issue remains unresolved, consider updating the BIOS to the latest version provided by the manufacturer.
Remember, CMOS Checksum Errors can vary depending on the specific computer and its components. If these steps don’t resolve your issue, it’s recommended to seek professional assistance or consult the manufacturer for further guidance.
Troubleshooting CMOS Checksum Error in Windows
If you’re encountering a CMOS Checksum Error in Windows, don’t worry. We’re here to help you fix it quickly and easily.
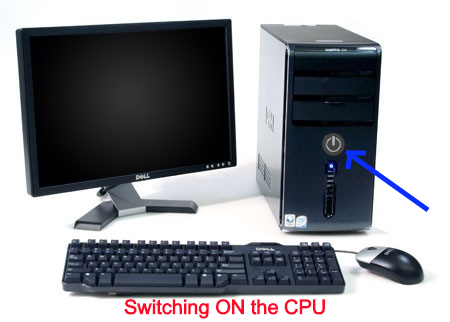
Step 1: Start by shutting down your PC completely and unplugging it from the power outlet. This ensures a clean restart.
Step 2: Open up your PC case and locate the CMOS battery on the motherboard. It looks like a small watch battery. Remove it carefully and wait for a few minutes.
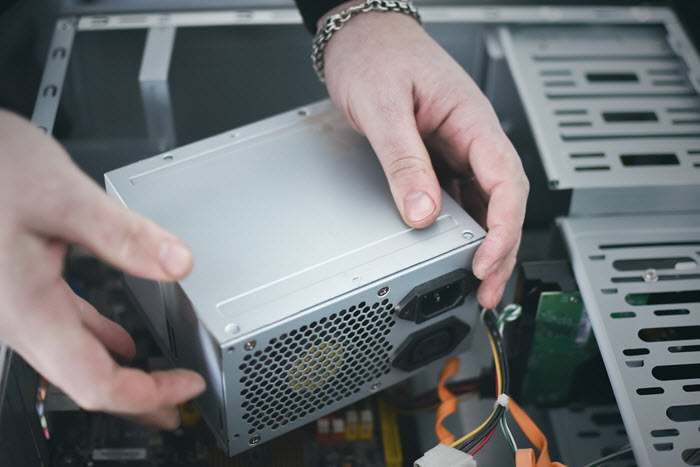
Step 3: While you’re waiting, check for any loose connections or damaged cables inside your PC. Make sure everything is properly connected.
Step 4: Once the waiting time is over, reinsert the CMOS battery back into its slot. Make sure it’s seated securely.
Step 5: Close your PC case and plug it back into the power outlet.
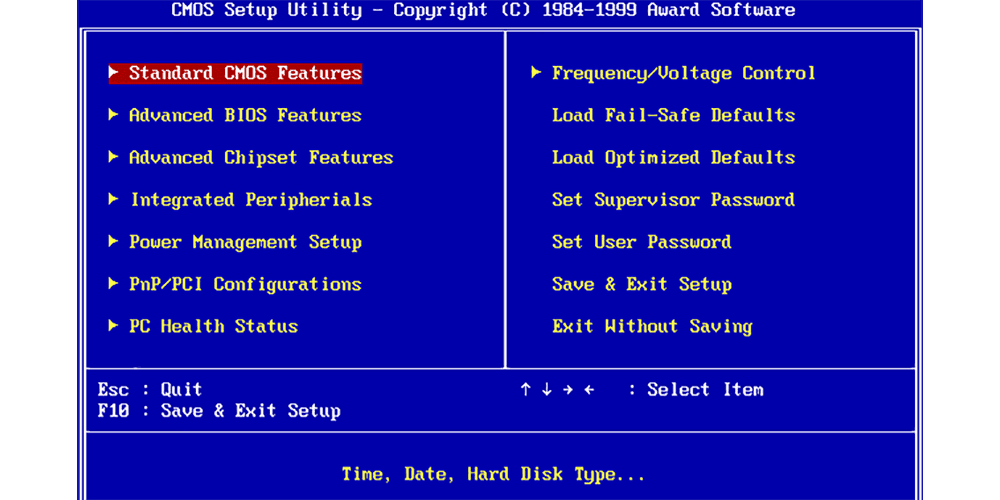
Step 6: Power on your PC and enter the BIOS setup by pressing the appropriate key during startup (usually displayed on the screen).
Step 7: In the BIOS setup, navigate to the “Load Defaults” or “Load Optimal Defaults” option and select it to load the default settings.
Step 8: Save the changes and exit the BIOS setup.
Your CMOS Checksum Error should now be resolved, and your PC should start up without any issues. If you’re still experiencing problems, it might be worth considering updating your BIOS or seeking professional help.
Steps to Resolve CMOS Checksum Bad Error
- Reset the CMOS
- Power off the computer.

- Open the computer’s case.
- Locate the CMOS battery on the motherboard.
- Remove the CMOS battery carefully.
- Wait for a few minutes.
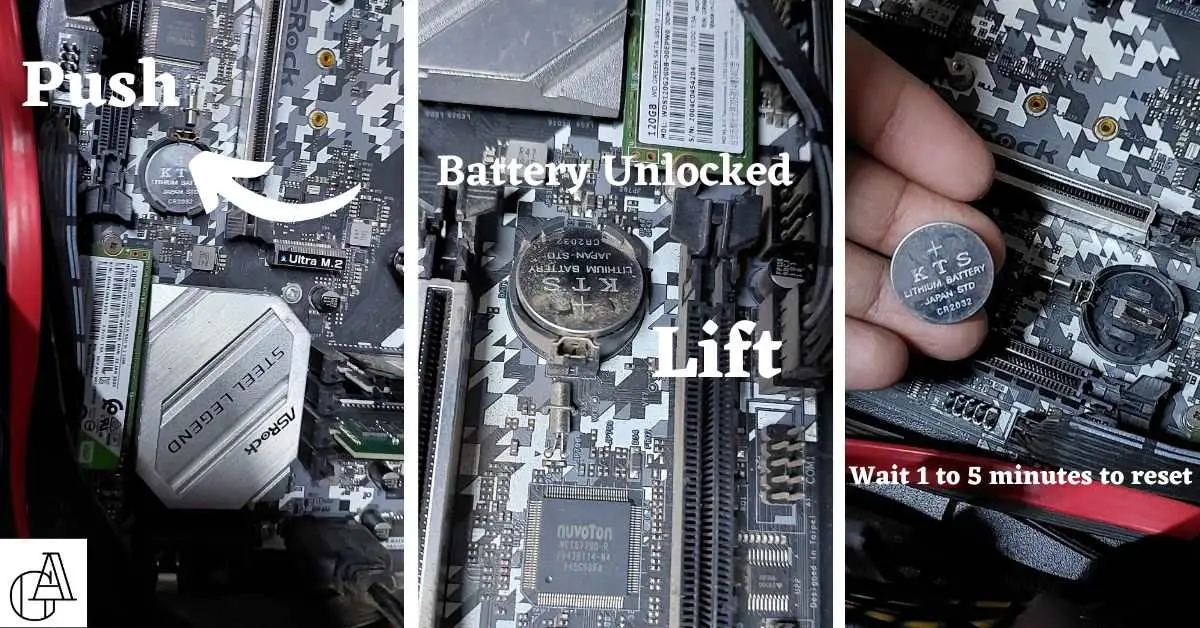
- Insert the CMOS battery back into its slot.
- Close the computer’s case.
- Power on the computer.
- Update BIOS
- Identify the motherboard manufacturer and model.
- Visit the manufacturer’s website.
- Download the latest BIOS update for your specific motherboard model.
- Create a bootable USB drive or CD with the BIOS update.
- Restart the computer and boot from the USB drive or CD.
- Follow the on-screen instructions to update the BIOS.
- After the BIOS update is complete, restart the computer.
- Replace CMOS Battery
- Power off the computer.
- Open the computer’s case.
- Locate the CMOS battery on the motherboard.
- Remove the CMOS battery carefully.
- Take note of the battery type and voltage.
- Obtain a new CMOS battery with the same specifications.
- Insert the new CMOS battery into its slot.
- Close the computer’s case.
- Power on the computer.
- Check and Reset Hardware
- Power off the computer.
- Open the computer’s case.
- Check all connections between hardware components and the motherboard.
- Ensure all components are securely seated.
- Remove any unnecessary components.
- Power on the computer and check if the error still occurs.
- If the error persists, try replacing hardware components one by one.
csharp

using System;

using System.Diagnostics;
class Program
{
static void Main()
{
try
{
EventLog systemEventLog = new EventLog("System");
foreach (EventLogEntry entry in systemEventLog.Entries)
{
if (entry.Source.Equals("EventLog") && entry.Message.Contains("CMOS checksum error"))
{
Console.WriteLine("CMOS Checksum Error Event:");
Console.WriteLine("Event ID: " + entry.InstanceId);
Console.WriteLine("Message: " + entry.Message);
Console.WriteLine("Time Generated: " + entry.TimeGenerated);
Console.WriteLine("-------------------------------------");
}
}
}
catch (Exception ex)
{
Console.WriteLine("Error: " + ex.Message);
}
}
}
The above code retrieves entries from the Windows system event log (specifically the “System” log) and searches for events related to “CMOS checksum error” by checking the event source and message content. It then prints relevant details such as the event ID, message, and time generated. Keep in mind that this approach relies on events being logged, and it does not directly modify CMOS settings.
Solutions for CMOS Checksum Error on Windows 10
Solution for CMOS Checksum Error on Windows 10:
If you’re encountering a CMOS Checksum Error on Windows 10, follow these steps to resolve the issue:
1. Reset CMOS settings: Power off your computer and unplug it from the power source. Locate the CMOS battery on your motherboard and remove it for a few minutes. Reinsert the battery and restart your computer.
2. Update BIOS: Visit your PC manufacturer’s website and download the latest BIOS update for your specific model. Follow the manufacturer’s instructions to install the update.
3. Replace CMOS battery: If resetting CMOS settings didn’t work, it might be necessary to replace the CMOS battery. Contact your PC manufacturer or a professional technician for assistance.
Remember to save any important files before attempting these solutions. If the issue persists, it’s recommended to seek further support from your PC manufacturer or a professional technician.
Remember, always exercise caution when working with hardware components to avoid any damage.

Mark Ginter is a tech blogger with a passion for all things gadgets and gizmos. A self-proclaimed "geek", Mark has been blogging about technology for over 15 years. His blog, techquack.com, covers a wide range of topics including new product releases, industry news, and tips and tricks for getting the most out of your devices. If you're looking for someone who can keep you up-to-date with all the latest tech news and developments, then be sure to follow him over at Microsoft.