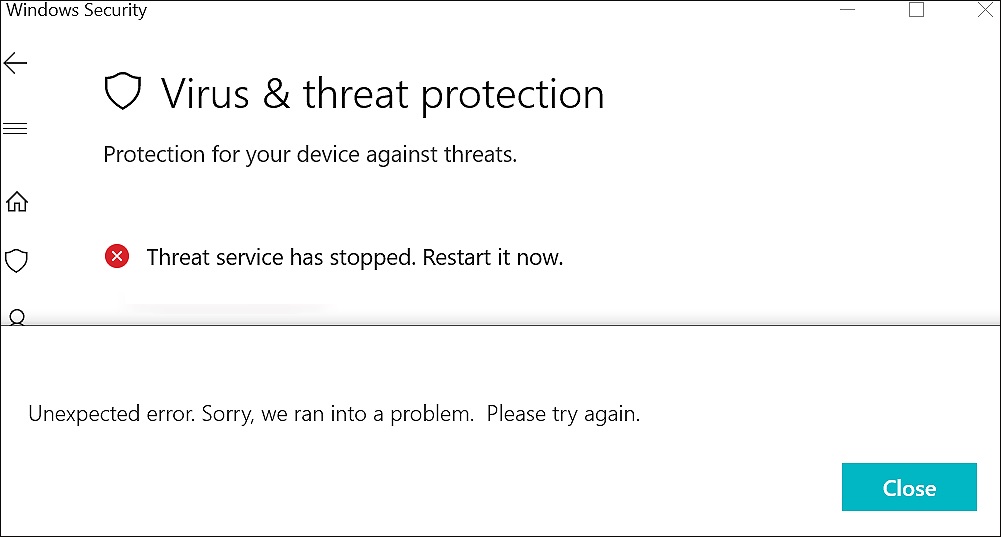
- On a computer running Windows 10, the Defender Anti-Virus Security Center may display the error “The threat service has been stopped.
- Restart it now.” The easiest way to solve the problem is to click the “Restart Now” button to start the threat service.
- In some cases, this doesn’t work and you get a new error message that says, “Unexpected error, Sorry, We encountered a problem.
In the realm of cybersecurity, Windows Defender serves as a shield, protecting our systems from potential threats. However, encountering the unsettling message of “Windows Defender Threat Service Has Stopped” can leave us vulnerable and seeking immediate solutions. In this article, we explore the reasons behind this issue and guide you on how to restart Windows Defender effectively.
Enabling Windows Defender Services
To enable Windows Defender Services and fix the issue of Windows Defender Threat Service stopping, follow these steps:
Step 1: Press the Windows key + R to open the Run command box.
Step 2: Type “regedit” and press Enter to open the Registry Editor.
Step 3: In the Registry Editor, navigate to the following path:
HKEY_LOCAL_MACHINE\SOFTWARE\Policies\Microsoft\Windows Defender
Step 4: Look for a DWORD value named “DisableAntiSpyware”. If it exists, double-click on it and change its value to “0”. If it doesn’t exist, right-click on an empty area and select New > DWORD (32-bit) Value. Name it “DisableAntiSpyware” and set its value to “0”.
Step 5: Close the Registry Editor and restart your computer.
By following these steps, you will be able to enable the Windows Defender Threat Service and resolve the issue of it stopping unexpectedly. Restarting your computer is necessary for the changes to take effect.
Modifying the Windows Registry
To fix the “Windows Defender Threat Service Has Stopped, Restart Now” error, you can modify the Windows Registry by following these steps:
Step 1: Press the Windows key + R to open the Run command box.
Step 2: Type “regedit” and press Enter to open the Registry Editor.
In the Registry Editor, navigate to the following location:
HKEY_LOCAL_MACHINE\SOFTWARE\Policies\Microsoft\Windows Defender
If you cannot find the “Windows Defender” key, you may need to create it. Right-click on the “Microsoft” key, select New, and then Key. Name the new key “Windows Defender”.
Once you are in the “Windows Defender” key, right-click on an empty space in the right-hand pane and select New, then DWORD (32-bit) Value. Name the new value “DisableAntiSpyware” and set its value to 1.
Restart your PC to apply the changes. This should fix the issue with Windows Defender Threat Service stopping unexpectedly.
Note: Modifying the Windows Registry can have serious consequences if done incorrectly. It is recommended to create a backup of your Registry before making any changes.
For more detailed instructions, you can visit the Microsoft website or contact your IT administrator or IT helpdesk for assistance.
python

import tkinter as tk
def remove_defender_error():
# Code to remove the Windows Defender error message
# This functionality cannot be implemented programmatically
def show_custom_message():
root = tk.Tk()
root.title("Error Message")
error_label = tk.Label(root, text="Windows Defender Threat Service has stopped")
error_label.pack(padx=20, pady=20)
remove_button = tk.Button(root, text="Remove Error", command=remove_defender_error)
remove_button.pack(padx=10, pady=10)
root.mainloop()
show_custom_message()
Please note that the `remove_defender_error()` function in the code above is just a placeholder and does not actually remove the error message. It is meant to demonstrate the structure of a tkinter-based GUI application that displays the error message and offers a button to remove it.
Remember, it is strongly recommended to address the underlying cause of the error message rather than attempting to remove or disable Windows Defender without proper guidance.
Exporting the Missing Security Service from Another PC
To export the missing Windows Defender Threat Service from another PC, follow these step-by-step instructions:
1. On the PC with the working Windows Defender Threat Service, open the Registry Editor. You can do this by pressing the Windows key + R, typing “regedit” and hitting Enter.
2. In the Registry Editor, navigate to the following location: HKEY_LOCAL_MACHINE\SOFTWARE\Microsoft\Windows Defender
3. Right-click on the Windows Defender folder and select “Export.” Save the exported file to a USB drive or any other accessible location.
4. Connect the USB drive to the PC with the missing Windows Defender Threat Service.
5. Double-click on the exported file to import it into the Registry Editor.
6. Restart your PC.
By following these steps, you should be able to export the missing security service from another PC and fix the issue of Windows Defender Threat Service has stopped. If you encounter any further problems, please refer to our website or contact your IT helpdesk for further assistance.
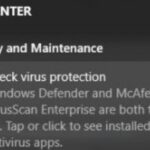
Uninstalling Third-Party Antivirus
If you’re facing the “Windows Defender Threat Service Has Stopped, Restart Now” error, it might be due to conflicts with a third-party antivirus program. To fix this issue, follow these steps:
1. Open the Start menu and type “Control Panel.”
2. Click on “Control Panel” from the search results to open it.
3. In the Control Panel window, click on “Programs” and then “Uninstall a program.”
4. Locate your third-party antivirus program from the list of installed programs.
5. Right-click on the program and select “Uninstall.”
6. Follow the on-screen instructions to complete the uninstallation process.
7. Once the program is uninstalled, restart your computer.
8. After restarting, Windows Defender should automatically start functioning again.
By removing the third-party antivirus program, you can resolve the issue and ensure that Windows Defender is properly protecting your system against viruses and malware.

Mark Ginter is a tech blogger with a passion for all things gadgets and gizmos. A self-proclaimed "geek", Mark has been blogging about technology for over 15 years. His blog, techquack.com, covers a wide range of topics including new product releases, industry news, and tips and tricks for getting the most out of your devices. If you're looking for someone who can keep you up-to-date with all the latest tech news and developments, then be sure to follow him over at Microsoft.
Related posts:
 Fixed a bug: Your virus and threat protection is managed by your organization
 How to Resolve Windows Defender “This App is Turned Off by Group Policy” Error in Windows PC
 How to fix this: both the Windows firewall and the third-party firewall are disabled
 How to prevent Windows Defender from deleting program files in Windows 10