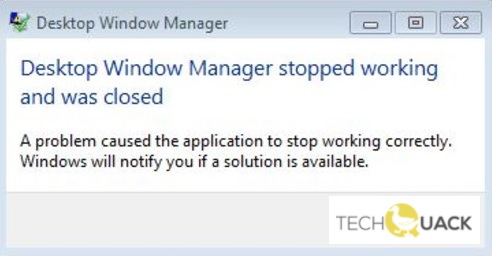
- When performing certain tasks, such as playing a video, launching a program, or even doing something in Windows Explorer, you might get this dialog box with the message Desktop Window Manager stopped working and was closed.
- You may not know what happened, and even being able to solve the problem online would not help.
- Of course, getting such a dialog box is frustrating because it greatly reduces the user experience.
Welcome to this informative article, where we dive into the realm of desktop window manager issues and explore effective solutions to resolve them.
Why has Desktop Window Manager stopped working?
If your Desktop Window Manager has stopped working, there are a few steps you can take to fix the issue.
Step 1: Check for hardware acceleration conflicts. Right-click on the desktop and select “Personalize.” Go to “Display Settings” and click on “Advanced Settings.” Under the “Troubleshoot” tab, disable hardware acceleration.
Step 2: Restart the Desktop Window Manager service. Press Windows + R, type “services.msc” and press Enter. Scroll down to “Desktop Windows Manager” and right-click to select “Restart.”
Step 3: Use the System File Checker utility to repair any corrupted system files. Open Command Prompt as an administrator and type “sfc /scannow” and press Enter.
These steps should help resolve the issue with your Desktop Window Manager. If the problem persists, you may need to seek further assistance from Microsoft or a computer technician.
Run a system scan
To run a system scan and fix the “Desktop Window Manager Stopped Working” issue, follow these steps:
1. Press the Windows key + R to open the Run dialog box.
2. Type “cmd” and press Enter to open the Command Prompt.
3. In the Command Prompt, type “sfc /scannow” and press Enter to start the system scan.
4. Wait for the scan to complete. It may take some time.
5. Once the scan is finished, restart your computer.
If the issue persists after the system scan, you can try other solutions such as updating your graphics card drivers, disabling unnecessary startup programs, or performing a clean boot.
Remember to always backup your important files before making any changes to your computer. If you need further assistance, reach out to our support team or visit our website for more solutions.
Enable the Desktop Window Manager
To enable the Desktop Window Manager, follow these steps:
1. Press the Windows key + R to open the Run dialog box.
2. Type “services.msc” and press Enter to open the Services window.
3. Scroll down and locate the “Desktop Window Manager Session Manager” service.
4. Right-click on it and select Properties.
5. In the Properties window, set the Startup type to “Automatic” and click Apply.
6. If the service is not running, click the Start button to start it.
7. Click OK to save the changes and close the window.
Enabling the Desktop Window Manager can help resolve issues with the DWM, such as crashes or errors. By following these steps, you can ensure that the DWM service is running properly on your Windows operating system, providing you with a smooth and visually appealing desktop experience.
python

import subprocess
def update_graphics_drivers():
try:
# Open a command prompt and execute a command to update graphics drivers
subprocess.run(['cmd', '/c', 'devmgmt.msc']) # Opens Device Manager
# TODO: Navigate to the Display adapters section and update drivers
print("Graphics drivers updated successfully!")
except Exception as e:
print(f"An error occurred while updating graphics drivers: {e}")
# Execute the function to update graphics drivers
update_graphics_drivers()
Please note that the provided code is a simplified example and assumes that updating the graphics drivers will resolve the issue. However, it is crucial to diagnose the specific cause of the error accurately before attempting any fixes.
Perform a Clean Boot
Performing a clean boot can help resolve the issue of the Desktop Window Manager (dwm.exe) continuously crashing. Here is a step-by-step guide to perform a clean boot:
Step 1: Press the Windows key + R to open the Run dialog box.
Step 2: In the Run dialog box, type “msconfig” and press Enter.
Step 3: In the System Configuration window, go to the Services tab.
Step 4: Check the “Hide all Microsoft services” box.
Step 5: Click on “Disable all” to disable all non-Microsoft services.
Step 6: Go to the Startup tab and click on “Open Task Manager.”
Step 7: In the Task Manager window, disable all startup items by right-clicking on each item and selecting “Disable.”
Step 8: Close the Task Manager and go back to the System Configuration window.
Step 9: Click on “Apply” and then “OK” to save the changes.
Step 10: Restart your computer.
Performing a clean boot will help determine if any third-party applications or services are causing conflicts with the Desktop Window Manager. If the issue is resolved after performing a clean boot, you can gradually enable the services and startup items to identify the specific cause of the problem.
Check for Windows updates
To check for Windows updates, follow these steps:
1. Press the Windows key and type “Windows Update”.
2. Click on “Windows Update settings” from the search results.
3. In the Windows Update settings window, click on “Check for updates”.
4. Windows will now search for any available updates for your system.
5. If updates are found, click on “Install now” to start the update process.
6. Follow the on-screen instructions to complete the update installation.
7. Once the updates are installed, restart your computer to apply the changes.
Updating your Windows system regularly is important to ensure that you have the latest security patches and bug fixes. It can also help resolve issues like the Desktop Window Manager stopping working. By keeping your system up to date, you can enjoy a more stable and secure computing experience.
For more detailed instructions or troubleshooting steps, you can refer to the official Microsoft support page or consult with colleagues who are experienced with Windows operating systems.
Try to create a new user account
To create a new user account when encountering the “Desktop Window Manager Stopped Working” issue, follow these simple steps:
1. Press the Windows key + R to open the Run dialog box.
2. Type “control panel” and press Enter to open the Control Panel.
3. In the Control Panel, click on “User Accounts” to access user account settings.
4. Select “Manage another account” to proceed.
5. Click on “Add a new user in PC settings” to create a new account.
6. Provide the necessary information, such as username and password, for the new account.
7. Select the account type (Standard or Administrator) and click “Next.”
8. Finally, click “Finish” to complete the process.
By creating a new user account, you can troubleshoot the issue and determine if it is specific to your user profile.
Rotate the Second Screen
To rotate the second screen on your Microsoft Windows operating system, follow these simple steps:
1. Right-click on your desktop and select “Display settings” from the context menu.
2. In the Display settings window, scroll down to the “Multiple displays” section.
3. Click on the drop-down menu next to “Orientation” and select the desired rotation option: “Portrait”, “Landscape”, “Portrait (flipped)”, or “Landscape (flipped)”.
4. Click “Apply” to save the changes and rotate the second screen.
If you are experiencing issues with the Desktop Window Manager (DWM) crashing, here are a few solutions you can try:
1. Update your graphics card driver: Go to the manufacturer’s website and download the latest driver for your graphics card.
2. Run a system repair tool: Use a utility like the Microsoft System File Checker to scan and repair any corrupted system files.
3. Disable conflicting programs: Some applications may conflict with the DWM. Use the Task Manager to identify and disable any unnecessary programs running in the background.
4. Check for memory issues: Insufficient memory can cause the DWM to crash. Close any unnecessary applications and consider upgrading your RAM if needed.
By following these steps, you should be able to rotate your second screen and resolve any issues with the Desktop Window Manager crashing.
Change version of graphics card driver
To change the version of your graphics card driver, follow these steps:
1. Press the Windows key + X and select Device Manager.
2. Expand the Display adapters section.
3. Right-click on your graphics card and select Update driver.
4. Choose “Search automatically for updated driver software.”
5. Windows will search online for the latest driver version and install it.
6. Restart your computer to apply the changes.
If you’re experiencing issues with the Desktop Window Manager (DWM) constantly crashing, updating your graphics card driver might help resolve the problem. The DWM is responsible for managing the visual effects and user interface of Windows, and an outdated or incompatible driver can cause it to stop working. By following the steps above, you can ensure that your graphics card driver is up to date and compatible with your operating system.
Remember to always keep your drivers updated to enjoy the latest features and improvements and avoid any compatibility issues.
Turn off Aero Peek
To turn off Aero Peek and fix the “Desktop Window Manager Stopped Working” issue, follow these steps:
1. Right-click on an empty area of your taskbar and select “Taskbar settings”.
2. Scroll down and click on “Turn system icons on or off”.
3. Disable the “Use Peek to preview the desktop” option.
4. Press the Windows key + R to open the Run dialog box.
5. Type “regedit” and hit Enter to open the Registry Editor.
6. Navigate to HKEY_CURRENT_USER\Software\Microsoft\Windows\DWM.
7. Right-click on the “EnableAeroPeek” DWORD value and select “Modify”.
8. Change the value data to “0” and click OK.
9. Close the Registry Editor and restart your computer.
By following these steps, you can disable Aero Peek and resolve the issue of the Desktop Window Manager crashing. If you encounter any further problems, consider reaching out to our support team or referring to our comprehensive knowledge base for more troubleshooting solutions.

Mark Ginter is a tech blogger with a passion for all things gadgets and gizmos. A self-proclaimed "geek", Mark has been blogging about technology for over 15 years. His blog, techquack.com, covers a wide range of topics including new product releases, industry news, and tips and tricks for getting the most out of your devices. If you're looking for someone who can keep you up-to-date with all the latest tech news and developments, then be sure to follow him over at Microsoft.