- Error 0x000007d1 is one such printing error that occurred on a brand new Epson printer.
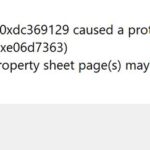
- This problem usually occurs when the printer stops responding and then displays an additional error message The specified driver is invalid.
- Read this article if you also encounter the same error code when printing on your computer.
- The printer error is mostly due to the printer not responding.
- It is a dangerous problem that usually occurs after Windows updates and other computer processes related to daily activities.
Printing can be a seamless task when everything goes smoothly, but encountering error 0x000007d1 in Windows 10 can disrupt this seemingly simple process. In this article, we delve into the causes behind this frustrating error and provide effective solutions to get your printer up and running flawlessly once again.
Check printer connectivity and troubleshoot error 0x000007d1
Check Printer Connectivity and Troubleshoot Error 0x000007d1
If you’re encountering Error 0x000007d1 when trying to print in Windows 10, follow these steps to fix it:
1. Ensure Printer Connectivity:
– Make sure your printer is properly connected to your PC.
– Check all cables and connections for any issues.
– Restart your printer and PC to reset the connection.
2. Update Printer Drivers:
– Go to the Start Menu and search for “Device Manager.”
– Expand the “Printers” category and locate your printer.
– Right-click on your printer and select “Update driver.”
– Choose to automatically search for updated driver software.
3. Troubleshoot Printer:
– Open Windows Settings and select “Devices.”
– Click on “Printers & scanners” and select your printer.
– Click on “Manage” and choose “Troubleshoot.”
4. Clear Print Spooler:
– Press the Windows + R keys to open the Run dialog box.
– Type “services.msc” and press Enter.
– Locate “Print Spooler” in the list and right-click on it.
– Select “Stop” and wait a few seconds.
– Right-click on it again and select “Start.”
Following these steps should help resolve the error and get your printer back up and running.
Edit registry entries and update printer drivers to fix error 0x000007d1
To fix error 0x000007d1 when printing in Windows 10, you can try editing registry entries and updating printer drivers. Follow these steps:
1. Press the Windows key + R to open the Run dialog box.
2. Type “regedit” and press Enter to open the Registry Editor.
3. Navigate to the following path: HKEY_LOCAL_MACHINE\SYSTEM\CurrentControlSet\Control\Print\Environments\Windows x64\Drivers.
4. Delete any subkeys related to the printer causing the error.
5. Download the latest driver for your printer from the manufacturer’s website.
6. Install the new driver and restart your computer.
Updating the printer driver and editing registry entries can resolve the issue in most cases. If you still encounter the error, consider contacting your printer manufacturer for further assistance. Remember to always be cautious when modifying registry entries and create a backup before making any changes.
Restart computer and run Windows troubleshooter for error 0x000007d1
To fix error 0x000007d1 when printing in Windows 10, follow these steps:
1. Restart your computer to refresh the system processes and clear any temporary issues.
2. After restarting, open the Windows troubleshooter to automatically detect and resolve the error. To do this, go to the Start Menu and search for “troubleshoot” and select “Troubleshoot settings.”
3. In the Troubleshoot settings, scroll down and click on “Printer” under the “Find and fix other problems” section.
4. Click on “Run the troubleshooter” and follow the on-screen instructions to identify and fix the error.
5. If the troubleshooter doesn’t resolve the issue, check if your printer’s driver is up to date. Visit the manufacturer’s website and download the latest driver for your printer model.
6. Install the updated driver and try printing again.
Disable SNMP status and Windows Firewall to resolve error 0x000007d1
To resolve error 0x000007d1 when printing in Windows 10, you can try disabling SNMP status and Windows Firewall. These steps may help fix the problem:
1. Press the Windows key on your keyboard to open the Start Menu.
2. Type “Windows Settings” and click on the corresponding link.
3. In Windows Settings, click on “Network & Internet” and select “Status” on the left-hand side.
4. Scroll down and click on “Change adapter options.”
5. Right-click on your network connection and select “Properties.”
6. Scroll down and uncheck the box next to “Simple Network Management Protocol (SNMP)” and click “OK.”
7. Go back to Windows Settings and click on “Privacy & Security.”
8. Select “Windows Security” and click on “Firewall & network protection.”
9. Click on “Private network” and turn off the toggle switch for “Windows Defender Firewall.”
10. Restart your machine and try printing again.
These steps should help resolve the error and allow you to print without any issues.
Reinstall printer and clear printer spooler for error 0x000007d1
To fix error 0x000007d1 when printing in Windows 10, you can try reinstalling the printer and clearing the printer spooler. Follow these steps:
1. Press the Windows key + R on your keyboard to open the Run dialog box.
2. Type “control printers” and click OK to open the Devices and Printers window.
3. Right-click on your printer and select Remove device. Confirm the removal if prompted.
4. Press the Windows key + X and select “Command Prompt (Admin)” or “Windows PowerShell (Admin)”.
5. Type “net stop spooler” and press Enter to stop the printer spooler service.
6. Open File Explorer and navigate to C:\Windows\System32\spool\PRINTERS.
7. Delete all the files in the PRINTERS folder.
8. Go back to the Command Prompt or PowerShell window and type “net start spooler” to start the printer spooler service again.
9. Reinstall your printer by connecting it to your computer and following the on-screen instructions.
This should help resolve the error 0x000007d1 and allow you to print without any issues.

Mark Ginter is a tech blogger with a passion for all things gadgets and gizmos. A self-proclaimed "geek", Mark has been blogging about technology for over 15 years. His blog, techquack.com, covers a wide range of topics including new product releases, industry news, and tips and tricks for getting the most out of your devices. If you're looking for someone who can keep you up-to-date with all the latest tech news and developments, then be sure to follow him over at Microsoft.