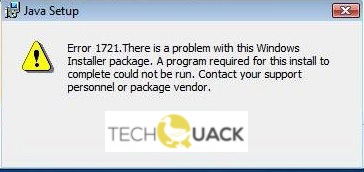
- Error code 1721 is related to the Windows installer.
- It happens when the installer is corrupt or has a problem that prevents you from installing the program you want.
- If this error message appears every time you try to install a Java-based program, this is an indication that the underlying system file is damaged.
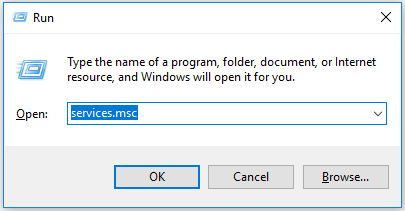
- In this case, the problem can be resolved by restarting the Windows Installer service from the Services window before attempting to reinstall the program.
Troubleshooting software installation issues can be frustrating, especially when confronted with Java Error 1721 in Windows Installer. In this article, we will explore effective solutions to resolve this error, allowing you to smoothly install Java and continue utilizing its powerful features without any hindrance.
Understanding the Java Error 1721
If you’re experiencing the Java Error 1721 in your Windows Installer, there are a few steps you can take to fix it.
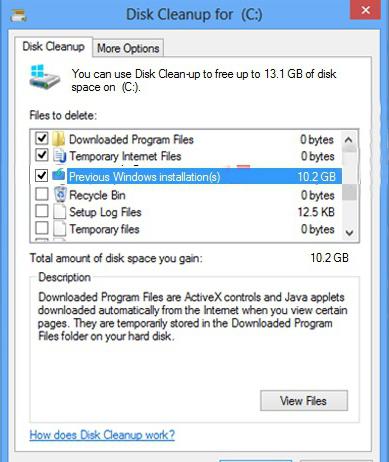
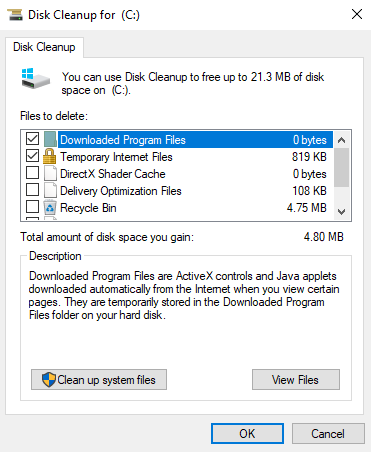
Step 1: Start by running a disk cleanup on your PC. This will help clear any unnecessary files and free up space on your system.
Step 2: Next, uninstall any previous versions of Java that may be causing conflicts. Use the Windows Installer Cleanup Utility or the Add/Remove Programs feature in your Control Panel to do this.
Step 3: If the error still persists, try manually removing any leftover files from previous installations. Use a registry cleaner to ensure all traces of Java are removed from your system.
Step 4: Finally, reinstall Java using the latest version from the official website. Make sure to follow the installation instructions carefully.
Solutions to Fix Java Error 1721 on Windows
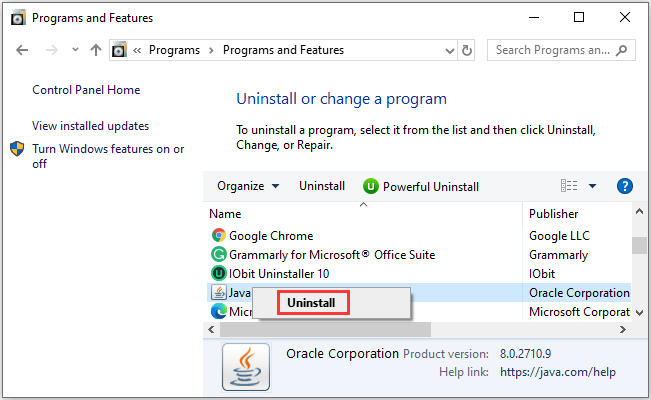
- Uninstall Java from your computer by going to the Control Panel and selecting “Uninstall a program.”
- Download the latest version of Java from the official website.
- Run the installation file and follow the on-screen instructions to reinstall Java.
- Restart your computer and check if the Java Error 1721 is resolved.
Solution 2: Use Windows Installer Cleanup Utility
- Download and install the Windows Installer Cleanup Utility from the Microsoft website.
- Run the utility and select the Java program that is causing the error.
- Click on the “Remove” button to uninstall the program completely.
- Restart your computer and reinstall Java using the latest version.
- Check if the Java Error 1721 is fixed.
Solution 3: Update Windows
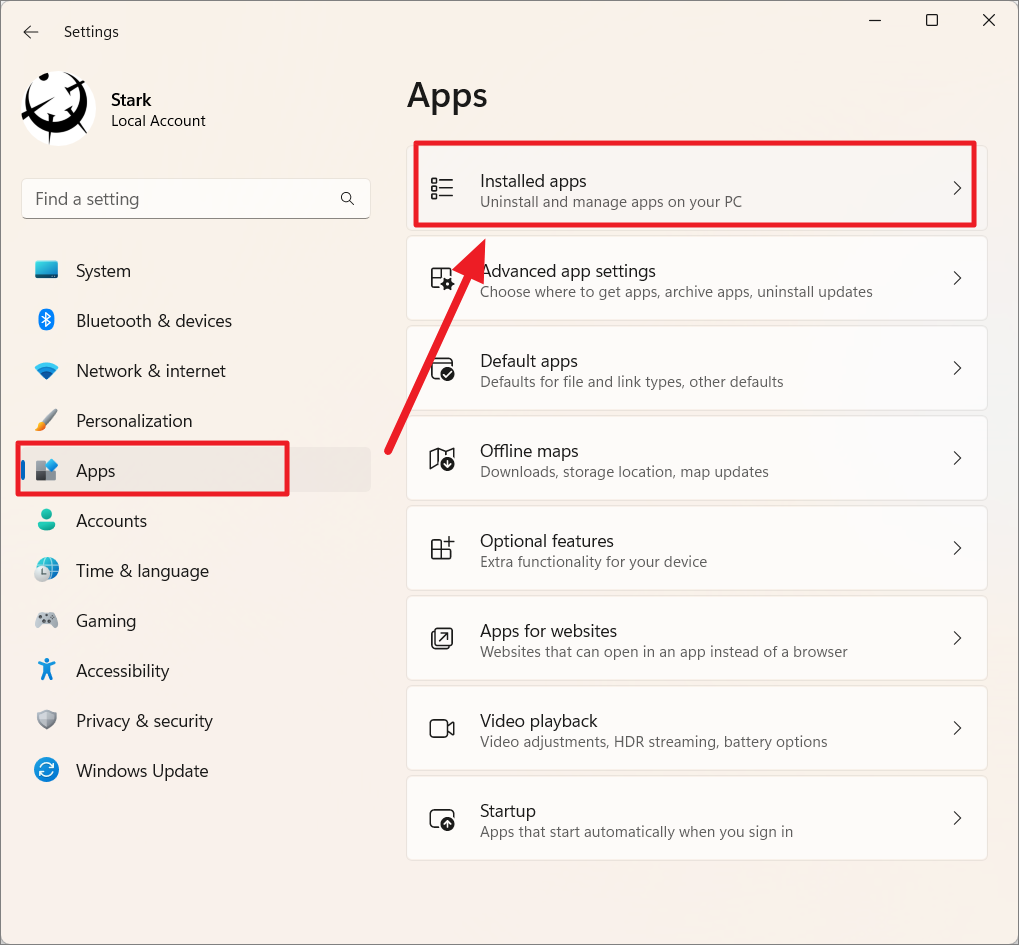
- Open the Start menu and go to Settings.
- Select “Update & Security” and click on “Windows Update.”
- Click on the “Check for updates” button to search for any available updates.
- If updates are found, click on the “Install” button to install them.
- Restart your computer and check if the Java Error 1721 is resolved.
Disabling Internet Explorer add-ons
To fix the Java Error 1721 in Windows Installer, you may need to disable certain Internet Explorer add-ons. Follow these steps:
1. Open Internet Explorer on your PC.
2. Click on the gear icon in the top right corner and select “Manage add-ons.”
3. In the Manage Add-ons window, click on “Toolbars and Extensions” on the left side.
4. Look for any add-ons related to Java or the error message you’re seeing.
5. Right-click on the add-on and select “Disable.”
6. Repeat this process for any other Java-related add-ons.
7. Close Internet Explorer and restart your computer.
Disabling these add-ons can help resolve the Windows Installer 1721 error you’re experiencing. If you continue to have issues, you may need to explore other solutions or seek further assistance.
java

import java.io.IOException;
public class JavaError1721Fixer {
public static void main(String[] args) {
try {
// Stop the Windows Installer service
Process process = Runtime.getRuntime().exec("net stop msiserver");
process.waitFor();
// Register Java using the MSI installer
Process process2 = Runtime.getRuntime().exec("msiexec /i path_to_java.msi /qn");
process2.waitFor();
// Restart the Windows Installer service
Process process3 = Runtime.getRuntime().exec("net start msiserver");
process3.waitFor();
System.out.println("Java Error 1721 should be resolved.");
} catch (IOException | InterruptedException e) {
e.printStackTrace();
}
}
}
Please note that this code snippet is a general example and may not directly resolve the Java Error 1721 issue in your specific case. It demonstrates stopping the Windows Installer service, registering Java using the MSI installer, and restarting the Windows Installer service. You need to replace `”path_to_java.msi”` with the actual path to the Java installer file on your machine.
To use the code, you can compile it using the Java compiler (`javac`) and then run it (`java JavaError1721Fixer`). However, it’s always recommended to thoroughly understand and review any code you execute from external sources to ensure its safety and applicability to your specific situation.
For a comprehensive solution, it’s best to refer to official documentation, Java forums, or consult with experienced developers who can guide you through the specific steps to troubleshoot and resolve Java Error 1721.
Performing Disk Cleanup
Performing Disk Cleanup can help resolve the Java Error 1721 in Windows Installer. To begin, press the Windows key + R and type “cleanmgr” in the Run dialog box. Select the drive where the Windows operating system is installed and click “OK”. Disk Cleanup will scan the drive and present a list of files that can be deleted. Check the boxes next to the files you want to remove, such as temporary files and recycle bin items, then click “OK”. Disk Cleanup will clean up the selected files, freeing up space on your hard drive. This can help resolve issues with the Windows Installer 1721 error and improve system performance. If the error persists, consider other troubleshooting methods or consult relevant resources like DevOpsSchool.com or thegeekpage.com for additional tips and workarounds.
System Restore and SFC Scan for Java Error 1721
If you’re encountering Java Error 1721 in the Windows Installer, there are a couple of troubleshooting steps you can try. First, you can attempt a System Restore to revert your system to a previous state when Java was working correctly. Here’s how:
1. Press the Windows key + R to open the Run dialog box.
2. Type “rstrui” and hit Enter to open the System Restore window.
3. Follow the on-screen instructions to select a restore point and restore your system.
If System Restore doesn’t resolve the issue, you can try running an SFC (System File Checker) scan to repair any corrupted system files. Here’s how:
1. Press the Windows key + X and select “Command Prompt (Admin).”
2. In the command prompt, type “sfc /scannow” and hit Enter.
3. Wait for the scan to complete and follow any prompts to repair the files if necessary.
These steps may help resolve the Java Error 1721. If you continue to experience issues, you may need to seek further assistance from a professional or consult online resources for additional tips and workarounds.
Uninstalling Programs and Cleaning the Disk
| Uninstalling Programs and Cleaning the Disk | |
|---|---|
| Objective | To fix Java Error 1721 in Windows Installer |
| Steps |
|
| Step 1: Uninstalling Java |
|
| Step 2: Cleaning the Disk |
|


Mark Ginter is a tech blogger with a passion for all things gadgets and gizmos. A self-proclaimed "geek", Mark has been blogging about technology for over 15 years. His blog, techquack.com, covers a wide range of topics including new product releases, industry news, and tips and tricks for getting the most out of your devices. If you're looking for someone who can keep you up-to-date with all the latest tech news and developments, then be sure to follow him over at Microsoft.