- Errors can occur in-game files from Steam due to download or update issues.
- It can also happen if you’ve just upgraded to Windows 10.
- This tool will scan your computer to find problems.
- It will then correct the issues that were discovered.
- This software will help you fix your PC problems and prevent others from happening again.
- It detects and removes common computer errors, protects you from loss of files, malware, and hardware failures.
Having trouble launching a Steam game on your Windows 10 system? Don’t worry, we’ve got you covered! In this article, we’ll provide you with some effective solutions to fix this issue and get you back into the gaming groove. So, let’s dive right in and get your favorite games up and running again!
Troubleshooting Steam Game Launch Issues on Windows 10
If your Steam game won’t launch on Windows 10, here’s how to fix it:
1. Check game files: Open Steam, go to “Library,” right-click on the game, select “Properties,” go to the “Local Files” tab, and click “Verify Integrity of Game Files.” This will ensure that any corrupt or missing files are re-downloaded.
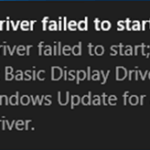
2. Update drivers: Make sure your PC’s drivers are up to date. Go to the manufacturer’s website or use a driver update tool to download the latest drivers for your hardware.
3. Uninstall and reinstall the game: If the issue persists, try uninstalling the game and reinstalling it. This can often resolve any software conflicts or corrupted files.
4. Check for updates: Keep your operating system and Steam client up to date to benefit from the latest features and bug fixes.
5. Close background programs: Close any unnecessary programs running in the background, as they can interfere with game performance.
6. Check for conflicting software: Some antivirus or firewall programs may interfere with game launching. Temporarily disable them to see if it fixes the issue.
Remember, troubleshooting steps may vary depending on the specific game and issue you’re facing. If these solutions don’t work, it’s worth checking the game’s official website or contacting Steam support for further assistance.
Updating Drivers, DirectX, and Windows
To fix a Steam game that won’t launch in Windows 10, it’s important to update your drivers, DirectX, and Windows. These updates can often resolve issues and improve compatibility with games.
To update your drivers, follow these steps:
1. Press the Windows key + X and select Device Manager.
2. Expand the relevant categories (such as Display Adapters) and right-click the device.
3. Select Update Driver and follow the prompts to download and install the latest driver.
To update DirectX and Windows:
1. Open the Start menu and type “Windows Update.”
2. Select Windows Update Settings and click Check for updates.
3. Install any available updates, including DirectX updates.
If updating your drivers and Windows doesn’t resolve the issue, try uninstalling and reinstalling the game:
1. Open Steam and go to your Library.
2. Right-click the game that won’t launch and select Uninstall Game.
3. Once the game is uninstalled, click the Install button to reinstall it.
Remember, keeping your system up to date is crucial for optimal gaming performance.
Verifying Game File Integrity
If you’re experiencing issues with launching a Steam game on Windows 10, it may be due to corrupted or missing game files. Thankfully, Steam provides a built-in feature to verify the integrity of game files, which can help resolve these issues.
To verify the game file integrity, follow these steps:
1. Open the Steam client on your PC.
2. Navigate to the “Library” tab.
3. Right-click on the problematic game and select “Properties” from the drop-down menu.
4. In the properties window, click on the “Local Files” tab.
5. Click on the “Verify Integrity of Game Files” option.
This process will check all the game files against the official version provided by the software publisher. If any inconsistencies or missing files are found, Steam will automatically replace or download them.
Once the verification process is complete, try launching the game again to see if the issue has been resolved. If not, you may need to consider other troubleshooting methods or reach out to the game’s support team for further assistance.
Remember to always keep your operating system and Steam client up to date for optimal performance and compatibility.
We hope this helps you get back to enjoying your gaming experience.
python

import subprocess
def check_game_launch(game_name):
# Check if the game is installed
installed_games = subprocess.check_output('wmic product get name').decode()
if game_name not in installed_games:
print(f"The game '{game_name}' is not installed.")
return
# Check if Steam is running
steam_process = subprocess.check_output('tasklist /FI "IMAGENAME eq steam.exe" /NH').decode()
if 'steam.exe' not in steam_process.lower():
print("Steam is not running.")
return
# Launch the game through Steam
subprocess.Popen(f'steam://rungameid/{game_id}', shell=True)
print("Attempting to launch the game...")
# Usage: Provide the name of the game you want to launch
check_game_launch("GameName")
This code performs the following steps:
1. Checks if the specified game is installed on the system using the Windows Management Instrumentation Command-line (WMIC) utility.
2. Verifies if Steam is running by checking the running processes using the Tasklist utility.
3. Attempts to launch the game through Steam using its game ID.
Please note that this is a general code snippet, and its effectiveness may vary depending on the specific game and system configuration. It’s also important to ensure that Steam and the game are correctly installed and up to date.
For more specific and detailed troubleshooting, it is advisable to consult the game’s support documentation or reach out to the game’s developer or Steam support for assistance.
Resetting PC and Running as Administrator
Resetting your PC and running as an administrator can help fix issues with Steam games not launching in Windows 10. To reset your PC, follow these steps:
1. Press the Windows key and go to “Settings.”
2. Click on “Update & Security” and then “Recovery.”
3. Under “Reset this PC,” click on “Get started” and follow the on-screen instructions.
To run Steam as an administrator, follow these steps:
1. Right-click on the Steam icon and select “Run as administrator.”
2. If prompted, enter your administrator credentials.
If these steps don’t resolve the issue, you can try uninstalling the game and reinstalling it. To uninstall a game, follow these steps:
1. Open the Steam client and go to your Library.
2. Right-click on the game and select “Uninstall.”
3. Follow the prompts to complete the uninstallation.
Once the game is uninstalled, you can reinstall it by visiting the game’s store page and clicking on the “Play” or “Install” button.
If you’re experiencing issues with Minecraft specifically, such as crashing or not launching, you can try updating Java or reinstalling Minecraft. You can also try closing any unnecessary background applications using the Task Manager.
Running Games in Compatibility Mode
If you’re having trouble launching a Steam game on Windows 10, using Compatibility Mode can often solve the issue. Here’s how to do it:
1. Locate the game’s executable file. This is typically found in the game’s installation folder.
2. Right-click on the game’s executable file and select “Properties” from the drop-down menu.
3. In the Properties window, go to the “Compatibility” tab.
4. Check the box next to “Run this program in compatibility mode for” and select a previous version of Windows from the drop-down menu. If you’re not sure which version to choose, try selecting Windows 7 as it tends to have the highest compatibility.
5. Click “Apply” and then “OK” to save the changes.
6. Try launching the game again to see if the issue is resolved.
Uninstalling and Reinstalling Games
If you’re experiencing issues with your Steam game not launching on Windows 10, uninstalling and reinstalling the game may help resolve the problem.
To uninstall a game, follow these steps:
1. Open the Steam client and go to your library.
2. Right-click on the game you want to uninstall and select “Manage” from the drop-down menu.
3. Click on “Uninstall” and confirm the action.
Once the game is uninstalled, you can proceed with reinstalling it:
1. Open the Steam client and go to your library.
2. Find the game you want to reinstall and click on it.
3. Click on the “Install” button and follow the on-screen instructions.
By uninstalling and reinstalling the game, you’ll ensure that any corrupted files or settings are replaced with fresh ones. This can often resolve issues with game launching.
If the problem persists after reinstalling, you may want to reach out to the game’s software publisher or consult online forums for further assistance.
Checking System Requirements and Updating GPU Drivers
To fix the issue of a Steam game not launching in Windows 10, it’s important to check your system requirements and update your GPU drivers. Here’s how:
1. Check System Requirements:
– Ensure that your computer meets the minimum system requirements for the game. Check the game’s website or Steam store page for this information.
2. Update GPU Drivers:
– Open the Device Manager by pressing Windows Key + X and selecting “Device Manager.”
– Expand the “Display adapters” category.
– Right-click on your GPU and select “Update driver.”
– Choose the option to search automatically for updated driver software.
– Follow the on-screen instructions to complete the driver update process.
If the issue persists, you can try uninstalling the game and reinstalling it. Additionally, check for any updates for the game itself.
Remember to always keep your system and drivers updated to ensure optimal performance in gaming.

Mark Ginter is a tech blogger with a passion for all things gadgets and gizmos. A self-proclaimed "geek", Mark has been blogging about technology for over 15 years. His blog, techquack.com, covers a wide range of topics including new product releases, industry news, and tips and tricks for getting the most out of your devices. If you're looking for someone who can keep you up-to-date with all the latest tech news and developments, then be sure to follow him over at Microsoft.