- If you get the error message “Windows failed to start Windows Audio service on local computer” when you try to play audio data on your computer, you don’t need to worry.
- Just follow the solutions suggested in this article and the problem will be solved very quickly.
- This happens when the Audio Service does not have enough permissions to run on your system.
Welcome to a guide that will help you troubleshoot and resolve the frustrating issue of Windows Audio Service not starting on your Windows 10 operating system. Discover effective solutions to restore your audio functionality and enjoy a seamless audio experience on your device.
Troubleshooting the “Windows could not start the Windows Audio Service on Local Computer” error
If you are encountering the “Windows could not start the Windows Audio Service on Local Computer” error on your Windows 10 computer, there are a few troubleshooting steps you can follow to resolve the issue.
Fix 1: Restart the Windows Audio Service.
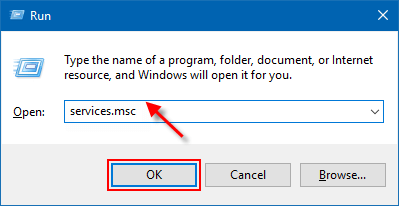
1. Press the Windows key + R to open the Run dialog box.
2. Type services.msc and press Enter to open the Services window.
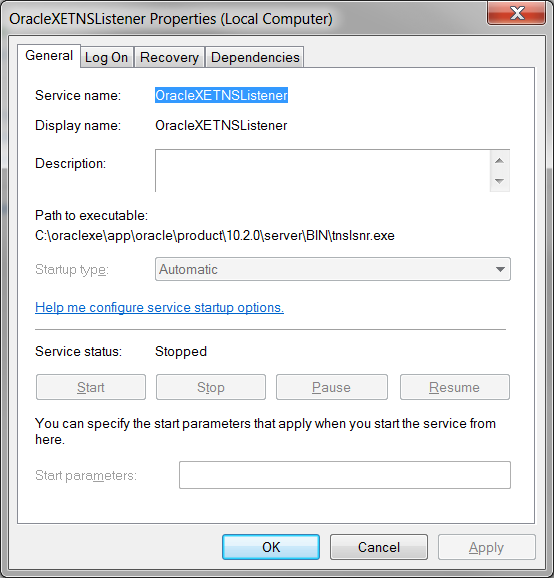
3. Scroll down and locate the Windows Audio service.
4. Right-click on it and select Restart.
If the error persists, you can try the following method:
Fix 2: Use the Sound troubleshooter.
1. Press the Windows key + I to open the Settings app.
2. Go to Update & Security > Troubleshoot.
3. Under the “Get up and running” section, click on Playing audio.
4. Click on the Run the troubleshooter button and follow the on-screen instructions.
These steps should help you troubleshoot and resolve the “Windows could not start the Windows Audio Service on Local Computer” error. If the issue persists, you may need to update your audio drivers or seek further assistance.
Running sound troubleshooters and fixing audio service issues
1. Use the built-in sound troubleshooter: Press the Windows key + I to open Settings, then go to System > Sound > Troubleshoot. Follow the on-screen instructions to identify and fix any audio issues.
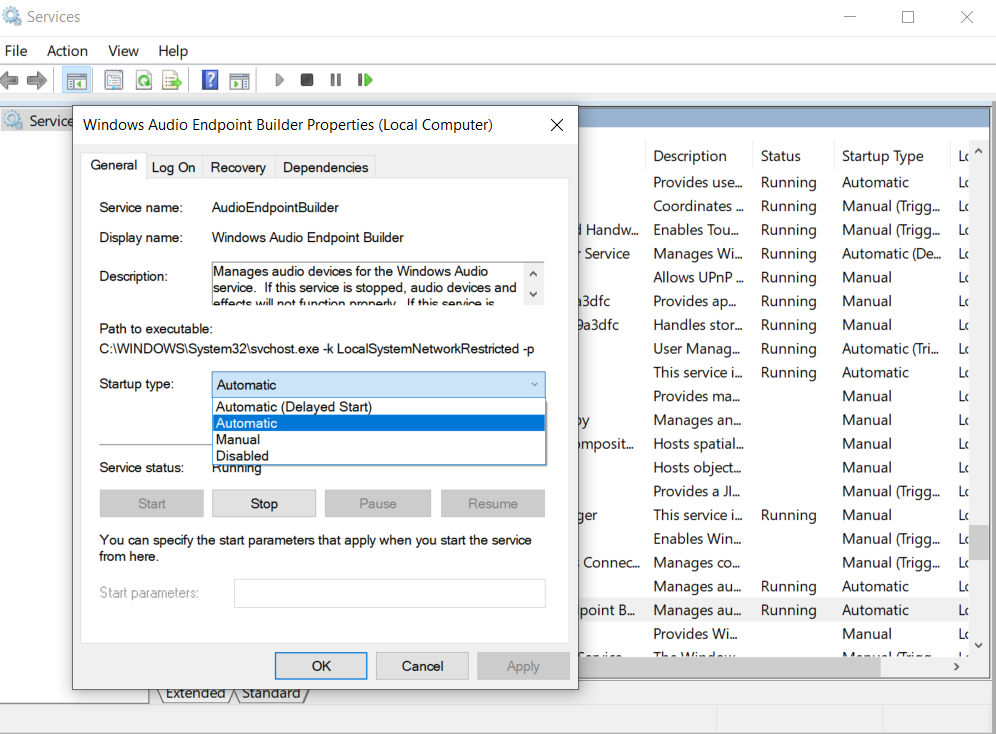
2. Reset the Audio Service: Open the Run dialog by pressing Windows key + R, then type “services.msc” and hit Enter. Scroll down to find “Windows Audio” and “Windows Audio Endpoint Builder”. Right-click on each service, select “Properties”, and set the Startup type to “Automatic”. Click “Apply” and “OK”, then restart your computer.
3. Use the Command Prompt: Press Windows key + X and select “Command Prompt (Admin)”. Type the command “sfc /scannow” and hit Enter. This will scan and repair any corrupted system files that may be causing the audio issue.
Remember to save your work before attempting any troubleshooting methods, and backup your important files in case of any unexpected issues.
Using SFC and DISM to resolve the audio service problem
If you are experiencing issues with the audio service on your Windows 10 computer, you can use the SFC (System File Checker) and DISM (Deployment Image Servicing and Management) tools to help resolve the problem. These tools can help fix errors related to the Audiosrv service and other audio-related components.
To use SFC, follow these steps:
1. Press the Windows key + R to open the Run dialog box.
2. Type “cmd” and press Enter to open the Command Prompt.
3. In the Command Prompt, type “sfc /scannow” and press Enter.
4. Wait for the scan to complete and follow any instructions provided.
To use DISM, follow these steps:
1. Press the Windows key + R to open the Run dialog box.
2. Type “cmd” and press Enter to open the Command Prompt.
3. In the Command Prompt, type “dism /online /cleanup-image /restorehealth” and press Enter.
4. Wait for the process to complete and follow any instructions provided.
These methods can help fix issues with the audio service and restore functionality to your PC.
powershell

# Check if the current user has administrative privileges

$isAdmin = ([Security.Principal.WindowsPrincipal] [Security.Principal.WindowsIdentity]::GetCurrent()).IsInRole([Security.Principal.WindowsBuiltInRole] "Administrator")
if (-not $isAdmin) {
Write-Host "This tool requires administrative privileges. Please run it as an administrator."
exit
}
# Check if the Windows Audio service is running
$audioService = Get-Service -Name Audiosrv
if ($audioService.Status -eq 'Running') {
Write-Host "The Windows Audio service is already running."
exit
}
# Attempt to start the Windows Audio service
try {
Start-Service -Name Audiosrv
Write-Host "The Windows Audio service has been started successfully."
} catch {
Write-Host "Failed to start the Windows Audio service. Error: $($_.Exception.Message)"
}
To use this code, follow these steps:
1. Open a text editor and paste the above code into a new file.
2. Save the file with a “.ps1” extension (e.g., `windows_audio_service_fix.ps1`).
3. Right-click the saved script file and choose “Run with PowerShell” or open PowerShell and navigate to the script’s location using the `cd` command.
4. Execute the script and follow any on-screen instructions.
Please note that running PowerShell scripts can be risky if obtained from untrusted sources. Ensure you understand the code before executing it or obtain it from a reliable source.
Remember, this is just a basic sample code that attempts to restart the Windows Audio service. Depending on the cause of the problem, additional troubleshooting steps may be required.
Granting full control to the audio service via the Registry
1. Press the Windows key + R to open the Run dialog box.
2. Type “regedit” and press Enter to open the Registry Editor.
3. In the Registry Editor, navigate to the following key:
HKEY_LOCAL_MACHINE\SYSTEM\CurrentControlSet\Services\AudioSrv
4. Right-click on the “AudioSrv” key and select Permissions.
5. In the Permissions window, click on the “Advanced” button.
6. In the “Advanced Security Settings” window, click on the “Add” button.
7. In the “Select User or Group” window, type “Everyone” and click on the “Check Names” button.
8. Click on the “OK” button to add the “Everyone” group.
9. In the Permissions window, select the “Everyone” group and check the “Full Control” box.
10. Click on the “OK” button to save the changes.
11. Close the Registry Editor and restart your computer.
This should grant full control to the audio service and solve the Windows Audio Service start problem on Windows 10.
Adjusting the Log on settings to fix audio service startup issues
To adjust the log-on settings and fix audio service startup issues on Windows 10, follow these steps:
1. Press the Windows key + R to open the Run dialog box.
2. Type “regedit” and press Enter to open the Registry Editor.
3. In the Registry Editor, navigate to the following key: HKEY_LOCAL_MACHINE\SOFTWARE\Microsoft\Windows\CurrentVersion\MMDevices\Audio\Render
4. Right-click on the “Render” key and select “Permissions.”
5. In the Permissions window, click on “Advanced.”
6. Click on “Change” next to the owner’s name.
7. Type “Administrators” in the “Enter the object name to select” field and click “Check Names.”
8. Click “OK” to apply the changes.
9. Check the box next to “Replace owner on subcontainers and objects” and click “OK.”
10. Close the Registry Editor and restart your computer.
This method should help resolve audio service startup issues on Windows 10. If you continue to experience problems, you may need to update your audio drivers or troubleshoot other possible causes.
Resolving the error by restarting audio services, starting necessary components, adding local and network services, installing sound drivers, using a restore point, or reinstalling Windows 10
- Open Run dialog by pressing Windows key + R.
- Type services.msc and press Enter.
- Locate Windows Audio, Windows Audio Endpoint Builder, and Plug and Play services in the list.
- Right-click on each of these services and select Restart.

- Check if the audio problem is resolved.
Starting necessary components:
- Open Run dialog by pressing Windows key + R.
- Type services.msc and press Enter.
- Locate Windows Audio and Windows Audio Endpoint Builder services in the list.
- Right-click on each of these services and select Properties.
- Set the Startup type of both services to Automatic.
- Click OK to save the changes.
- Restart your computer and check if the audio problem is resolved.
Adding local and network services:
- Open Run dialog by pressing Windows key + R.
- Type services.msc and press Enter.
- Locate Windows Audio and Windows Audio Endpoint Builder services in the list.
- Right-click on each of these services and select Properties.
- In the Log On tab, click on Local System account.
- Check the Allow service to interact with desktop box.
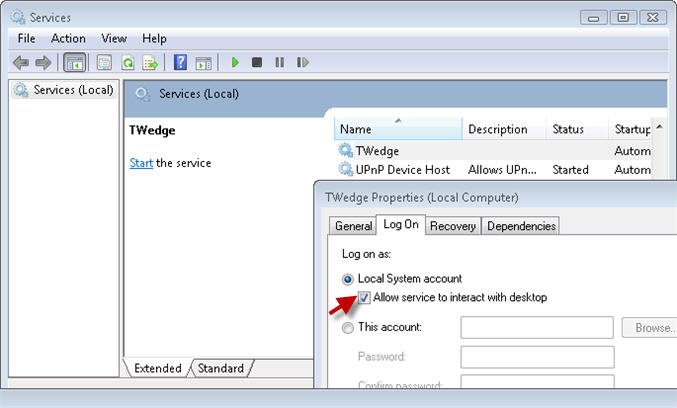
- Click OK to save the changes.
- Restart your computer and check if the audio problem is resolved.
Installing sound drivers:
- Open Device Manager by pressing Windows key + X and selecting Device Manager from the menu.
- Expand the Sound, video and game controllers category.
- Right-click on your sound device and select Update driver.
- Choose Search automatically for updated driver software.
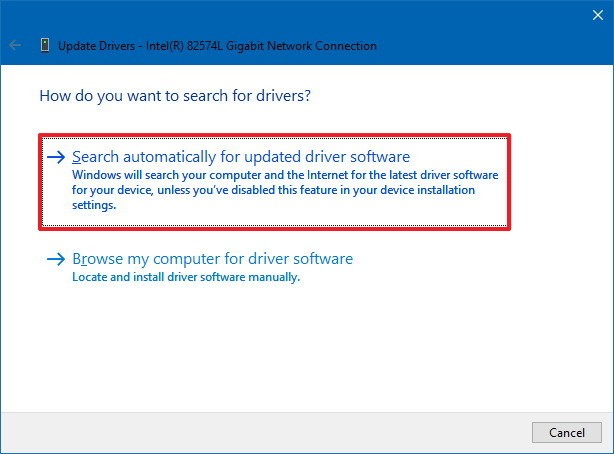
- Follow the on-screen instructions to install the updated drivers.
- Restart your computer and check if the audio problem is resolved.
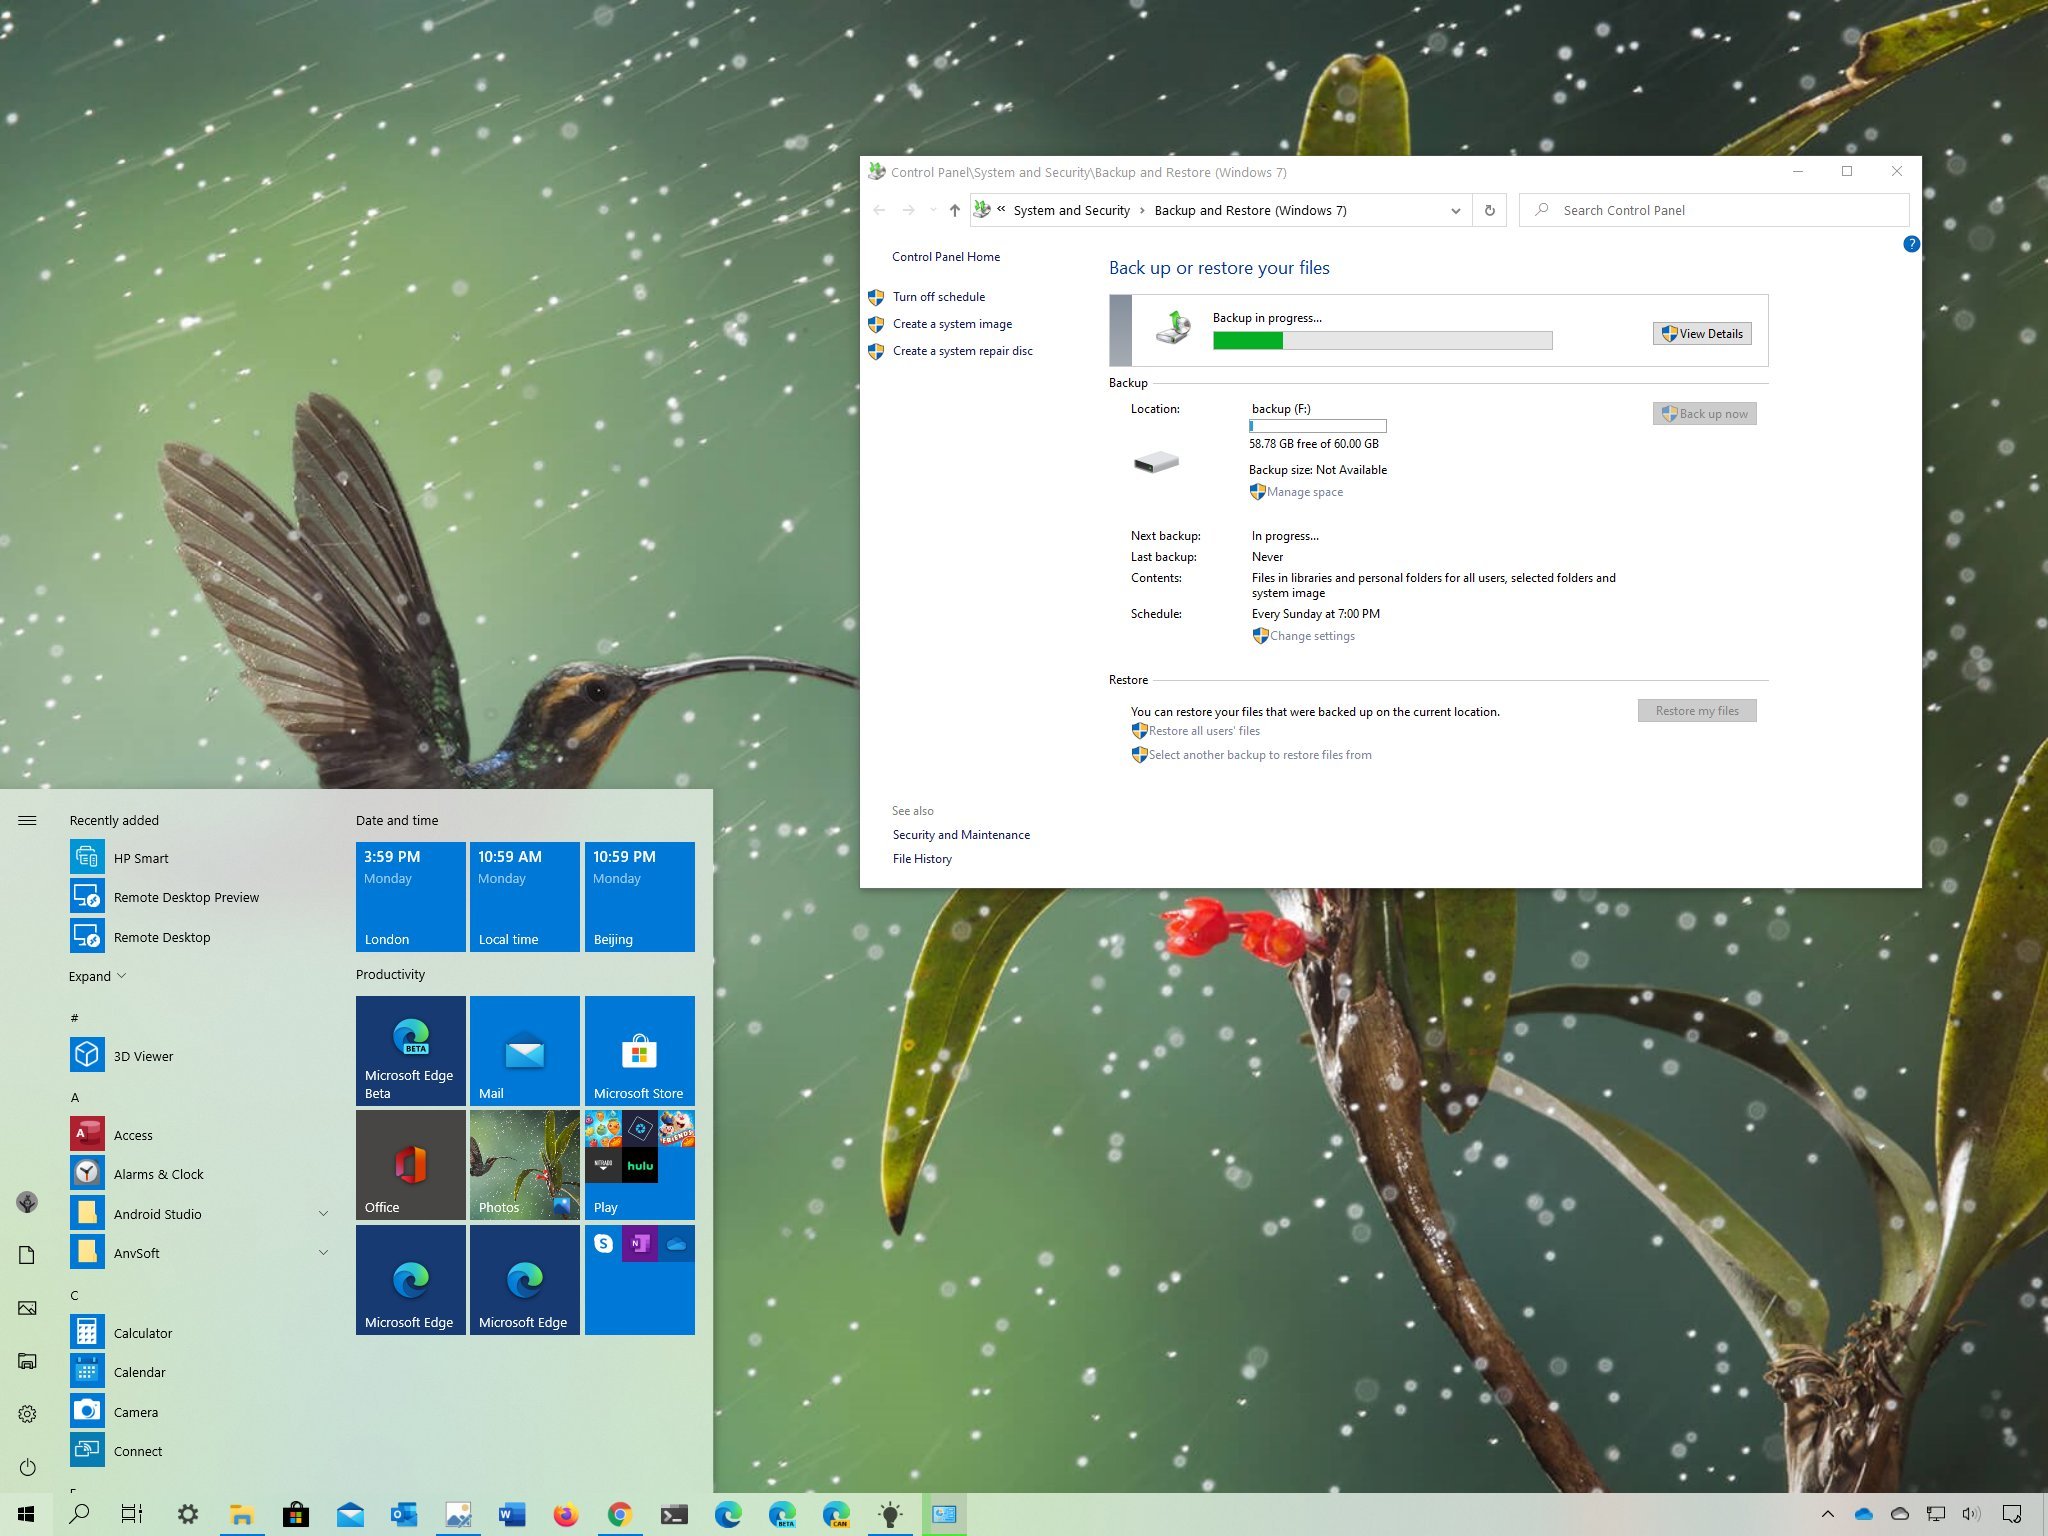
Using a restore point:
- Open Control Panel by typing Control Panel in the search bar and selecting it from the results.
- Click on Recovery and then select Open System Restore.
- Click Next and choose a restore point when the audio was working correctly.
- Follow the on-screen instructions to restore your computer to the selected restore point.
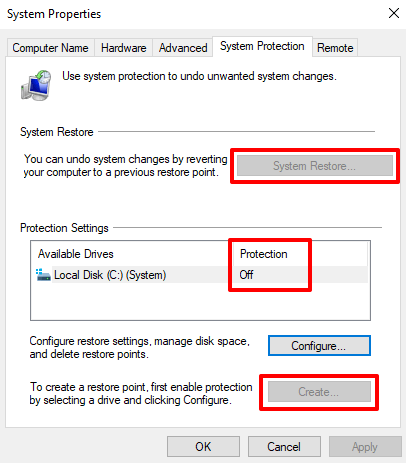
- Restart your computer and check if the audio problem is resolved.
Reinstalling Windows 10:
- Before proceeding with this step, make sure to backup your important files.
- Open Settings by pressing Windows key + I.
- Click on Update & Security and then select Recovery.
- Under Reset this PC, click on Get started.
- Choose either Keep my files or Remove everything depending on your preference.
- Follow the on-screen instructions to reinstall Windows 10.
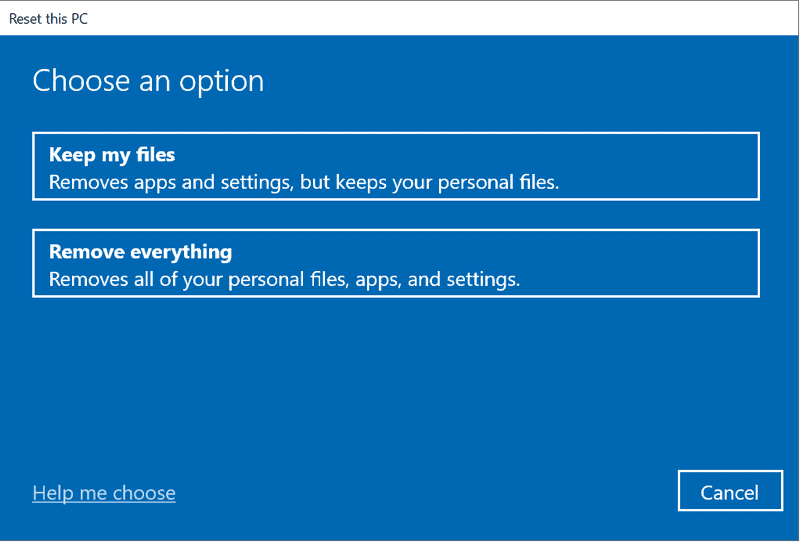
- After the reinstallation is complete, check if the audio problem is resolved.

Mark Ginter is a tech blogger with a passion for all things gadgets and gizmos. A self-proclaimed "geek", Mark has been blogging about technology for over 15 years. His blog, techquack.com, covers a wide range of topics including new product releases, industry news, and tips and tricks for getting the most out of your devices. If you're looking for someone who can keep you up-to-date with all the latest tech news and developments, then be sure to follow him over at Microsoft.