- This crash is usually preceded by a user attempting to make configuration changes to their audio devices, i.e., playback or recording devices.
- L files play an important role in program execution in Windows.
- For some users, the error goes away after a few tries, but for the rest of the rest, here are solutions that are known to work against this error.
- In the next section, we will show you how to fix the Windows Shell Common DLL error that has stopped working.
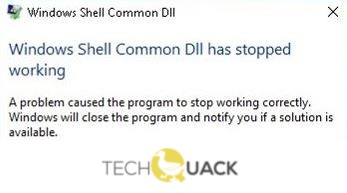
In the realm of Windows troubleshooting, encountering the dreaded “Windows Shell Common DLL Stopped Working” issue can be a frustrating experience. This article aims to provide you with practical tips and solutions to help repair this vexing problem efficiently. So, let’s delve into the depths of DLL errors and discover how to overcome them without breaking a sweat.
Reinstall audio drivers
To reinstall audio drivers in Windows, follow these steps:
1. Press the Windows Key + S to open the Search bar and type “Device Manager.”
2. Open Device Manager and expand the “Sound, video, and game controllers” category.
3. Right-click on your audio driver and select “Uninstall device.”
4. Check the box that says “Delete the driver software for this device” and click “Uninstall.”
5. Restart your PC.
6. After the restart, Windows will automatically reinstall the audio driver.
7. If the issue persists, you can manually download and install the audio driver from the manufacturer’s website.
By reinstalling the audio drivers, you can resolve the Windows Shell Common DLL stopped working issue and regain audio functionality on your PC.
Uninstall Synaptics driver
To uninstall the Synaptics driver and resolve the Windows Shell Common DLL Stopped Working issue, follow these steps:
1. Open the Start menu and type “Device Manager” in the search bar.
2. Click on the “Device Manager” app that appears in the search results.
3. In the Device Manager window, expand the “Mice and other pointing devices” category.
4. Right-click on the Synaptics driver and select “Uninstall device”.
5. A confirmation dialog box will appear. Check the box that says “Delete the driver software for this device” and click “Uninstall”.
6. After the driver has been uninstalled, restart your computer.
By following these steps, you can effectively uninstall the Synaptics driver and address the Windows Shell Common DLL Stopped Working issue. Remember to restart your computer after the uninstallation process is complete.
Repair system files
To repair the Windows Shell Common DLL stopped working issue, follow these steps:
1. Press the Windows key + S and type “CMD” to open the command prompt.
2. Right-click on Command Prompt and select “Run as administrator”.
3. In the command prompt, type “sfc /scannow” and press Enter.
4. Wait for the system file checker to scan and repair any corrupted system files.
5. Once the process is complete, restart your computer.
If the issue persists, you can try updating your drivers. Here’s how:
1. Press the Windows key + S and type “Device Manager” to open it.
2. Expand the relevant category (e.g., Display adapters for graphics drivers).
3. Right-click on the device and select “Update driver”.
4. Choose to automatically search for updated driver software.
5. Follow the on-screen instructions to complete the update.
If these steps don’t resolve the issue, you may need to consider using a dedicated tool like Driver Booster to update your drivers more efficiently.
python

import subprocess
def restart_explorer():
try:
subprocess.run('taskkill /f /im explorer.exe', check=True)
subprocess.run('start explorer.exe', check=True)
print('Windows Explorer has been restarted successfully.')
except subprocess.CalledProcessError:
print('Failed to restart Windows Explorer.')
restart_explorer()
Please note that this code should be executed with caution, as restarting the Windows Explorer process can temporarily close your desktop environment. Make sure to save any unsaved work before running this script.
Remember, this code only provides a basic example to restart the Windows Explorer process, which may help in some cases. However, it might not resolve the underlying cause of the “Windows Shell Common DLL has stopped working” issue. Consulting official documentation or seeking professional assistance is highly recommended for comprehensive troubleshooting and resolving system errors.
Change UserChoice key security permissions
To change the UserChoice key security permissions in order to repair the Windows Shell Common DLL stopped working issue, follow these steps:
1. Press the Windows key + R to open the Run dialog box.
2. Type “regedit” and press Enter to open the Registry Editor.
3. In the Registry Editor, navigate to the following location: HKEY_CURRENT_USER\Software\Microsoft\Windows\CurrentVersion\Explorer\FileExts\.dll\UserChoice
4. Right-click on the UserChoice key and select “Permissions” from the context menu.
5. In the Permissions dialog box, click on “Advanced” and then click on “Change” next to the owner name.
6. In the Select User or Group dialog box, type your Windows username and click on “Check Names” to verify.
7. Click “OK” and then check the box next to “Replace owner on subcontainers and objects.”
8. Click “Apply” and then click “OK” to save the changes.
9. Close the Registry Editor and restart your computer for the changes to take effect.
Note: Modifying the registry can be risky, so it’s recommended to create a backup before making any changes.
Copy necessary files to System32 directory
To resolve the issue of Windows Shell Common DLL not working, you can copy the necessary files to the System32 directory. This can be done by following a few simple steps.
1. First, locate the DLL file that is causing the issue. This can usually be found in the error message or by searching for the specific file name.
2. Once you have located the DLL file, open the File Explorer and navigate to the System32 directory. This directory is typically located in the C:\Windows folder.
3. Copy the DLL file from its current location and paste it into the System32 directory. You may be prompted for administrator permission to complete this action.
4. After copying the DLL file, restart your computer to apply the changes.
By copying the necessary files to the System32 directory, you can effectively fix the Windows Shell Common DLL stopped working issue.
Disable antivirus
To disable antivirus software on your Windows device, follow these steps:
1. Open the antivirus program on your computer.
2. Look for the settings or options menu within the antivirus program.
3. Find the option to disable or turn off real-time protection.
4. Click on this option to disable the antivirus temporarily.
5. Confirm any prompts or warnings that appear.
6. Once the antivirus is disabled, you can proceed with troubleshooting the Windows Shell Common DLL stopped working issue.
Remember to re-enable your antivirus software after resolving the issue to ensure your device remains protected.
Note: Disabling antivirus software temporarily can leave your device vulnerable to malware and other threats. Use caution and only disable antivirus software when necessary for troubleshooting purposes.
For more in-depth troubleshooting steps and solutions for the Windows Shell Common DLL stopped working issue, refer to the article by Milan Stanojevic and Alex Serban.
Perform SFC scan
Performing an SFC (System File Checker) scan can help fix the “Windows Shell Common DLL Stopped Working” issue. Here’s how:
1. Press the Windows key + R to open the Run dialog box.
2. Type “cmd” and press Enter to open the Command Prompt.
3. In the Command Prompt, type “sfc /scannow” and press Enter.
4. Wait for the scan to complete. It may take some time.
5. If any issues are found, the SFC scan will attempt to repair them automatically.
6. Once the scan is finished, restart your computer and check if the issue is resolved.
Performing an SFC scan can help fix problems with DLL files and ensure the stability of your Windows shell. It’s a useful troubleshooting step that can resolve various issues, including the “Windows Shell Common DLL Stopped Working” error.

Mark Ginter is a tech blogger with a passion for all things gadgets and gizmos. A self-proclaimed "geek", Mark has been blogging about technology for over 15 years. His blog, techquack.com, covers a wide range of topics including new product releases, industry news, and tips and tricks for getting the most out of your devices. If you're looking for someone who can keep you up-to-date with all the latest tech news and developments, then be sure to follow him over at Microsoft.