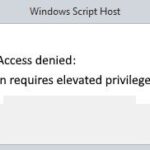
- To solve this problem, you have to run the command line as an administrator.
- Every time you want to make a change or run system files, you must open CMD in extended mode.
- To fix this error, right-click and run it as administrator, CMD will open as an extended command line.
Unlocking the secrets of troubleshooting errors encountered by administrators running a console session, this article presents a comprehensive guide to fixing the issue at hand. Delve into essential solutions and expert tips to ensure a smooth and efficient administration experience.
Causes of the “You Must Be an Administrator Running a Console Session” Error
If you encounter the “You Must Be an Administrator Running a Console Session” error, there are a few potential causes and solutions to consider.
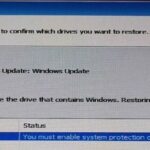
First, ensure that you are logged in as an administrator on your Windows 10 PC. This error typically occurs when attempting to run a command or utility that requires administrator permissions.
One possible fix is to run the Command Prompt in administrator mode. To do this, right-click on the Start button, select “Command Prompt (Admin),” and then proceed with the necessary commands.
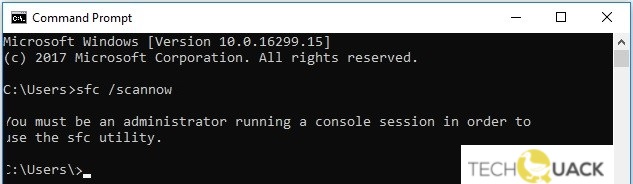
Another solution is to use the System File Checker (SFC) utility to scan and fix any system file issues. Open the Command Prompt as an administrator and type “sfc /scannow“. This will initiate a scan and repair any corrupted system files.
If these methods do not resolve the issue, you may need to look into other fixes or seek further assistance. Remember to always be cautious when making changes to your system settings and consult reliable sources for guidance.
How to Fix the “You Must Be an Administrator Running a Console Session” Error
If you’re encountering the “You Must Be an Administrator Running a Console Session” error on Windows 10, there are a few fixes you can try.
First, make sure you’re running Command Prompt with administrator permissions. To do this, right-click on the Command Prompt icon and select “Run as administrator.”
If that doesn’t work, try running the System File Checker tool (SFC) to scan for and repair any corrupted system files. Open Command Prompt as an administrator and type “sfc /scannow” followed by Enter.
Another option is to check your user account settings. Make sure you have the necessary authority to run console sessions.
If none of these methods resolve the issue, you may need to post your case on a forum or contact a system administrator for further assistance.
Remember to always be cautious when making changes to your PC’s settings and files, as incorrect commands or improper permission changes can cause further issues.
Setting Elevated CMD as Default
To set Elevated CMD as the default in your console session, follow these steps:
1. Open the Command Prompt as an administrator by right-clicking on the Start menu and selecting “Command Prompt (Admin).”
2. In the Command Prompt window, type “REG ADD “HKCU\Software\Microsoft\Command Processor” /v AutoRun /t REG_SZ /d “CD /D %USERPROFILE%” /f” and press Enter. This command sets the default directory to your user profile.
3. Next, type “REG ADD “HKCU\Software\Microsoft\Command Processor” /v AutoRun /t REG_SZ /d “CD /D %USERPROFILE%” /f” and press Enter. This command enables command history in the Command Prompt.
4. Close the Command Prompt window and reopen it. From now on, every time you open the Command Prompt as an administrator, it will automatically open in your user profile directory and have command history enabled.
These steps should help you fix the issue of not being able to run commands in an elevated Command Prompt session.
python

import os

import ctypes

import sys
def is_admin():
try:
return ctypes.windll.shell32.IsUserAnAdmin()
except:
return False
def run_sfc_utility():
if is_admin():
# Execute the sfc utility here
os.system("sfc /scannow")
else:
# Display an error message if not running as an administrator
print("Error: You must run this script as an administrator.")
# Entry point of the script
if __name__ == "__main__":
run_sfc_utility()
The above Python code checks if the script is running with administrative privileges using the `is_admin()` function. If the script is executed as an administrator, it proceeds to run the sfc utility by calling `os.system(“sfc /scannow”)`. If the script is not executed with administrator privileges, it displays an error message indicating that it must be run as an administrator.
However, please note that the provided code snippet assumes you have the necessary administrative privileges to execute the sfc utility and is intended for illustrative purposes only.
Opening Command Prompt as Administrator
To open Command Prompt as an Administrator, follow these steps:
1. Press the Windows key and type “Command Prompt” in the search bar.
2. Right-click on the “Command Prompt” app and select “Run as administrator.”
3. If prompted for permission, click “Yes” to grant administrative access.
4. The Command Prompt window will open with elevated privileges, indicated by “Administrator” in the window title.
5. You can now run any commands that require administrator rights.
This method allows you to perform advanced tasks and troubleshooting, such as using the System File Checker (SFC) tool to scan and repair system file issues. If you encounter errors or the SFC command is not working, make sure you are running the Command Prompt as an administrator.
Remember, it’s important to exercise caution when making changes using the Command Prompt, as incorrect commands can potentially harm your system.
Checking and Disabling Antivirus
To check and disable antivirus in an administrator console session, follow these steps:
1. Type “Command Prompt” in the Windows search bar to open the Command Prompt as an administrator.
2. In the Command Prompt window, type “sfc /scannow” and press Enter. This will run the System File Checker (SFC) tool to scan and repair any corrupted system files.
3. If the SFC command does not work and you encounter a console session error, try running the command in safe mode. To do this, restart your computer and press F8 repeatedly before the Windows logo appears. Select “Safe Mode with Command Prompt” from the boot options menu.
4. If the SFC command still does not work or you receive an “SFC Scannow not working” error, it might be due to interference from your antivirus program. Temporarily disable your antivirus software by following the instructions provided by the program’s manufacturer.
5. Once the antivirus is disabled, run the SFC command again using the steps mentioned in step 2.
Remember to re-enable your antivirus software after completing the system file scan and repair.
Running a Full Anti-virus Scan
To run a full anti-virus scan, follow these steps:
1. Type “Command Prompt” in the search bar and open the Command Prompt as an administrator.
2. In the Command Prompt window, type the following command: fullscan. This will initiate a full anti-virus scan on your system.
3. Wait for the scan to complete. This process may take some time, so be patient.
4. Once the scan is finished, the results will be displayed in the Command Prompt window. Review the results to see if any threats were detected.
5. If any threats are found, take appropriate action to remove or quarantine them.
6. It is recommended to regularly perform full anti-virus scans to ensure the security of your system.
Remember, running a full anti-virus scan helps to detect and remove any potential threats on your computer.
Creating a Desktop Shortcut for Command Prompt
- Create a new shortcut on the desktop:
- Right-click on an empty area of the desktop and select New.
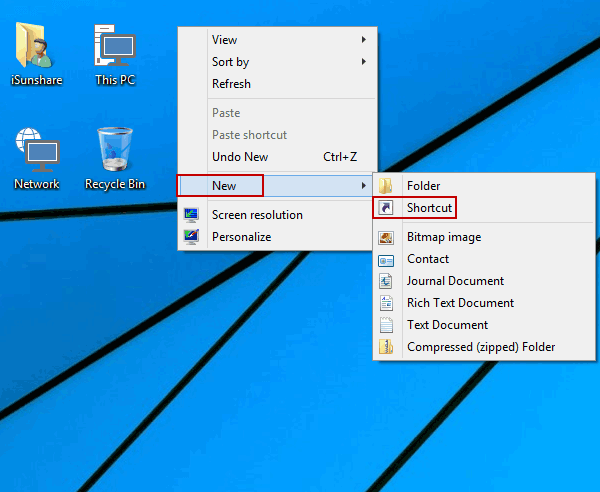
- Select Shortcut from the drop-down menu.
- Specify the location of the item:
- Type %windir%\system32\cmd.exe in the text field.
- Choose a name for the shortcut:
- Enter a desired name for the shortcut, such as “Command Prompt.”
- Create the shortcut:
- Click on the Finish button to create the shortcut.
- Customize the shortcut’s properties:
- Right-click on the newly created shortcut and select Properties.
- In the Shortcut tab, click on the Advanced… button.
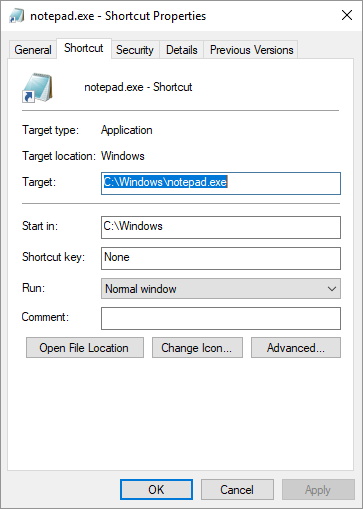
- Check the box that says Run as administrator.
- Click OK to save the changes.
- Click Apply and then OK to exit the Properties window.
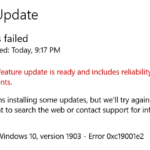
Updating Windows and Creating a New User Account
- Update Windows
- Open Windows Update by clicking on the Start button and selecting Settings.
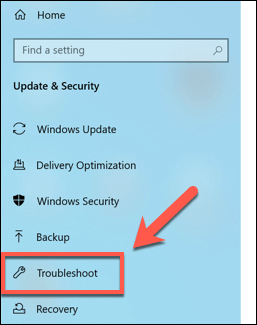
- In the Settings window, click on Update & Security.
- Click on Check for updates to see if there are any available updates for your Windows system.
- If updates are found, click on Install updates to start the update process.
- Wait for the updates to download and install. This may take some time.
- Restart your computer after the updates are installed.
- Create a New User Account
- Open Settings by clicking on the Start button and selecting Settings.
- In the Settings window, click on Accounts.
- In the Accounts window, click on Family & other users on the left-hand side.
- Under the Other users section, click on Add someone else to this PC.
- Click on I don’t have this person’s sign-in information.
- Click on Add a user without a Microsoft account.
- Enter a username and password for the new user account.
- Click on Next and then click on Finish to create the new user account.

Mark Ginter is a tech blogger with a passion for all things gadgets and gizmos. A self-proclaimed "geek", Mark has been blogging about technology for over 15 years. His blog, techquack.com, covers a wide range of topics including new product releases, industry news, and tips and tricks for getting the most out of your devices. If you're looking for someone who can keep you up-to-date with all the latest tech news and developments, then be sure to follow him over at Microsoft.