- If your network cable is not connected properly or is broken, almost any PC can get an error message preventing you from accessing the Internet.
- If routers are not cleaned regularly, dirt and debris can get into the ports, causing the network cable to connect incorrectly.
- The WLAN drivers installed on your system may be out of date, so these drivers may cause an error and your system’s Internet connection may not work properly.
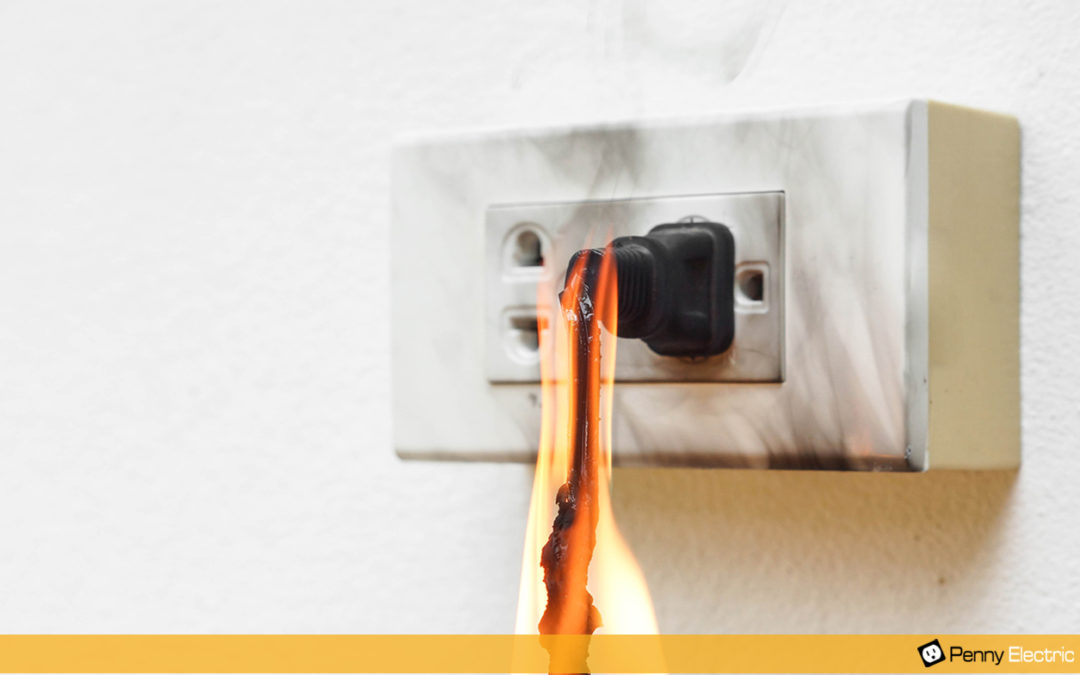
Unveiling the Secrets of Faulty Electrical Connections
Understanding the “network cable not properly plugged in” error
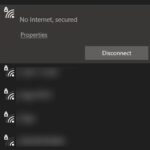
If you’re encountering the “network cable not properly plugged in” error, don’t worry – it’s fixable. This error message typically occurs when your network cable is not securely connected to your computer’s Ethernet port.
To resolve this issue, follow these steps:
1. Check the physical connection: Make sure the network cable is properly plugged into both your computer’s Ethernet port and the Ethernet port on your modem or router.
2. Inspect the cable: Look for any visible damage or loose connections on the cable itself. If you notice any issues, try using a different Ethernet cable to see if that resolves the problem.
3. Update network adapter drivers: Outdated or incompatible network adapter drivers can cause connectivity issues. To update your drivers, you can use a reliable tool like Driver Easy.
4. Run network troubleshooters: Windows 10 offers built-in troubleshooters that can automatically detect and fix common network issues. To access them, go to the Start menu, type “troubleshoot,” and select “Network troubleshooter.”
Troubleshooting steps for the error
- Check the Power Source: Ensure that the device is properly connected to a power outlet or that the battery is charged.
- Inspect the Power Cable: Make sure the power cable is securely plugged into both the device and the power source.
- Try a Different Power Outlet: Sometimes, an electrical issue with the power outlet can cause the error. Test the device with a different power outlet to rule out this possibility.
- Replace the Power Cable: If the power cable appears damaged or worn out, try using a different cable to see if it resolves the error.
- Restart the Device: A simple restart can often fix minor glitches and errors. Turn off the device, disconnect it from the power source, wait for a few seconds, and then reconnect and restart.
- Update Device Drivers: Outdated or incompatible device drivers can lead to errors. Check for any available updates for the device drivers and install them.
- Run a System Diagnostic: Use built-in diagnostic tools or software to identify any hardware or software issues that may be causing the error.
- Perform a Hard Reset: If all else fails, try performing a hard reset, which involves fully powering off the device and then turning it back on. This can help resolve stubborn errors.
- Contact Support: If none of the troubleshooting steps resolve the error, reach out to our dedicated support team for further assistance.
Disabling the network and hard-rebooting the PC
If you’re experiencing network issues or your PC is not working properly, there are a few steps you can take to troubleshoot the problem. First, try disabling the network connection and then hard-rebooting your PC. This can often resolve minor connectivity issues.
To disable the network connection, follow these steps:
1. Click on the Start button and type “Network Connections” in the search bar.
2. Select “View network connections” from the search results.
3. Right-click on your network adapter and choose “Disable” from the drop-down menu.
4. Wait a few seconds and then right-click on the adapter again and choose “Enable” to re-enable the connection.
If disabling the network connection doesn’t solve the issue, you can also try running the network adapter troubleshooter. This built-in tool in Windows 10 can help diagnose and fix common network problems. To run the troubleshooter, follow these steps:
1. Click on the Start button and type “Troubleshoot” in the search bar.
2. Select “Troubleshoot settings” from the search results.
3. Scroll down and click on “Network Adapter” under the “Find and fix other problems” section.
4. Click on “Run the troubleshooter” and follow the on-screen instructions.
python

import subprocess
def is_network_cable_plugged():
try:
# Run a command to check network interface status (Linux example)
output = subprocess.check_output("ip link show eth0", shell=True).decode("utf-8")
# Extract the state of the network interface
state = output.split("state ")[1].split(" ")[0]
# Check if the network interface is up
if state == "UP":
return True
else:
return False
except:
# Handle any exceptions that may occur during the process
return False
# Usage example
if is_network_cable_plugged():
print("Network cable is properly plugged in.")
else:
print("Network cable is not properly plugged in.")
Please note that the above code assumes a Linux environment and uses the `ip link show` command to check the status of the `eth0` network interface. You may need to modify it based on your specific operating system and network interface names. Additionally, this code only checks the status of the network interface and not the physical connection of the cable itself.
Changing network duplex settings
Properly Plugged in or Broken – Fix
Changing Network Duplex Settings
| Step | Description |
|---|---|
| 1 | Access network adapter properties |
| 2 | Go to the “Advanced” tab |
| 3 | Locate the “Speed & Duplex” or similar setting |
| 4 | Change the duplex setting to “Auto” or the desired value (e.g., “Full Duplex”) |
| 5 | Click “OK” or “Apply” to save the changes |
| 6 | Restart the computer for the changes to take effect |
Updating the network driver
To update your network driver, follow these steps:
1. Press the Windows key + X to open the Start menu and select Device Manager.
2. In Device Manager, expand the Network adapters category.
3. Right-click on your network adapter and select Update driver.
4. Choose the option to automatically search for updated driver software.
5. If Windows doesn’t find any updates, you can also visit the manufacturer’s website and download the latest driver manually.
6. Once the update is complete, restart your computer to apply the changes.
Updating your network driver can significantly improve your internet connection and resolve various network issues. Remember to periodically check for driver updates to ensure optimal performance.
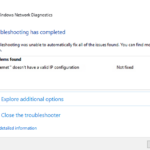
Running the Internet Connections troubleshooter
To troubleshoot internet connection issues, you can use the Internet Connections troubleshooter on your Windows computer. This tool can help identify and fix common problems that may be affecting your internet connection.
To run the troubleshooter, follow these steps:
1. Press the Windows key + R on your keyboard to open the Run dialog box.
2. Type “msdt.exe /id NetworkDiagnosticsWeb” and press Enter.
3. The troubleshooter will now open and start scanning for issues with your internet connection.
If any issues are found, the troubleshooter will provide recommended fixes. Follow the on-screen instructions to apply the suggested solutions.
If the troubleshooter is unable to fix the problem, you may need to try other troubleshooting methods or seek further assistance.
Remember, a properly plugged-in cable or a broken cable can cause internet connection problems. Make sure all cables are securely connected and not damaged.
Cleaning the Ethernet port
Start by turning off your computer and unplugging the Ethernet cable from the port. Use a can of compressed air to blow out any dust or debris that may have accumulated in the port.
Next, take a cotton swab and dip it in rubbing alcohol. Gently clean the inside of the port, being careful not to apply too much pressure. This will remove any stubborn dirt or grime.
Once the port is clean, plug the Ethernet cable back in and turn on your computer. If you’re still experiencing issues, you can try running the network adapter Troubleshooter. Simply go to the Control Panel, search for “Troubleshooting,” and select “Network and Internet.” Then, click on “Network Adapter” and follow the on-screen instructions.
Remember, a clean Ethernet port can greatly improve your internet connection and resolve any connectivity issues you may be facing.
Power cycling the computer
If you’re experiencing issues with your computer, power cycling can often be a simple and effective solution. This process involves turning off your computer completely and then turning it back on. Here’s how to do it:
1. Save any open files or documents and close all programs.
2. Click on the Start menu and select “Shut Down” or “Restart.”
3. Wait for the computer to fully shut down. This may take a few moments.
4. Once the computer is off, unplug the power cord from the back of the computer. If you’re using a laptop, remove the battery as well.
5. Leave the computer unplugged for at least 30 seconds.
6. After the 30 seconds have passed, plug the power cord (or reinsert the battery) back into the computer.
7. Turn on the computer by pressing the power button. Wait for it to fully boot up.
Power cycling can help resolve a variety of issues, such as network adapter driver problems, internet connection errors, blue screen errors, and more. Give it a try before attempting any other fixes.
Reinstalling the network adapter driver
To reinstall the network adapter driver, follow these steps:
1. Press the Windows key + R to open the Run dialog box.
2. Type “devmgmt.msc” and press Enter to open the Device Manager.
3. Expand the Network adapters category and locate your network adapter.
4. Right-click on the network adapter and select Uninstall device.
5. In the confirmation dialog box, check the box that says “Delete the driver software for this device” and click Uninstall.
6. Once the driver is uninstalled, restart your computer.
7. After the restart, Windows will automatically reinstall the network adapter driver.
8. If the driver is not automatically installed, you can manually install it by going to the manufacturer’s website and downloading the latest driver for your network adapter.
9. Install the downloaded driver and restart your computer again.
If you are still experiencing internet issues after reinstalling the network adapter driver, it may indicate a hardware problem. In this case, consider seeking professional assistance or contacting your network adapter manufacturer for further support.

Mark Ginter is a tech blogger with a passion for all things gadgets and gizmos. A self-proclaimed "geek", Mark has been blogging about technology for over 15 years. His blog, techquack.com, covers a wide range of topics including new product releases, industry news, and tips and tricks for getting the most out of your devices. If you're looking for someone who can keep you up-to-date with all the latest tech news and developments, then be sure to follow him over at Microsoft.