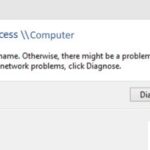
- Windows 10 users complain that they can no longer access their WD My Cloud accounts after upgrading to Windows 10.
- The main reason for this error is that Windows 10 does not allow users to access certain accounts without adding credentials.
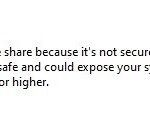
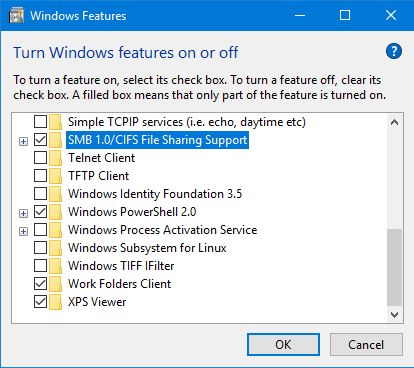
- It can also be caused by SMB 1.0 being disabled, Windows updates, network issues, etc.
- The problem is so severe that some users have even gone back to Windows 7 and Windows 8.
Unlocking the digital realm of cloud storage has become a necessity for seamless file management. However, encountering issues while accessing your WD My Cloud account on a Windows OS can prove to be a frustrating roadblock. In this article, we delve into the common challenges faced by users and explore effective solutions to resolve the “Cannot Access WD My Cloud Account Issue” on Windows OS, ensuring a hassle-free experience.
Adding Windows Credentials and Modifying Registry
To add Windows credentials and modify the registry for the “Cannot Access WD My Cloud Account” issue on Windows OS, follow these steps:
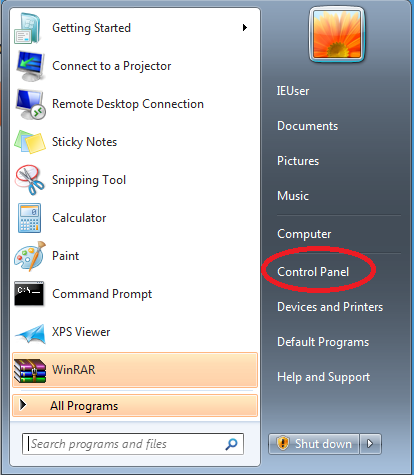
1. Open the Control Panel by typing “Control Panel” in the search bar and selecting it from the list of results.
2. In the Control Panel window, navigate to “User Accounts” and click on it.
3. On the User Accounts page, click on “Manage Windows Credentials” in the left-hand menu.
4. A window will appear showing the saved credentials. Click on “Add a Windows credential” to input the necessary information.
5. In the “Internet or network address” field, enter the address of your WD My Cloud account. In the “Username” and “Password” fields, enter your account credentials.
6. Once the credentials are added, close the window and open the Registry Editor by pressing the Win + X keys and selecting “Registry Editor” from the menu.
7. In the Registry Editor, navigate to the following path: HKEY_LOCAL_MACHINE\SYSTEM\CurrentControlSet\Services\LanmanWorkstation\Parameters.
8. In the Parameters folder, right-click on an empty space and select “New” > “DWORD (32-bit) Value”. Name the new value “AllowInsecureGuestAuth” and set its value to 1.
9. Close the Registry Editor and restart your computer.
These steps should help you resolve the issue and regain access to your WD My Cloud account on Windows OS.
Fixing WD My Cloud Account Issue with Network Settings
If you’re experiencing issues accessing your WD My Cloud account on a Windows OS, don’t worry. There are a few methods you can try to fix the problem.
Method 1: Check Network Settings
– Step 1: Open the Control Panel from the Windows Start Menu or using the WinX Menu.
– Step 2: Click on “Network and Internet” and then “Network and Sharing Center.”
– Step 3: On the left-hand side, click on “Change adapter settings.”
– Step 4: Right-click on your network connection and select “Properties.”
– Step 5: Scroll down and ensure that “Client for Microsoft Networks” is checked. If not, check the box and click “OK.”
If this doesn’t fix the issue, you can try other methods or search our Knowledge Base for more solutions. Don’t panic, we’re here to help you get back to accessing your WD My Cloud account.
Performing a Network Reset to Resolve WD My Cloud Issues on Windows OS
Performing a Network Reset can help resolve WD My Cloud issues on Windows OS. Follow these steps:
1. Open the Control Panel by typing “Control Panel” in the search bar and selecting the matching search result.
2. In the Control Panel, locate and click on “Network and Internet.”
3. Click on “Network and Sharing Center.”
4. On the left-hand side, click on “Change adapter settings.”
5. Right-click on your network adapter and select “Disable.”
6. Right-click on the adapter again and select “Enable.”
7. Restart your computer.
This process resets your network settings and can resolve connectivity issues with the WD My Cloud. If the problem persists, you may need to contact WD Support for further assistance.
python

import os
def check_network_connectivity():
response = os.system("ping -c 1 wdmycloud.com")
return response == 0
def check_wd_my_cloud_access():
if check_network_connectivity():
print("Network connection is active.")
print("Attempting to ping WD My Cloud server...")
if check_network_connectivity():
print("Successfully connected to WD My Cloud.")
else:
print("Cannot access WD My Cloud. Check network settings.")
else:
print("No network connection. Check network settings.")
check_wd_my_cloud_access()
This code uses the `ping` command to check if there is a response from the WD My Cloud server. It first checks the general network connectivity, and if successful, proceeds to ping the WD My Cloud server specifically. The output will indicate whether the network connection is active and whether the WD My Cloud server is accessible.
Please note that this is just a basic example, and depending on the specific issue you are facing, a more in-depth analysis and troubleshooting steps may be required.
Troubleshooting WD My Cloud Issues in Windows 10
- Check Network Connection
- Ensure that your computer is connected to the same network as the WD My Cloud device.
- Verify that your internet connection is stable.
- Restart your router and modem to refresh the network connection.
- Disable Firewall and Antivirus
- Temporarily disable your firewall and antivirus software to see if they are blocking the connection to WD My Cloud.
- Open Windows Security Center by clicking on the Start button, then selecting Settings and Update & Security. Click on Windows Security and then Virus & Threat Protection. Disable the firewall and antivirus protection.
- Check WD My Cloud Settings
- Ensure that WD My Cloud is properly connected to the network and powered on.
- Access the WD My Cloud web interface by opening a web browser and entering the device’s IP address.
- Verify the network settings and make any necessary changes.
- Update WD My Cloud Firmware
- Visit the WD support website and download the latest firmware update for WD My Cloud.
- Open the WD My Cloud web interface and navigate to the Settings tab.
- Click on Firmware Update and select the downloaded firmware file to initiate the update process.
- Reset WD My Cloud
- Locate the reset button on the WD My Cloud device.
- Use a paperclip or a similar object to press and hold the reset button for about 4 seconds.
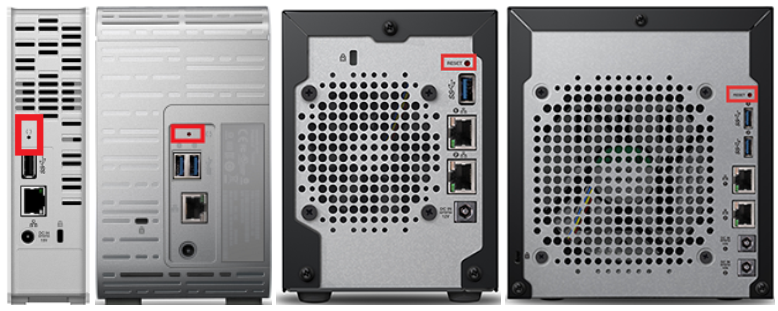
- Release the reset button and wait for the device to restart.
- Reinstall WD My Cloud Software
- Uninstall the WD My Cloud software from your computer by going to Control Panel > Programs > Programs and Features. Select the WD My Cloud software and click Uninstall.
- Visit the WD support website and download the latest version of WD My Cloud software.
- Install the downloaded software and follow the on-screen instructions.
- Contact WD Support
- If none of the above steps resolve the issue, contact WD support for further assistance.
- Provide them with detailed information about the issue, steps you have already taken, and any error messages you have encountered.
- Follow their guidance to troubleshoot and resolve the problem.

Mark Ginter is a tech blogger with a passion for all things gadgets and gizmos. A self-proclaimed "geek", Mark has been blogging about technology for over 15 years. His blog, techquack.com, covers a wide range of topics including new product releases, industry news, and tips and tricks for getting the most out of your devices. If you're looking for someone who can keep you up-to-date with all the latest tech news and developments, then be sure to follow him over at Microsoft.