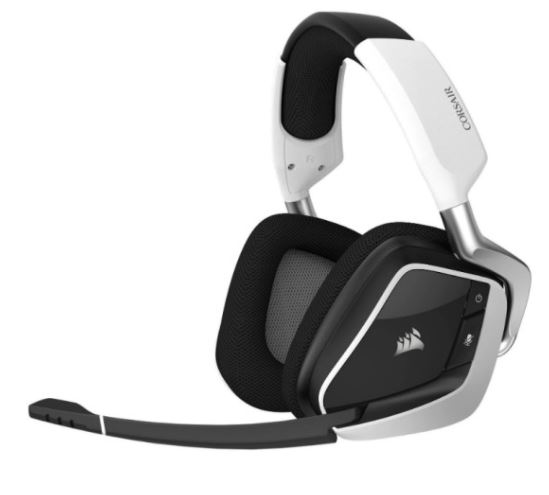
- There has been a lot of discussions lately about the problem of the Corsair Void Microphone malfunctioning.
- In this article, Techquack analyzes this problem in more detail and offers solutions to fix it.
- To solve this problem, you need to find the cause of the “Corsair headset mic not working” error.
- It’s also possible that the microphone works on other platforms, but not on the desktop version of Discordance.com.
Unveiling the Silence: Troubleshooting the Corsair Void Microphone on Windows
Troubleshooting Corsair Void Microphone Issues
If you’re experiencing microphone issues with your Corsair Void headset on Windows, here are some troubleshooting solutions to help you resolve the problem.
Step 1: Open Sound Settings
– Go to the Start menu, then click on Settings.
– Select System, then click on Sound.
– Under the Input section, make sure your Corsair Void headset is selected as the default sound recording device.
Step 2: Check Audio Driver and Cable Connection
– Ensure that your audio driver is up to date. You can do this by visiting the manufacturer’s website and downloading the latest driver.
– Make sure the microphone cable is securely connected to both the headset and your computer.
Step 3: Adjust Microphone Volume
– Open the Sound settings again and click on the Device properties link.
– Adjust the microphone volume to an appropriate level.
If these steps don’t work, you can try reaching out to Corsair support or seeking assistance from online forums. Remember to provide specific details about your issue, such as the Corsair Void model and your operating system (e.g., Windows 10), to receive accurate help.
Modifying Audio Settings and Troubleshooting Hardware
To resolve the issue of Corsair Void microphone not working on Windows, follow these troubleshooting steps:
Step 1: Open Sound Settings.
– Click on the Start menu and search for “Sound Settings”.
– Open the Sound Settings window.
Step 2: Select the correct sound recording device.
– Under the “Input” section, check if the correct microphone is selected as the default device.
– If not, click on the drop-down menu and select the Corsair Void headset microphone.
Step 3: Check the microphone volume.
– Increase the microphone volume to an appropriate level to ensure it is not muted or too low.
– Adjust the volume slider accordingly.
Step 4: Update Corsair iCUE software.
– Visit the Corsair website and download the latest version of the iCUE software.
– Install the software and restart your PC.
Step 5: Troubleshoot hardware issues.
– Make sure the Corsair Void headset is properly connected to your PC.
– Check for any loose connections or damage to the headset.
If these steps do not resolve the issue, it is recommended to reach out to Corsair support or refer to online forums for further assistance.
Updating Audio Driver and Troubleshooting Microphone Errors
To resolve microphone issues with the Corsair Void headset on Windows 10, you may need to update your audio driver and troubleshoot any errors. Here are some steps to help you:
1. Update Audio Driver: Go to the manufacturer’s website or use a reliable driver updater tool to download and install the latest audio driver for your system.
2. Troubleshoot Microphone Errors:
– Check Hardware Connections: Ensure your microphone is properly connected to your computer.
– Adjust Microphone Settings: Right-click the speaker icon in the taskbar, select “Sounds,” go to the “Recording” tab, and make sure the microphone is enabled and set as the default device.
– Test Microphone: Use the Windows Voice Recorder app or an online microphone test to check if your microphone is working.
– Check App Settings: If the microphone works in some apps but not others (e.g., Discord), check the app’s audio settings and make sure the correct microphone is selected.
For more detailed troubleshooting solutions, you can refer to the Corsair support page or reach out to their customer support team.
python

# Sample code to troubleshoot microphone issues
import pyaudio
def list_microphone_devices():
p = pyaudio.PyAudio()
num_devices = p.get_device_count()
print("Available microphone devices:")
for i in range(num_devices):
device_info = p.get_device_info_by_index(i)
if 'microphone' in device_info['name'].lower():
print(f"Device {i}: {device_info['name']}")
p.terminate()
def test_microphone(device_index):
p = pyaudio.PyAudio()
device_info = p.get_device_info_by_index(device_index)
print(f"Testing microphone: {device_info['name']}")
try:
stream = p.open(format=pyaudio.paInt16,
channels=1,
rate=44100,
input=True,
frames_per_buffer=1024,
input_device_index=device_index)
print("Listening...")
while True:
data = stream.read(1024)
# Process or analyze the recorded audio data
except Exception as e:
print(f"Error occurred: {e}")
stream.stop_stream()
stream.close()
p.terminate()
# Usage example:
list_microphone_devices()
test_microphone(0) # Replace 0 with the appropriate device index
Note: The provided code is a basic example and may not specifically address the Corsair Void microphone. It demonstrates how to list available microphone devices and test a selected device using the `pyaudio` library in Python.
Setting Corsair Void Headset as the Default Recording Device
To set your Corsair Void headset as the default recording device, follow these steps:
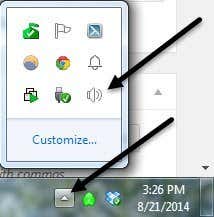
1. Right-click on the volume icon in the system tray and select “Sounds” from the context menu.
2. In the Sounds window, go to the “Recording” tab.
3. Find your Corsair Void headset in the list of recording devices. It might be labeled as “Corsair Void RGB” or similar.
4. Right-click on your Corsair Void headset and select “Set as Default Device” from the context menu.
5. If you’re using a laptop, make sure to also set the Corsair Void headset as the default communication device.
6. Click on “Apply” and then “OK” to save the changes.
By following these steps, you should be able to resolve the issue of your Corsair Void microphone not working on Windows. If the problem persists, try checking for driver updates, adjusting mic volume levels, or contacting Corsair support for further assistance.
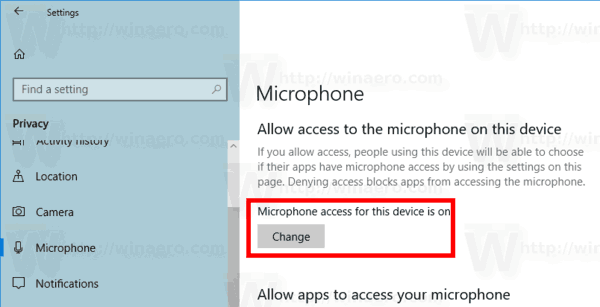
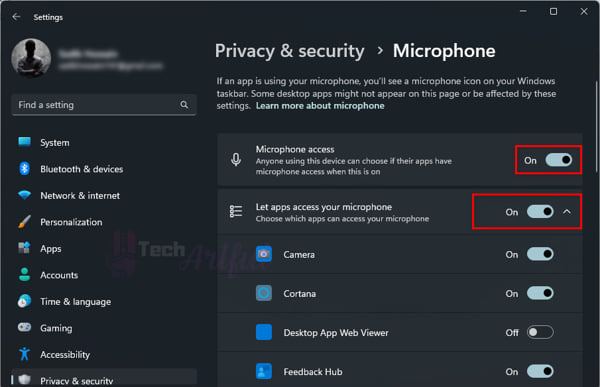
Allowing App Access and Changing Microphone Format for Corsair Void Mic
- Open the Windows Start menu by clicking on the Windows icon in the bottom left corner of the screen.
- Type “Microphone privacy settings” in the search bar and press Enter.
- In the Microphone settings window, locate the “Allow apps to access your microphone” section.
- Make sure the toggle switch under this section is turned on to allow apps to access your microphone.
- Scroll down to the “Choose which apps can access your microphone” section.
- Ensure that the toggle switch next to the app you want to use with your Corsair Void microphone is turned on.
Changing Microphone Format
- Right-click on the speaker icon located in the system tray at the bottom right corner of the screen.
- Select “Sounds” from the context menu that appears.
- In the Sound window, go to the “Recording” tab.
- Locate your Corsair Void microphone in the list of recording devices.
- Click on the Corsair Void microphone to select it.
- Click on the “Properties” button below the list of recording devices.
- In the Microphone Properties window, go to the “Advanced” tab.
- Under the “Default Format” section, select a different format from the drop-down menu.
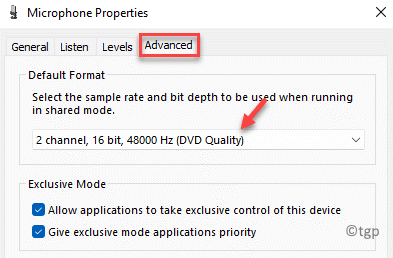
- Click “Apply” and then “OK” to save the changes.

Mark Ginter is a tech blogger with a passion for all things gadgets and gizmos. A self-proclaimed "geek", Mark has been blogging about technology for over 15 years. His blog, techquack.com, covers a wide range of topics including new product releases, industry news, and tips and tricks for getting the most out of your devices. If you're looking for someone who can keep you up-to-date with all the latest tech news and developments, then be sure to follow him over at Microsoft.