- Updated November 2022: This tool will stop these errors and fix common problems: Get it at this link.
- It will scan your computer to find problems and correct the issues that were discovered.
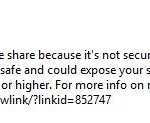
- The SMBv1 protocol is a very deprecated protocol.
- It is notorious for allowing many ransomware programs to access the system.
- After the Wannacry ransomware attack, users were prompted to disable it.
- Microsoft eventually disabled it by default on all systems.
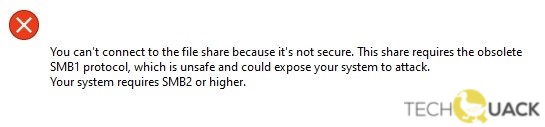
Unlocking the seamless sharing experience on Windows 10, this article delves into the ingenious ways to tackle the hurdles posed by the outdated SMB1 protocol.
Resolving the Obsolete SMB1 Protocol Issue
To resolve the “Share Requires Obsolete SMB1 Protocol” issue in Windows 10, follow these steps:
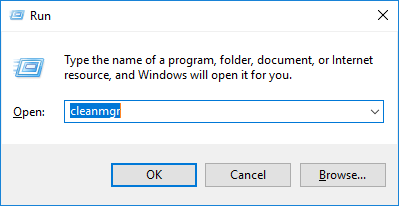
1. Press the Windows key + R to open the Run dialog box.
2. Type “services.msc” and hit Enter.
3. In the Services window, scroll down and locate “Server” in the list.
4. Right-click on “Server” and select “Properties.”
5. In the Properties window, go to the “General” tab and change the “Startup type” to “Automatic.”
6. Click on “Apply” and then “OK” to save the changes.
7. Close the Services window.
8. Press the Windows key + X and select “Command Prompt (Admin).”
9. In the Command Prompt window, type “sc.exe config lanmanworkstation depend= bowser/mrxsmb20/nsi” and hit Enter.
10. Restart your computer.
Enabling and Updating the SMBv1/SMBv2 Protocols
To enable and update the SMBv1/SMBv2 protocols in Windows 10, follow these steps:
1. Open the Run dialog box by pressing Windows key + R and type “services.msc” to open the Services console.
2. Scroll down and find the “Server” service, right-click on it and select “Properties”.
3. In the “Properties” window, go to the “General” tab and change the “Startup type” to “Automatic”.
4. Click on the “Apply” button and then click “OK”.
5. Next, locate the “Workstation” service, right-click on it and select “Properties”.
6. In the “Properties” window, go to the “General” tab and change the “Startup type” to “Automatic”.
7. Click on the “Apply” button and then click “OK”.
8. Restart your computer for the changes to take effect.
You have now enabled and updated the SMB protocols on your Windows 10 PC, resolving the “Share Requires Obsolete SMB1 Protocol” issue. Remember to keep your OS, router, and other network devices up to date to ensure a secure and efficient network connection. If you encounter any further issues, consult Microsoft’s support resources or seek assistance from your IT department.
Troubleshooting File Share Connection Problems
-
Verify network connectivity
- Check if the computer is connected to the network.
- Ensure the network cables are properly plugged in.
- Restart the router or modem if necessary.
-
Confirm SMB1 Protocol is enabled
- Press Windows Key + R to open the Run dialog box.
- Type appwiz.cpl and press Enter.
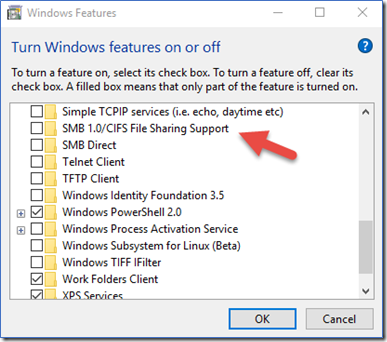
- Click on Turn Windows features on or off.
- Scroll down and locate SMB 1.0/CIFS File Sharing Support.

- Ensure the checkbox next to it is checked, then click OK.
- Follow any prompts to install the feature if necessary.
-
Disable SMB1 Protocol and enable SMB2 or SMB3
- Press Windows Key + R to open the Run dialog box.
- Type regedit and press Enter to open the Registry Editor.
- Navigate to HKEY_LOCAL_MACHINE\SYSTEM\CurrentControlSet\Services\LanmanServer\Parameters.
- Look for the SMB1 key and double-click on it.
- Change the value to 0 to disable SMB1 Protocol.
- Create a new DWORD value named SMB2 and set its value to 1 to enable SMB2 Protocol.
- Restart the computer for the changes to take effect.
-
Check firewall settings
- Open Windows Security by clicking on the Windows Start button and selecting Settings > Update & Security > Windows Security.
- Click on Firewall & network protection.
- Ensure that the Private and Public network settings have Network discovery and File and printer sharing enabled.
-
Restart the File Sharing service
- Press Windows Key + R to open the Run dialog box.
- Type services.msc and press Enter to open the Services window.
- Scroll down and locate the Server service.
- Right-click on it and select Restart.
powershell

# Disable SMB1 protocol

Set-SmbServerConfiguration -EnableSMB1Protocol $false

Set-SmbClientConfiguration -EnableSMB1Protocol $false
# Enable SMB2 and SMB3 protocols
Set-ItemProperty -Path "HKLM:\SYSTEM\CurrentControlSet\Services\LanmanServer\Parameters" SMB1 -Type DWORD -Value 0
Set-ItemProperty -Path "HKLM:\SYSTEM\CurrentControlSet\Services\LanmanServer\Parameters" SMB2 -Type DWORD -Value 1
Set-ItemProperty -Path "HKLM:\SYSTEM\CurrentControlSet\Services\LanmanServer\Parameters" SMB3 -Type DWORD -Value 1
# Restart the computer for changes to take effect
Restart-Computer
This code disables the SMB1 protocol and enables the newer SMB2 and SMB3 protocols. After running this code and restarting your Windows 10 machine, the issue related to the obsolete SMB1 protocol should be resolved.
Please keep in mind that modifying registry settings and restarting your computer can have significant effects on your system. Ensure you have a backup and understand the potential implications before making any changes.
Fixing the Missing SMBv1 Protocol Error in Windows 10
To fix the “Share Requires Obsolete SMB1 Protocol” error in Windows 10, follow these steps:
1. Press the Windows key + R to open the Run dialog box.
2. Type “optionalfeatures” and press Enter to open the Windows Features window.
3. Scroll down and locate “SMB 1.0/CIFS File Sharing Support” in the list.
4. Uncheck the box next to it and click OK.
5. Restart your PC to apply the changes.
After the restart, your Windows 10 system will no longer use the SMBv1 protocol for file sharing. This helps improve security and prevents potential vulnerabilities. However, keep in mind that some older devices or network applications may still rely on SMBv1. If you encounter any issues accessing file shares or network resources, you may need to update the firmware or software on those devices.

Mark Ginter is a tech blogger with a passion for all things gadgets and gizmos. A self-proclaimed "geek", Mark has been blogging about technology for over 15 years. His blog, techquack.com, covers a wide range of topics including new product releases, industry news, and tips and tricks for getting the most out of your devices. If you're looking for someone who can keep you up-to-date with all the latest tech news and developments, then be sure to follow him over at Microsoft.