- Error code 0x80190001 is one of the most common errors you encounter while working with Microsoft Office applications.
- This error occurs because of corrupt Windows registry files.
- You can fix this issue manually by deleting the corrupted registry entries.
- In case you don’t want to delete the entire registry, we recommend you use third-party software.
- If you are experiencing issues while installing Windows 10, check out our troubleshooting guide to troubleshoot your computer troubleshooting tool.
Unlock the Secrets: Resolving the Windows Update Error Code 0x80190001
Causes and Solutions for Error Code 0x80190001
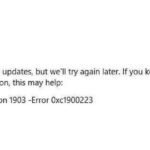
Error code 0x80190001 can occur during the Windows Update process, preventing updates from being installed. This error is often caused by a configuration issue or a problem with the Windows Update service. To fix this error, follow these steps:
1. Run the Windows Update Troubleshooter tool to automatically identify and fix common Windows Update problems.
2. Check your internet connection and ensure it is stable. A weak or unstable connection can cause update errors.
3. Clear the Windows Update cache to remove any corrupt update files that may be causing the error.
4. Disable any firewall or antivirus software temporarily, as they may be blocking the update process.
5. Update your device drivers to ensure compatibility with the latest Windows updates.
6. If the issue persists, try using a third-party software like MiniTool Partition Wizard to repair any corrupted system partitions.
Following these steps should help resolve error code 0x80190001 and allow you to successfully update your Windows system.
Troubleshooting Windows Update Error 0x80190001
If you’re encountering Windows Update Error 0x80190001, here are some solutions to help you fix it.
Method 1: Run Windows Update Troubleshooter
1. Press Windows Key + I to open Settings.
2. Go to Update & Security > Troubleshoot.
3. Select Windows Update and click on Run the troubleshooter.
4. Follow the on-screen instructions to complete the troubleshooting process.
Method 2: Use MiniTool Partition Wizard
1. Download and install MiniTool Partition Wizard.
2. Launch the tool and select your system partition.
3. Click on Check File System and select “Check & fix detected errors”.
4. Wait for the process to complete and restart your computer.
Remember to always back up your important data before making any changes to your system. These methods should help you resolve the Windows Update Error 0x80190001 and ensure a smooth update process.
Run Update Troubleshooter
To fix Windows Update Error Code 0x80190001, you can run the Update Troubleshooter. This built-in tool can help identify and resolve common update issues on your Windows device. Here’s how:
1. Press the Windows key + I to open Settings.
2. Click on “Update & Security.”
3. In the left pane, select “Troubleshoot.”
4. Scroll down and click on “Additional troubleshooters.”
5. Under “Get up and running,” select “Windows Update.”
6. Click on “Run the troubleshooter.”
The troubleshooter will then scan your device for any update-related problems and provide potential solutions. Follow the on-screen instructions to complete the troubleshooting process.
If the troubleshooter doesn’t resolve the issue, you may need to try other methods like manually resetting the Windows Update components or using the Windows Update Assistant. Remember to always keep your device up to date to ensure optimal performance and security.
Check Date and Time Settings
1. Incorrect date and time settings can cause Windows Update Error Code 0x80190001. Make sure your computer’s date and time are accurate.
To check date and time settings:
– Open the Start menu and search for “Date and Time settings.”
– Click on the “Date and Time settings” option.
– Ensure that the “Set time automatically” and “Set time zone automatically” options are turned on.
– If they are already on, turn them off and on again to refresh the settings.
2. If the error persists, try manually setting the date and time:
– In the “Date and Time settings” window, turn off the “Set time automatically” and “Set time zone automatically” options.
– Click on the “Change” button under the “Change date and time” section.
– Adjust the date and time to the correct values and click on “Change.”
3. After adjusting the date and time settings, restart your PC and check if the error is resolved.
Disable Antivirus During Setup
To fix Windows Update Error Code 0x80190001, you may need to disable your antivirus software during the setup process. Antivirus programs can sometimes interfere with the installation of updates, causing errors to occur. Here’s how you can disable your antivirus:
1. Right-click on the antivirus icon in your system tray and select “Disable” or “Turn Off” from the context menu.
2. If prompted, choose the option to disable the antivirus temporarily.
3. Open the Windows Update settings by searching for “Windows Update” in the Start menu and selecting it from the results.
4. Click on “Check for updates” to initiate the update process.
5. If the error code 0x80190001 persists, try running the Windows Update troubleshooter to automatically detect and fix any issues.
Remember to re-enable your antivirus software after the update is complete to ensure your PC stays protected.
Delete Junk Files with Disk Cleanup
To fix Windows Update Error Code 0x80190001, you can use Disk Cleanup to delete unnecessary files on your computer. Follow these steps:
1. Press the Windows key + R to open the Run dialog box.
2. Type “cleanmgr” and press Enter to open Disk Cleanup.
3. Select the drive you want to clean up and click OK.
4. Disk Cleanup will analyze the drive and present a list of files to delete.
5. Check the boxes next to the types of files you want to delete, such as temporary files and recycle bin contents.
6. Click OK to delete the selected files.
Deleting junk files can free up space on your computer and potentially resolve Windows Update errors.
Repair System Files and Extend System Reserved Partition
To fix Windows Update Error Code 0x80190001, you may need to repair system files and extend the system reserved partition. Follow these steps:
Repair System Files:
1. Open the Command Prompt as an administrator.
2. Type “sfc /scannow” and press Enter.
3. Wait for the scan to complete and fix any corrupted system files.
Extend System Reserved Partition:
1. Press Win + X and select “Disk Management.”
2. Right-click on the System Reserved partition and select “Extend Volume.”
3. Follow the on-screen instructions to extend the partition.
By repairing system files and extending the system reserved partition, you can resolve issues causing Error Code 0x80190001 during Windows Update. Remember to restart your computer after completing these steps. If the issue persists, consider seeking further assistance from Microsoft Support or their partners.

Mark Ginter is a tech blogger with a passion for all things gadgets and gizmos. A self-proclaimed "geek", Mark has been blogging about technology for over 15 years. His blog, techquack.com, covers a wide range of topics including new product releases, industry news, and tips and tricks for getting the most out of your devices. If you're looking for someone who can keep you up-to-date with all the latest tech news and developments, then be sure to follow him over at Microsoft.