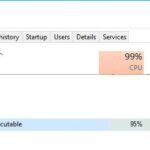
- Sysmain is a memory optimization service that runs in the background on Windows 10.
- It analyzes your computer’s behavior on your hard drive and determines which files and applications you use most often.
- When analyzing program usage patterns, SysMain sometimes exaggerates and overloads the hard disk.
- In some cases, the computer becomes virtually unusable within 10-15 minutes of starting because it is trying to load too many programs at once.
Introducing a Simple Fix for SysMain High Disk Usage in Windows PC
What is Service Host SysMain (Superfetch)?
Service Host SysMain, also known as Superfetch, is a Windows system process that helps improve system performance by preloading frequently used programs into memory. However, sometimes it can cause high disk usage, leading to slow performance. To solve this issue, follow these steps:
1. Open Task Manager by pressing Ctrl+Shift+Esc.
2. Click on the “Processes” tab and locate “Service Host: SysMain” or “Superfetch”.
3. Right-click on it and select “End Task” to temporarily stop the process.
4. If the problem persists, you can disable SysMain permanently. Open the Registry Editor by pressing Windows+R, type “regedit”, and hit Enter.
5. Navigate to “HKEY_LOCAL_MACHINE\SYSTEM\CurrentControlSet\Services\SysMain”.
6. Double-click on “Start” and change the value to “4” to disable SysMain.
7. Restart your PC to apply the changes.
Why is SysMain Using So Much Disk CPU Memory?
If you’re experiencing high disk usage from SysMain on your Windows PC, there are a few steps you can take to resolve the issue.
First, open the Task Manager by pressing Ctrl + Shift + Esc. Look for SysMain or Service Host: SysMain in the list of processes. If it’s using a high percentage of CPU or memory, that could be the cause of the problem.
To fix this, you can disable SysMain or Superfetch. Open the Run dialog by pressing Windows + R, then type “services.msc” and press Enter. In the Services window, scroll down to find SysMain or Superfetch. Right-click on it and select “Properties.” Change the Startup type to “Disabled” and click “OK.”
Another method is to use the Registry Editor. Press Windows + R, type “regedit,” and press Enter. In the Registry Editor, navigate to “HKEY_LOCAL_MACHINE\SYSTEM\CurrentControlSet\Control\Session Manager\Memory Management\PrefetchParameters.” Look for “EnableSuperfetch” and double-click on it. Change the value to 0 and click “OK.”
These steps should help reduce the high disk usage caused by SysMain and improve your system performance.
How to Fix Service Host SysMain High Disk Usage
To fix Service Host SysMain high disk usage in Windows PC, follow these steps:
1. Open the Run dialog box by pressing Windows Key + R.
2. Type “services.msc” and press Enter to open the Services window.
3. Scroll down and find “SysMain” or “Superfetch” in the list of services.
4. Right-click on it and select “Properties.”
5. In the Properties window, go to the “General” tab.
6. Change the startup type to “Disabled” and click “OK.”
7. Restart your computer for the changes to take effect.
This will disable the SysMain service and reduce disk usage. However, keep in mind that this might affect the overall performance of your system, especially if you have a low amount of RAM. If you experience any issues, you can always revert the changes by following the same steps and setting the startup type back to “Automatic.”
powershell

# Run PowerShell as administrator and execute the following commands
# Stop SysMain service
Stop-Service -Name SysMain
# Disable SysMain service
Set-Service -Name SysMain -StartupType Disabled
# Confirm the status of SysMain service
Get-Service -Name SysMain
Executing the above code will stop the SysMain service (if it is running) and disable it from starting automatically in the future. This might help alleviate high disk usage caused by SysMain. However, please note that this solution may not be suitable for every scenario, and it is crucial to understand the potential impacts before making any changes to system services.
Disable SysMain from Services
To solve high disk usage caused by SysMain in Windows PC, you can disable it from Services. Follow these steps:
1. Press Windows key + R to open the Run dialog box.
2. Type “services.msc” and hit Enter to open the Services window.
3. Scroll down and locate “SysMain” in the list.
4. Right-click on “SysMain” and select “Properties”.
5. In the General tab, change the Startup type to “Disabled”.
6. Click on “Apply” and then “OK” to save the changes.
Disabling SysMain can help reduce high disk usage and improve your PC’s performance. It’s important to note that disabling SysMain may impact the overall system performance. If you experience any issues, you can enable it again using the same steps.
Disable SysMain Using Registry Editor
To disable SysMain using Registry Editor, follow these steps:
1. Press the Windows key + R to open the Run dialog box.
2. Type “regedit” and press Enter to open the Registry Editor.
3. Navigate to the following path: HKEY_LOCAL_MACHINE\SYSTEM\CurrentControlSet\Services\SysMain.
4. Double-click on the “Start” DWORD value on the right pane.
5. Change the value data from “3” to “4” and click OK.
6. Close the Registry Editor and restart your computer.
Disabling SysMain can help resolve high disk usage issues on your Windows PC. SysMain, also known as Superfetch, is a Windows service that preloads frequently used programs into RAM to improve load times. However, in some cases, it can cause high disk usage and impact system performance. By disabling it, you can potentially alleviate these issues. Keep in mind that this method applies to Windows 10 and may vary slightly for other versions.
Note: Modifying the Registry can have unintended consequences, so it’s recommended to create a backup before making any changes.
Modify SysMain via Command Line
To modify SysMain via Command Line and solve high disk usage in Windows PC, follow these steps:
1. Open Command Prompt as an administrator by pressing Windows Key + X and selecting “Command Prompt (Admin).”
2. In the Command Prompt window, type “net.exe stop sysmain” and press Enter. This will stop the SysMain service.
3. If you want to disable SysMain permanently, type “sc.exe config sysmain start=disabled” and press Enter. This will prevent SysMain from starting automatically.
4. To enable SysMain again, type “sc.exe config sysmain start=auto” and press Enter. This will allow SysMain to start automatically.
5. Restart your computer to apply the changes.
By modifying SysMain via Command Line, you can effectively resolve high disk usage issues on your Windows PC. Remember to use these commands carefully, as they can impact system processes and overall performance.
Update Device Drivers
To update device drivers on your Windows PC and solve the SysMain high disk usage issue, follow these steps:
1. Press the Windows key + X and select “Device Manager” from the menu.
2. Expand the categories and locate the device drivers you want to update.
3. Right-click on the driver and select “Update driver” from the context menu.
4. Choose the option to automatically search for updated driver software.
5. If a newer version is found, follow the on-screen instructions to install it.
Updating device drivers can help resolve performance issues and improve overall system stability. Make sure to keep your drivers up to date for optimal performance.
Remember to periodically check for driver updates from the manufacturer’s website as well.
By updating your device drivers, you can ensure compatibility with the latest Windows 10 version and enhance your PC’s performance.
Run System File Checker (SFC)
1. Press the Windows key + X and select “Command Prompt (Admin)”.
2. Type “sfc /scannow” and press Enter.
3. Wait for the scan to complete and follow any prompts given.
4. Restart your PC.
SFC will scan and repair any corrupted system files that may be causing the high disk usage. This can help resolve performance issues and improve load times.
If the problem persists, consider disabling Superfetch, a Windows service that can sometimes contribute to high CPU and disk usage. To disable Superfetch, open the Command Prompt (Admin), type “net.exe stop superfetch“, and press Enter.
Remember to regularly check for updates and keep your PC’s software and hardware up to date to ensure optimal performance.
Is Service Host SysMain Safe to Disable?
Service Host SysMain, also known as Superfetch, is a system process in Windows that helps improve the performance of your PC by preloading frequently used applications into memory. However, in some cases, it can cause high disk usage on your computer, which can affect its overall speed and performance.
If you’re experiencing high disk usage due to SysMain, you may be wondering if it’s safe to disable it. The answer is yes, it is generally safe to disable SysMain if you’re facing these issues. Disabling SysMain will stop the process from running and reduce the strain on your disk.
To disable SysMain, follow these steps:
1. Press Windows key + R to open the Run dialog box.
2. Type services.msc and press Enter.
3. In the Services window, scroll down and locate the SysMain service.
4. Right-click on it and select Properties.
5. In the Properties window, change the Startup type to Disabled.
6. Click Apply and then OK.
Note that disabling SysMain may slightly impact the startup time of your frequently used applications, as they won’t be preloaded into memory. However, if you’re facing high disk usage issues, disabling SysMain can help resolve them.
Remember, if you’re unsure about making changes to your system processes, it’s always a good idea to consult with a professional or seek guidance from a tech expert.
Mark Ginter is a tech blogger with a passion for all things gadgets and gizmos. A self-proclaimed "geek", Mark has been blogging about technology for over 15 years. His blog, techquack.com, covers a wide range of topics including new product releases, industry news, and tips and tricks for getting the most out of your devices. If you're looking for someone who can keep you up-to-date with all the latest tech news and developments, then be sure to follow him over at Microsoft.


