- Some Windows 10 users complain about problems connecting to the Internet on their computer.
- They notice the error “IPv6 connection: no access to network” in the network properties.
- If you encounter the same problem on your computer, follow the solutions suggested in this article and the problem will be solved in no time.
- In most cases, a precise troubleshooting step will identify the cause and solve the problem.
Connecting to the internet has become an essential part of our lives, but what happens when you encounter the IPv6 No Internet Access error? In this article, we will delve into the depths of this issue and provide you with practical solutions to fix it, ensuring a seamless online experience.
Causes of IPv6 No Network Access Errors
If you are experiencing IPv6 No Network Access errors, there are several possible causes to consider.
One common cause is incorrect network settings. To fix this, you can try resetting your network adapter by following these steps:
1. Press the Windows key + R to open the Run dialog box.
2. Type “ncpa.cpl” and press Enter to open the Network Connections window.
3. Right-click on your network adapter and select “Disable”. Wait a few seconds, then right-click again and select “Enable”.
Another possible cause is outdated or incompatible network drivers. To fix this, you can update your networking drivers by following these steps:
1. Press the Windows key + X and select “Device Manager”.
2. Expand the “Network adapters” category.
3. Right-click on your network adapter and select “Update driver”.
4. Follow the on-screen instructions to complete the driver update.
If these troubleshooting steps do not resolve the issue, there may be other factors at play. It is recommended to consult the Windows support page or contact your network administrator for further assistance.
Forget and Reconnect to Your Wireless Network
If you’re experiencing the IPv6 No Internet Access error, here’s a quick and easy way to fix it. Follow these steps:
1. Open the command prompt on your computer. To do this, press the Windows key + R, type “cmd”, and press Enter.
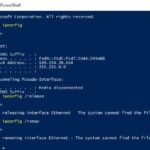
2. In the command prompt, type “ipconfig /release” and press Enter. This will release your current IP address.
3. Next, type “ipconfig /renew” and press Enter. This will renew your IP address and establish a new connection with your wireless network.
4. Finally, type “exit” to close the command prompt.
By forgetting and reconnecting to your wireless network, you can often resolve the IPv6 No Internet Access error and restore your network connectivity. This troubleshooting step is especially helpful if you’re using a Windows 7 or Windows 10 computer.
If you continue to experience connectivity issues, consider updating your networking drivers or disabling IPv6. These additional methods may help resolve the problem.
Remember to consult your device’s user guide or contact your network administrator for further assistance if needed.
Manually Reset the Winsock Catalog
To fix the “IPv6 No Internet Access” error, you can manually reset the Winsock Catalog on your Windows device. This troubleshooting step can help resolve network connection issues.
Here’s how to do it:
1. Press Windows Key + X and select Command Prompt (Admin) to open an elevated command prompt.
2. In the command prompt window, type the following command and press Enter: netsh winsock reset
3. Restart your computer to apply the changes.
After the restart, check if the “IPv6 No Internet Access” error is resolved and if you can now connect to the internet. If the issue persists, you may need to try other troubleshooting methods or seek further assistance.
Remember, this guide is specifically for manually resetting the Winsock Catalog and doesn’t cover other possible causes of the network access error.
python

import socket
def check_ipv6_connectivity():
try:
# Try connecting to a well-known IPv6 address
socket.create_connection(('ipv6.google.com', 80), timeout=5)
print("IPv6 connectivity is available.")
except (socket.timeout, socket.error):
print("No IPv6 internet access.")
check_ipv6_connectivity()
In this code, we attempt to create a connection to the IPv6 address of Google’s website. If the connection is successful, it indicates that the system has IPv6 connectivity. However, if a timeout or socket error occurs, it suggests that there is no IPv6 internet access.
Please note that this code only checks for IPv6 connectivity and not general internet access. If you need to check for both IPv4 and IPv6 connectivity, you could modify the code accordingly.
Disable Internet Protocol Version 6 (IPv6)
To fix the “IPv6 No Internet Access Error,” you can disable Internet Protocol Version 6 (IPv6) on your Windows device. Here’s how:
1. Press the Windows key + R to open the Run dialog box.
2. Type “control” and press Enter to open the Control Panel.
3. In the Control Panel, select “Network and Internet.”
4. Go to “Network and Sharing Center.”
5. Click on “Change adapter settings” on the left-hand side of the window.
6. Right-click on your network connection (e.g., Wi-Fi or Ethernet) and select “Properties.”
7. Uncheck the box next to “Internet Protocol Version 6 (TCP/IPv6)” and click OK.
8. Restart your computer for the changes to take effect.
By disabling IPv6, you may experience improved network connectivity if you’re facing issues with IPv6. However, please note that this solution is specific to Windows devices and may not apply to other operating systems.
Configure Your Network Adapter to Obtain the DNS Server Address Automatically
1. Open the Control Panel and navigate to the Network and Internet section.
2. Click on Network and Sharing Center.
3. On the left-hand side, click on Change adapter settings.
4. Right-click on your network adapter and select Properties.
5. In the Properties window, scroll down and select Internet Protocol Version 6 (IPv6).
6. Click on Properties.
7. In the IPv6 Properties window, make sure the option “Obtain DNS server address automatically” is selected.
8. Click OK to save the changes.
9. Close all windows and restart your computer.
By configuring your network adapter to obtain the DNS server address automatically, you can resolve the IPv6 no internet access error. This method ensures that your device automatically receives the DNS server address from your network, eliminating the need for manual configuration. Follow the steps mentioned above to fix the issue and regain network connectivity.
Power Reset Your Router and Modem
If you’re experiencing an IPv6 No Internet Access error, a simple power reset of your router and modem can often solve the problem. Follow these steps:
1. Turn off your router and modem by unplugging them from the power source.
2. Wait for 30 seconds to ensure a complete power cycle.
3. Plug in your modem first and wait for it to fully power up.
4. Then, plug in your router and give it some time to establish a connection.
By power resetting your devices, you allow them to refresh their network settings and establish a new connection. This can often resolve connectivity issues, including the IPv6 No Internet Access error.
If the error persists after power resetting, you may need to troubleshoot further or contact your Internet service provider for assistance.
Update Your Network Adapter Drivers
To fix the IPv6 no internet access error, you need to update your network adapter drivers. Here’s how:
1. Press the Windows key + X to open the Power User menu and select Device Manager.
2. In the Device Manager window, expand the Network adapters category.
3. Right-click on your network adapter and select Update driver.
4. Choose “Search automatically for updated driver software” and let Windows search for the latest driver updates.
5. If Windows doesn’t find any updates, you can visit the manufacturer’s website and download the latest drivers manually.
6. Once the drivers are updated, restart your computer to apply the changes.
Updating your network adapter drivers can often resolve connectivity issues and ensure a stable internet connection. Make sure to keep your drivers up to date to avoid future problems.
Mark Ginter is a tech blogger with a passion for all things gadgets and gizmos. A self-proclaimed "geek", Mark has been blogging about technology for over 15 years. His blog, techquack.com, covers a wide range of topics including new product releases, industry news, and tips and tricks for getting the most out of your devices. If you're looking for someone who can keep you up-to-date with all the latest tech news and developments, then be sure to follow him over at Microsoft.


