- PNP DETECTED FATAL ERROR is often caused by your antivirus program, and to solve this problem, you should remove it.
- Blue screen of death errors are usually caused by hardware or software compatibility issues.
- Windows 10 needs drivers to recognize your hardware, and if a particular driver is out of date, you won’t be able to use that hardware.
Welcome to an illuminating guide that unravels the mysteries surrounding the PNP Detected Fatal Error in Windows 10. Within this article, we will delve into the causes of this perplexing issue, explore various solutions, and provide you with the much-needed fixes to restore your Windows 10 system to its optimal functionality. Join us on this enlightening journey as we unravel the secrets behind this error and help you overcome it with ease.
Common Causes of PNP_DETECTED_FATAL_ERROR
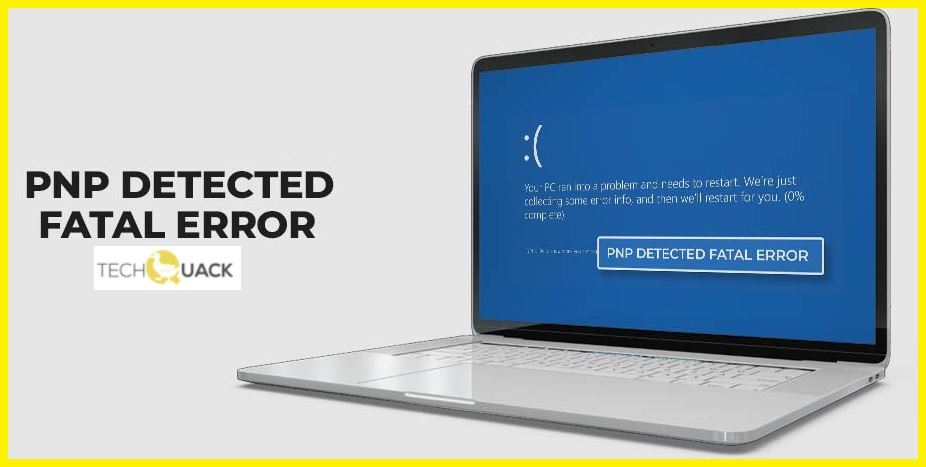
The PNP_DETECTED_FATAL_ERROR is a common Blue Screen of Death (BSOD) error in Windows 10. This fatal error is usually caused by issues with PnP (Plug and Play) devices or outdated drivers. To fix this error, follow these steps:
1. Update your drivers: Use a reliable driver update tool, such as the one provided by Milan Stanojevic, to update all your drivers. This will ensure compatibility and stability.
2. Check for hardware issues: In some cases, the PNP_DETECTED_FATAL_ERROR can be caused by faulty hardware. Check your devices and memory modules for any issues and make necessary changes or replacements.
3. Disable peripherals: Temporarily disconnect any peripherals, such as printers or external devices, to see if they are causing the error. This will help identify the problem.
4. Run system updates: Ensure that your system is up to date by running Windows updates. This can often resolve compatibility issues and fix any underlying problems.
Remember to back up your data before making any changes or updates to your system. If the error persists, seek professional help from experts like Vlad Turiceanu or Fortect.
Resolving Outdated Driver Issues
- Identify the outdated driver causing the issue:
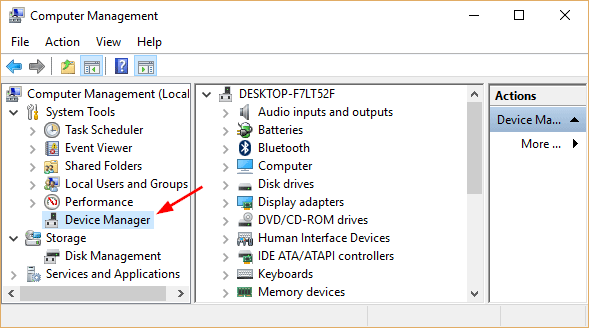
- Open Device Manager by pressing Win + X and selecting Device Manager from the list.

- Look for any devices with a yellow exclamation mark or a red X icon, as these indicate outdated or problematic drivers.
- Update the outdated driver:
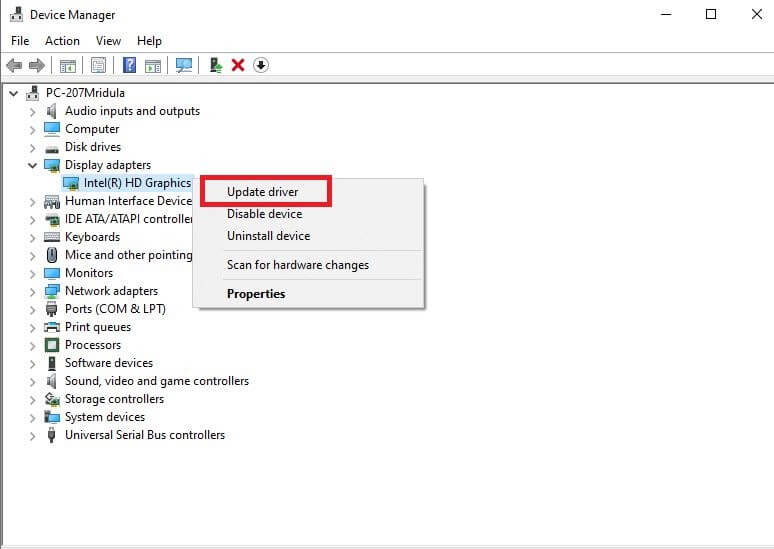
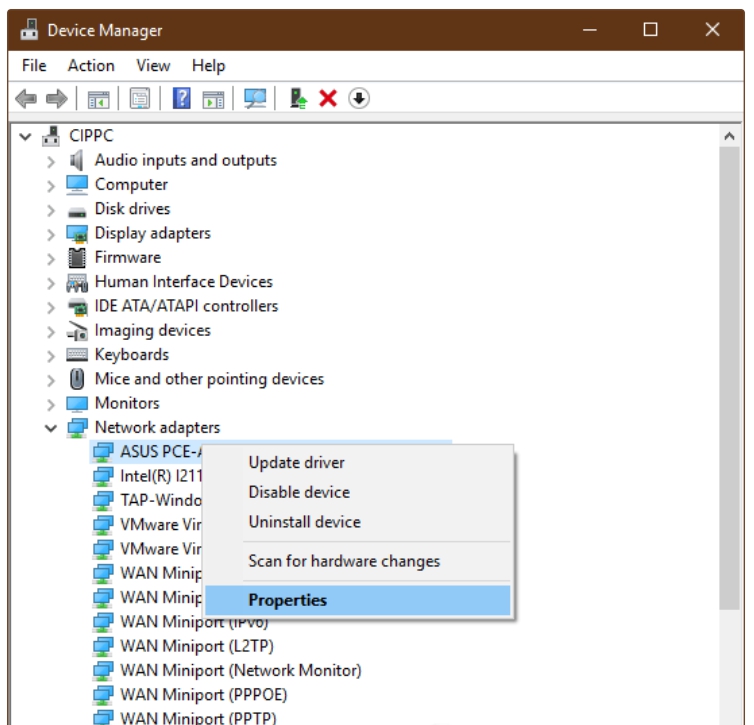
- Right-click on the device with the outdated driver and select Update driver.
- Choose the option to Search automatically for updated driver software.
- Windows will search for the latest driver online and install it if available.
- Manually download and install the latest driver:
- Go to the manufacturer’s website for the specific device.
- Search for the latest driver compatible with your Windows 10 version.
- Download the driver and follow the installation instructions provided by the manufacturer.
- Roll back the driver to a previous version:
- Open Device Manager and locate the device with the problematic driver.
- Right-click on the device and select Properties.
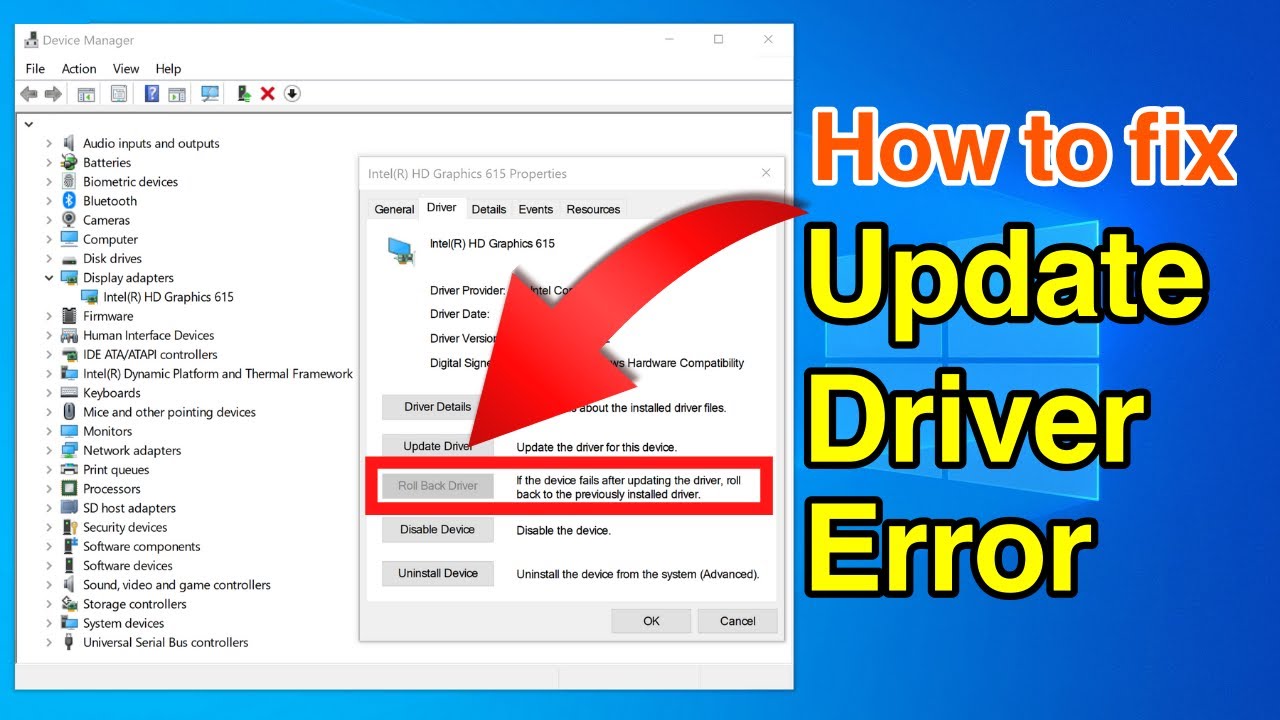
- Go to the Driver tab and click on Roll Back Driver.
- Follow the on-screen instructions to complete the rollback process.
- Uninstall and reinstall the driver:
- Open Device Manager and find the device with the problematic driver.
- Right-click on the device and select Uninstall device.
- Restart your computer.
- Windows will automatically reinstall the driver on startup.
- Use a driver update software:
- Download and install a reliable driver update software.
- Run the software and scan your system for outdated drivers.
- Follow the software’s instructions to update the outdated drivers.
Addressing Antivirus and Software Conflicts
If you’re encountering the BSOD PNP_DETECTED_FATAL_ERROR (0x000000CA) in Windows 10, it’s likely due to antivirus or software conflicts. To address this issue, follow these steps:
1. Start your PC in Safe Mode. Press the Win + I keys, then select “Update & Security” and click on “Recovery.” Under the “Advanced startup” section, click on “Restart now.” Once your PC restarts, choose “Troubleshoot” > “Advanced options” > “Startup Settings” > “Restart.” Press the F4 key to start in Safe Mode.
2. Uninstall any recently installed antivirus or software. Press the Win + X keys, then select “Device Manager.” Expand the “Software components” category and uninstall any recently installed programs or drivers.
3. Update your system and essential drivers. Press the Win + I keys, then select “Update & Security” > “Windows Update” > “Check for updates.” Install any available updates.
4. Run a system scan using the Windows Memory Diagnostic tool. Press the Win + R keys, then type “mdsched.exe” and press Enter. Follow the on-screen instructions to complete the scan.
5. Check your hardware components. Ensure that all your hardware, such as RAM and memory modules, is properly connected. If necessary, consider testing your hardware or consulting a professional.
Note: If these steps don’t resolve the issue, it may be beneficial to seek assistance from a professional or use data recovery tools to recover your files.
By addressing antivirus and software conflicts, you can fix the PNP_DETECTED_FATAL_ERROR and ensure smooth operation of your Windows 10 system.
Troubleshooting Hardware and Storage Problems
1. Check for loose connections: Ensure that all hardware components, such as cables and connectors, are securely connected to the computer.
2. Test the hardware: Run diagnostic tests on your hardware components to identify any faulty devices or memory module issues. Tools like Fortect can help with this process.
3. Update drivers and firmware: Outdated or incompatible drivers can cause hardware issues. Visit the manufacturer’s website or use Windows Update to download the latest drivers and firmware updates.
4. Uninstall recent updates or software: If the problem started after installing new updates or software, try uninstalling them and see if the issue persists.
5. Use System Restore: If the problem occurred after a recent change, use System Restore to revert your computer’s settings to a previous working state.
6. Perform a clean boot: Disable all startup programs and non-Microsoft services to determine if any third-party software is causing the problem.
7. Check for overheating: Overheating can cause hardware malfunctions. Ensure that your computer’s cooling system is working properly and keep the vents clean.
8. Seek professional help: If you have tried all the above solutions and are still experiencing hardware or storage problems, it may be time to consult a professional technician for further assistance.
Remember to back up your important files before attempting any troubleshooting steps to avoid data loss.
Checking for Hardware Issues
- Open Device Manager by pressing Windows Key + X and selecting Device Manager from the menu.
- In Device Manager, expand each category and look for any devices with a yellow triangle indicating a problem.
- If you find any devices with a yellow triangle, right-click on the device and select Update Driver.
- Choose the option to Search automatically for updated driver software and let Windows find and install the latest drivers.
- Restart your computer and check if the PNP Detected Fatal Error is resolved.
Rolling Back System Updates and Drivers
If you’re experiencing the BSOD PNP_DETECTED_FATAL_ERROR on your Windows 10 computer, you may need to roll back system updates and drivers to fix the issue. Rolling back updates and drivers can help resolve compatibility problems that can lead to this error.
Here’s how to roll back system updates and drivers:
1. Open the Start menu and search for “Device Manager.”
2. Open Device Manager and expand the category related to the problematic device.
3. Right-click on the device and select “Properties.”
4. Go to the “Driver” tab and click on “Roll Back Driver.”
5. Follow the on-screen instructions to complete the rollback process.
If rolling back the driver doesn’t fix the issue, you can also try rolling back system updates. Here’s how:
1. Open the Start menu and go to “Settings.”
2. Click on “Update & Security” and go to the “Windows Update” tab.
3. Click on “View update history” and then on “Uninstall updates.”
4. Right-click on the update that you want to uninstall and select “Uninstall.”
5. Follow the on-screen instructions to complete the uninstallation process.
Note that rolling back system updates and drivers may remove any improvements or security patches that were provided by the updates. If you’re unsure about rolling back updates, consider seeking assistance from a professional or contacting Microsoft Support.
Removing Junk Files and Problematic Software
To fix the PNP Detected Fatal Error in Windows 10, you need to remove junk files and problematic software. These can cause conflicts and lead to the error.
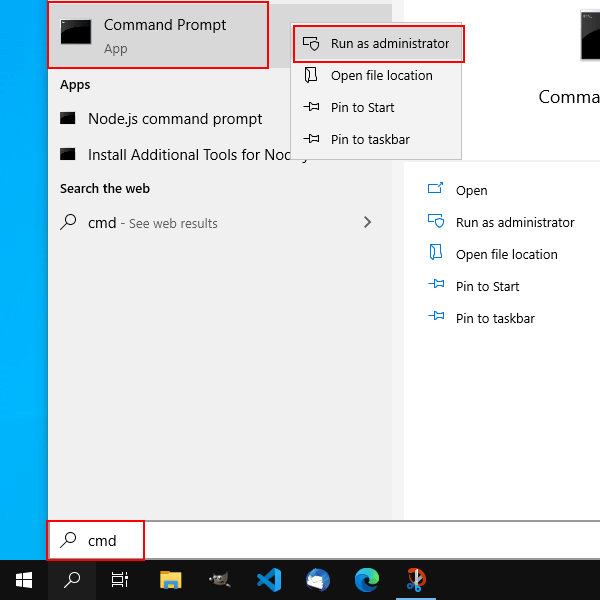
First, open the Command Prompt as an administrator. To do this, press the Windows key and type “Command Prompt.” Right-click on it and select “Run as administrator.”
Next, type “sfc /scannow” and press Enter. This will scan your system for any corrupted files and automatically fix them.
After that, remove any unnecessary files and programs. Go to the Start menu, click on Settings, and then select System. From there, click on Storage and choose the option to Free up space now. This will remove junk files and free up valuable disk space.
Lastly, update your drivers. Go to the manufacturer’s website and download the latest drivers for your hardware. This can help resolve any compatibility issues that may be causing the error.
Using System Restore or System Image Recovery
One potential solution to fix the PNP Detected Fatal Error in Windows 10 is to use System Restore or System Image Recovery. These tools can help restore your computer to a previous state, undoing any changes that may have caused the error.
To use System Restore, follow these steps:
1. Press the Windows key + R to open the Run dialog box.
2. Type “rstrui” and press Enter to open System Restore.
3. Follow the on-screen instructions to choose a restore point and restore your system.
If System Restore doesn’t work or isn’t available, you can try using System Image Recovery:
1. Insert your Windows installation media or recovery drive.
2. Restart your computer and boot from the installation media.
3. Select your language preferences and click “Next.”
4. Click “Repair your computer,” then navigate to Troubleshoot > Advanced options > System Image Recovery.
5. Follow the on-screen instructions to restore your system from a system image.
Using System Restore or System Image Recovery can be an effective way to fix the PNP Detected Fatal Error and get your Windows 10 system back up and running smoothly.
Advanced Troubleshooting Methods
- Perform a System Restore
- Open the Start menu and search for System Restore.
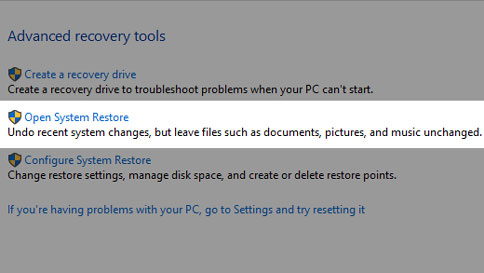
- Click on Create a restore point and then select System Restore.
- Choose a restore point and follow the on-screen instructions to restore your system.
- Run a Full System Scan with Antivirus Software
- Open your Antivirus software and navigate to the Scan or Scan Options section.
- Select Full System Scan or a similar option and start the scan.
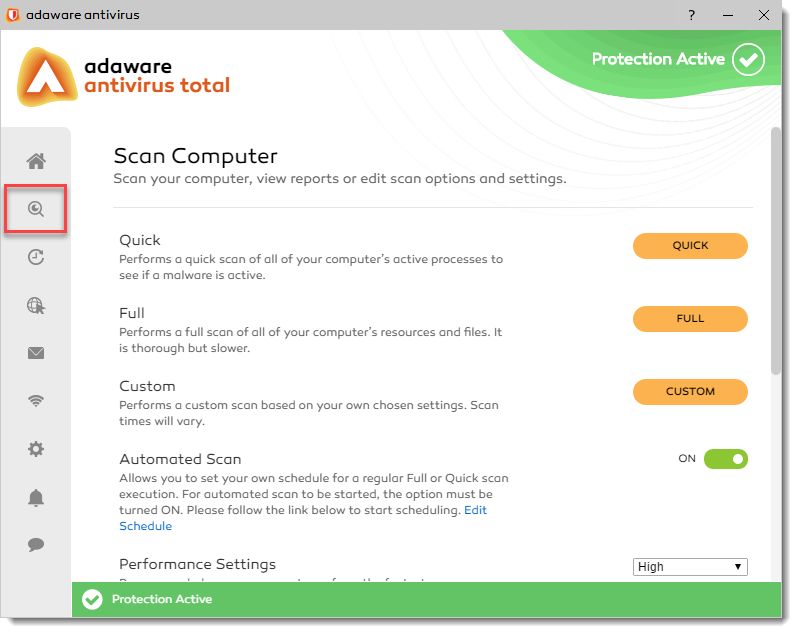
- Follow any prompts or instructions provided by the antivirus software.
- Update Device Drivers
- Open the Device Manager by pressing Win + X and selecting Device Manager from the menu.
- Expand the categories and locate the device drivers that need to be updated.
- Right-click on the device driver and select Update driver.
- Choose the option to Search automatically for updated driver software.
- Follow the on-screen instructions to complete the driver update.
- Perform a Clean Boot
- Press Win + R to open the Run dialog box.
- Type msconfig and press Enter.
- In the System Configuration window, go to the Services tab.
- Check the box that says Hide all Microsoft services.
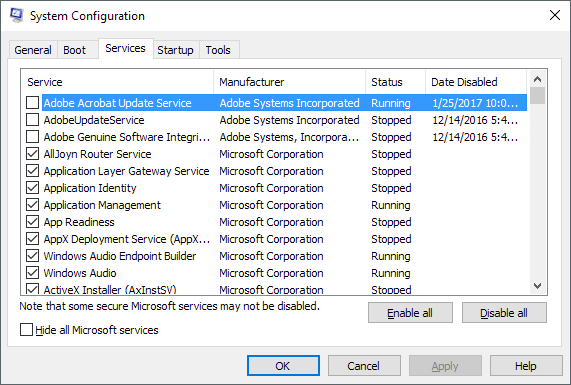
- Click on Disable all to disable all non-Microsoft services.
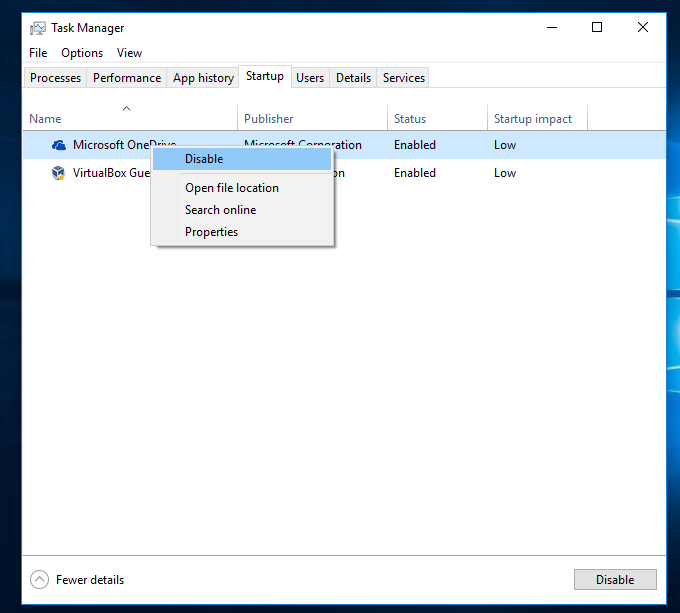
- Go to the Startup tab and click on Open Task Manager.
- In the Task Manager, disable any startup items by right-clicking on them and selecting Disable.
- Close the Task Manager and go back to the System Configuration window.
- Click on OK and then Restart your computer.
- Perform a System File Check
- Open the Command Prompt as an administrator by pressing Win + X and selecting Command Prompt (Admin).
- Type sfc /scannow and press Enter.
- Wait for the system file check to complete. This may take some time.
- If any issues are found, the system will attempt to repair them automatically.
Performing a Windows 10 Reset
If you’re experiencing a PNP Detected Fatal Error in Windows 10, performing a Windows 10 reset can help resolve the issue. Here’s how to do it:
Step 1: Go to the Start menu and click on the Settings icon.
Step 2: In the Settings window, click on “Update & Security.”
Step 3: From the left sidebar, select “Recovery.”
Step 4: Under the “Reset this PC” section, click on “Get started.”
Step 5: Choose whether you want to keep your files or remove everything, and follow the on-screen instructions to complete the reset process.
Performing a Windows 10 reset can help resolve various issues, including PNP Detected Fatal Errors. Just make sure to back up your important data before proceeding.

Mark Ginter is a tech blogger with a passion for all things gadgets and gizmos. A self-proclaimed "geek", Mark has been blogging about technology for over 15 years. His blog, techquack.com, covers a wide range of topics including new product releases, industry news, and tips and tricks for getting the most out of your devices. If you're looking for someone who can keep you up-to-date with all the latest tech news and developments, then be sure to follow him over at Microsoft.