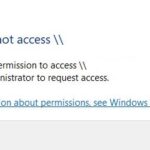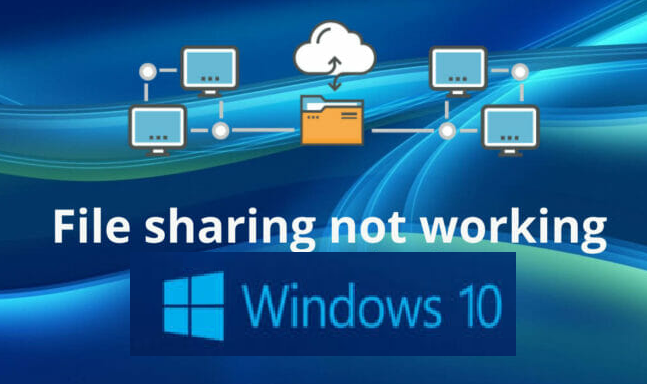
- Windows 10 users have noticed that file sharing in Windows 10 doesn’t work when you use it.
- Windows 10 is a useful Windows snapshot utility provided by Microsoft.
- It is designed to facilitate file sharing between users.
- In a few simple steps, you can share files on your PCs with users on the same local network.
- Users can even view these files on their cell phones on their phones.
Unlocking the potential of seamless file sharing and network drive access on Windows 10 has become a necessity in our interconnected world. This article delves into the steps required to restore these functionalities, empowering users to effortlessly collaborate and access files across their network.
Enable and Use File Sharing Properly
1. To restore file sharing and network drive files on Windows 10, follow these steps:
2. Step 1: Open the Registry Editor by pressing Win + R, typing “regedit,” and hitting Enter.
3. Navigate to HKEY_LOCAL_MACHINE\SOFTWARE\Microsoft\Windows\CurrentVersion\Policies\System.
4. Right-click on the blank space in the right-hand pane and select New > DWORD (32-bit) Value. Name it “LocalAccountTokenFilterPolicy” and set its value to 1.
5. Step 2: Open the Control Panel and go to “Network and Sharing Center.”
6. Click on “Change advanced sharing settings” on the left-hand side.
7. Expand the “Home or Work” network profile and enable “File and printer sharing.”
8. Click on “Save changes” to apply the settings.
9. Now you can share files and folders with other users on the network.
10. If you encounter any issues, check if the necessary services like “Function Discovery Resource Publication” and “Print Spooler” are running.
11. Additionally, make sure the firewall is not blocking file sharing.
12. Note: If you’re using Windows 7, the steps may vary slightly.
Remember to backup your important files before making any changes to ensure data safety.
Turn Password Protection off
To turn off password protection for network shares in Windows 10, follow these steps:
Step 1: Open the Control Panel and navigate to “Network and Sharing Center.”
Step 2: Click on “Change advanced sharing settings” in the left-hand menu.
Step 3: Expand the “All Networks” section and scroll down to “Password protected sharing.”
Step 4: Select the “Turn off password protected sharing” option.
Step 5: Click “Save changes” to apply the new settings.
Note: Turning off password protection for network shares will allow other users on the same network to access your shared folders and files without needing a password. Make sure to consider the security implications before making this change.
For further assistance or more detailed instructions, please refer to our article “Restoring Windows 10 File Sharing and Network Drive Files.”
Add a Windows Credential
To add a Windows credential for file sharing and network drives in Windows 10, follow these steps:
1. Open the Control Panel by typing “Control Panel” in the search bar and selecting it from the results.
2. In the Control Panel, click on “User Accounts” and then select “Credential Manager.”
3. In the Credential Manager, click on “Windows Credentials” and then select “Add a Windows credential.”
4. In the “Internet or network address” field, enter the network location or IP address of the computer or device you want to connect to.
5. In the “User name” and “Password” fields, enter the credentials for the network device or computer.
6. Click “OK” to save the Windows credential.
By adding a Windows credential, you can easily access shared folders and network drives on other computers or devices. This method is particularly useful if you are experiencing issues with file sharing or cannot access shared folders. It provides a straightforward solution to restore file sharing and network drive functionality in Windows 10.
Disable IPv6
To disable IPv6 in Windows 10 and restore file sharing and network drive files, follow these steps:
1. Press the Windows key + R to open the Run dialog box.
2. Type “regedit” and press Enter to open the Registry Editor.
3. In the Registry Editor, navigate to HKEY_LOCAL_MACHINE\SYSTEM\CurrentControlSet\Services\Tcpip6\Parameters.
4. Right-click on Parameters and select New > DWORD (32-bit) Value.
5. Name the new value “DisabledComponents” and set its value to 0xFFFFFFFF.
6. Restart your PC for the changes to take effect.
Disabling IPv6 can help resolve issues with file sharing and network drive files.
Change File Sharing Connections
To change file sharing connections in Windows 10, follow these steps:
1. Open the File Explorer app on your PC.
2. Navigate to the folder or file you want to share.
3. Right-click on the folder or file and select “Properties” from the dropdown menu.
4. In the Properties window, click on the “Sharing” tab.
5. Click on the “Advanced Sharing” button.
6. Check the box that says “Share this folder” to enable file sharing for the selected folder.
7. To customize the sharing permissions, click on the “Permissions” button.
8. In the Permissions window, you can add or remove users and set their access levels.
9. Click “OK” to save the changes and close the Permissions window.
10. Click “Apply” and then “OK” to apply the changes and close the Properties window.
These steps will help you change file sharing connections and ensure that your files and folders can be accessed by others on your network.
Disable Antivirus on your PC
To disable antivirus on your PC, follow these steps:
1. Open your antivirus software by clicking on its icon in the system tray or searching for it in the Start menu.
2. Look for the settings or preferences option within the antivirus program.
3. In the settings or preferences menu, locate the option to disable or turn off real-time protection.
4. Once you’ve found the option, click on it to disable the antivirus temporarily.
5. A pop-up window may appear asking for confirmation. Confirm your choice to disable the antivirus.
6. Remember to re-enable the antivirus once you’ve completed the necessary steps for restoring Windows 10 file sharing and network drive files.
By temporarily disabling your antivirus, you can perform the required fixes without any interference from the antivirus program. Just remember to enable it again afterward to ensure your PC’s security.
Enable the SMB 1.0/CIFS File Sharing Support
To enable SMB 1.0/CIFS File Sharing Support on Windows 10:
1. Press the Windows key + R to open the Run dialog box.
2. Type “appwiz.cpl” and hit Enter to open the Programs and Features window.
3. Click on “Turn Windows features on or off” on the left side of the window.
4. Scroll down and locate “SMB 1.0/CIFS File Sharing Support” in the list.
5. Check the box next to it and click OK.
6. Restart your computer for the changes to take effect.
If you encounter any issues, you can also try these additional methods:
Method 1:
1. Press the Windows key + R and type “regedit” to open the Registry Editor.
2. Navigate to “HKEY_LOCAL_MACHINE\SYSTEM\CurrentControlSet\Services\LanmanServer\Parameters”.
3. Look for the “SMB1” DWORD value and set it to 1.
4. Restart your computer.
Method 2:
1. Download the “Desktop\Network Shares.reg” file from the Microsoft support website.
2. Double-click the file to merge it into the Registry Editor.
3. Restart your computer.
Remember to backup your files before making any changes to your system.
Update Windows to the Latest Version
To update Windows to the latest version, follow these steps:
1. Press the Windows key + I to open the Settings app.
2. Click on “Update & Security”.
3. In the Windows Update tab, click on “Check for updates”.
4. If updates are available, click on “Download and install” to start the update process.
5. Restart your computer when prompted to finish installing the updates.
Note: Make sure you have a stable internet connection before starting the update process.
After updating Windows, you can proceed with restoring file sharing and network drive files. Here’s how:
1. Press the Windows key + R to open the Run dialog box.
2. Type “regedit” and press Enter to open the Registry Editor.
3. Navigate to the following location: HKEY_LOCAL_MACHINE\SOFTWARE\Microsoft\Windows\CurrentVersion\Policies\System
4. Look for a DWORD value named “LocalAccountTokenFilterPolicy”.
5. If the value doesn’t exist, right-click on an empty space in the right pane and choose “New” > “DWORD (32-bit) Value”. Name it “LocalAccountTokenFilterPolicy”.
6. Double-click on the “LocalAccountTokenFilterPolicy” value and set its data to “1”.
7. Close the Registry Editor and restart your computer.
After following these steps, your file sharing and network drive files should be restored. If you’re still experiencing issues, try using alternative methods or consult the Microsoft support page for further assistance.
Restart Your Computer
To restart your computer, follow these simple steps:
1. Click on the Start button in the bottom-left corner of your screen.
2. Select the Power icon and choose Restart from the options.
3. Wait for your computer to shut down and turn back on.
If you encounter any issues with file sharing and network drive files in Windows 10, here’s what you can do:
1. First, make sure that all computers involved are connected to the same network.
2. Check if the File Sharing and Network Discovery features are enabled. To do this, open the Control Panel, search for “Network and Sharing Center,” and click on it.
3. In the Network and Sharing Center, click on “Change advanced sharing settings” on the left-hand side.
4. Make sure that “Turn on file and printer sharing” and “Turn on network discovery” are selected.
5. If you’re having trouble with printer sharing, ensure that the “Printer Sharing” option is enabled as well.
6. Additionally, check if the “Function Discovery Resource Publication” service is running. Press the Windows key + R, type “services.msc” and hit Enter. Look for “Function Discovery Resource Publication” in the list and make sure it’s set to “Automatic” and running.
Following these steps should help resolve most file sharing and network drive file issues in Windows 10. If you encounter any other problems, consider searching for specific fixes related to your issue or reaching out to Microsoft support for further assistance.
Enable File and Network Sharing
To enable file and network sharing in Windows 10, follow these steps:
1. Open the File Explorer by pressing the Windows key + E.
2. In the File Explorer, navigate to the folder or drive that you want to share.
3. Right-click on the folder or drive and select “Properties” from the context menu.
4. In the Properties window, go to the “Sharing” tab.
5. Click on the “Advanced Sharing” button.
6. Check the box that says “Share this folder” and give it a share name.
7. Click on the “Permissions” button to set the access permissions for the shared folder.
8. In the Permissions window, you can add or remove users and assign their access levels.
9. Click “OK” to save the changes.
10. Close the Properties window.
Now, your folder or drive will be shared on the network, allowing other devices to access it. Remember to adjust your network settings and firewall if necessary.
Turn Off Password Protected Sharing
To turn off password protected sharing in Windows 10, follow these steps:
1. Open the Control Panel by pressing the Windows key + X and selecting “Control Panel” from the menu.
2. In the Control Panel, click on “Network and Sharing Center.”
3. Under the “Advanced sharing settings” section, click on “Change advanced sharing settings.”
4. Scroll down to the “Password protected sharing” option and select the “Turn off password protected sharing” choice.
5. Click on “Save changes” to apply the settings.
By disabling password protected sharing, you allow easier access to shared files and folders on your network. Keep in mind that this may pose a security risk, so make sure your network is secure and only accessible to trusted users.
If you encounter any issues or need further assistance, refer to Microsoft’s support page or seek help from the Windows community.
Allow File Sharing Through Windows Defender Firewall
To enable file sharing through Windows Defender Firewall, follow these steps:
1. Open Windows Defender Firewall settings by searching for “Windows Defender Firewall” in the Start menu.
2. Click on “Allow an app or feature through Windows Defender Firewall” on the left-hand side.
3. Click on the “Change settings” button, which may require administrator permission.
4. Scroll down and locate “File and Printer Sharing” in the list of allowed apps and features.
5. Make sure both private and public networks are checked for file and printer sharing.
6. Click on the “OK” button to save the changes.
By allowing file and printer sharing through Windows Defender Firewall, you can easily share files and printers with others on your network. This feature is particularly useful for collaborating on projects, accessing shared folders, and using network printers.
Please note that if you encounter any issues with file sharing, such as being unable to access shared folders or printers, there may be other factors at play. It’s worth checking if you have the necessary permissions, network connections, or if there are any compatibility issues with certain apps or devices.
If you’re using an older version of Windows, like Windows 7, the procedure for enabling file sharing may differ slightly. Additionally, if you have recently upgraded to Windows 10 from a previous version, you might encounter issues with accessing files from the “windows old folder.” In such cases, you can try restoring previous versions of files using file history or a system image backup.
Try Free File Sharing Alternative
Looking for a free file sharing alternative for Windows 10? Look no further! We have a solution for restoring your file sharing and network drive files.
If you’re experiencing issues with the file sharing function, try the following steps to restore it. First, download the Desktop\Network Shares.reg file from our website. Once downloaded, double-click on the REG file and follow the on-screen instructions. This will fix any problems you may be facing with file sharing.
In addition, if you’re having trouble accessing shared folders or network connections, you can try restoring previous versions of your files. Simply right-click on the folder or file you’re having trouble with, select “Properties,” and navigate to the “Previous Versions” tab. From there, you can choose a previous version to restore.
If all else fails, you can also consider using a system image or Windows backup to restore your shared folders and network drive files. These methods can help you recover your files and get your file sharing feature back up and running smoothly.
Bottom Line
If you’re experiencing issues with file sharing and accessing network drive files on Windows 10, here’s how you can restore the functionality:
1. Check your network settings: Ensure that your devices are connected to the same network and that file sharing is enabled on both the source and destination devices.
2. Verify folder sharing permissions: Right-click on the folder you want to share, select “Properties,” go to the “Sharing” tab, and click on “Advanced Sharing.” Enable sharing and set the appropriate permissions for each user.
3. Troubleshoot HomeGroup: If you encounter issues with HomeGroup, consider using alternative methods like creating a shared folder or using the file sharing feature directly.
4. Restore files from a previous version: Right-click on the folder or file, choose “Properties,” go to the “Previous Versions” tab, and select a suitable version to restore from.
5. Use Windows Backup or File History: If you have a backup or File History set up, you can restore your files from there.
Remember to restart your devices and check for any post-update issues. If the problem persists, consider seeking further assistance from Microsoft support.
How to enable File Sharing properly?
To enable File Sharing properly on Windows 10, follow these steps:
1. Open the “Control Panel” by typing it in the search bar and selecting it from the results.
2. Go to “Network and Internet” and click on “Network and Sharing Center.”
3. In the left-hand panel, click on “Change advanced sharing settings.”
4. Under the “Private” section, make sure that “Turn on network discovery” and “Turn on file and printer sharing” are selected.
5. Click on “Save changes” to apply the settings.
If you encounter any issues or are unable to access shared files or folders, here’s what you can do:
1. Check that both computers are connected to the same network.
2. Ensure that the shared folder has the correct permissions set for the intended users.
3. If a pop-up window appears asking for network credentials, enter the username and password of the computer sharing the files.
4. If you are trying to access files from a previous version of Windows, such as the “Windows.old” folder, you may need to restore previous versions of the files.
How do I fix Network Sharing Not Working?
If you’re experiencing Network Sharing Not Working on Windows 10, there are a few steps you can take to resolve the issue.
Firstly, ensure that both devices are connected to the same network and have file sharing enabled. To do this, go to Settings > Network & Internet > Sharing options, and turn on network discovery and file and printer sharing.
If the problem persists, try resetting the network settings. Open Command Prompt as an administrator and type netsh winsock reset, followed by netsh int ip reset. Restart your computer and check if the issue is resolved.
Another solution is to check the folder permissions. Right-click on the folder you want to share, select Properties, and go to the Sharing tab. Click on Advanced Sharing and make sure the “Share this folder” option is enabled.
If you’re still encountering problems, you can try restoring Windows 10’s file sharing function. Open the Control Panel, go to Programs > Programs and Features > Turn Windows features on or off. Locate File and Printer Sharing and ensure it’s checked.
Lastly, if you’re unable to access files from a previous version of Windows, you can try accessing the Windows.old folder. Open File Explorer and navigate to C:\Windows.old. Right-click on the folder you want to access, select Properties, go to the Previous Versions tab, and choose a version to restore.
By following these steps, you should be able to fix the Network Sharing Not Working issue and restore file sharing and network drive functionality on Windows 10.

Mark Ginter is a tech blogger with a passion for all things gadgets and gizmos. A self-proclaimed "geek", Mark has been blogging about technology for over 15 years. His blog, techquack.com, covers a wide range of topics including new product releases, industry news, and tips and tricks for getting the most out of your devices. If you're looking for someone who can keep you up-to-date with all the latest tech news and developments, then be sure to follow him over at Microsoft.