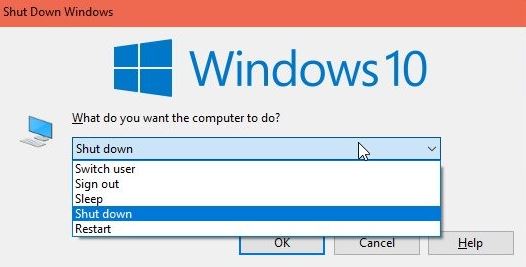
- Windows 10 is the fastest operating system that can be started or stopped in seconds.
- Windows 10 shutdown time has decreased from about 10 seconds to 90 seconds.
- The root cause of the problem is the USB Type C connector system (USCI) software interface in Windows 10.
In this article, we unveil the ultimate solution to the persistent Windows 10 shutdown delay predicament. Discover the ingenious fix that will bid farewell to those frustrating moments of waiting, once and for all.
Disconnect USB-C devices before shut down
Disconnecting USB-C devices before shutting down your Windows 10 computer can help resolve shutdown delay issues. Sometimes, certain USB-C devices can cause conflicts during the shutdown process, leading to a slow shutdown or even a delay in the shutdown timer.
To prevent this issue, simply disconnect any USB-C devices such as external hard drives or other peripherals before shutting down your PC. This will ensure that there are no conflicts between the USB-C devices and your computer’s shutdown process.
By following this simple step, you can avoid any unnecessary delays and ensure a faster and smoother shutdown experience on your Windows 10 computer. Remember, it’s always a good practice to disconnect any external devices before shutting down your PC to avoid any potential issues.
For more troubleshooting solutions or if you encounter any other issues with your Windows 10 computer, you can try using the DISM utility or running the Power Troubleshooter. These methods can help identify and resolve any underlying issues that may be causing the slow shutdown problem.
By taking these steps, you can ensure a quicker and more efficient shutdown process on your Windows 10 computer.
Run Power Troubleshooter
If you’re experiencing a delay when shutting down your Windows 10 computer, the Power Troubleshooter can help diagnose and fix the issue.
To run the Power Troubleshooter, follow these steps:
1. Press the Windows Key + X on your keyboard to open the Power User menu.
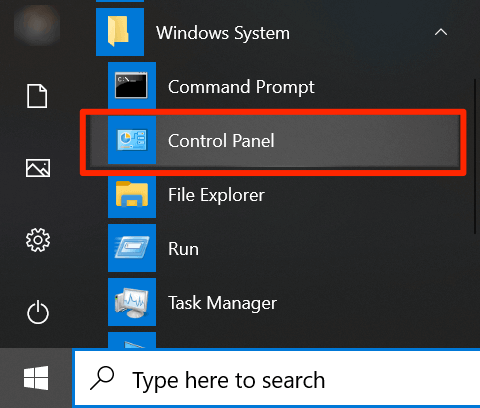
2. Select “Control Panel” from the menu.
3. In the Control Panel window, type “troubleshooter” in the search bar.
4. Click on “Troubleshoot” and then “View all” in the left-hand pane.
5. Scroll down and locate “Power” in the list of troubleshooters.
6. Click on “Power” and then click “Next” to begin the troubleshooter.
The Power Troubleshooter will scan your system for any power-related issues and attempt to fix them automatically. This includes checking for driver or hardware problems, repairing Windows files, and optimizing power settings.
By running the Power Troubleshooter, you can quickly resolve any shutdown delay problems and get your computer back to normal operation.
Disable Fast Startup feature
To solve the Windows 10 Shutdown Delay problem, one potential solution is to disable the Fast Startup feature. This feature can sometimes cause issues with the shutdown process, leading to delays.
To disable Fast Startup, follow these steps:
1. Press the Windows Key + X to open the Power User menu.
2. Select “Power Options” from the menu.
3. In the Power Options window, click on “Choose what the power buttons do” on the left side.
4. Click on “Change settings that are currently unavailable.”
5. Scroll down to the “Shutdown settings” section and uncheck the box next to “Turn on fast startup (recommended).”
6. Click “Save changes” to apply the settings.
Disabling Fast Startup may help resolve the slow shutdown issue caused by driver or hardware conflicts. If this doesn’t solve the problem, there may be other methods or fixes worth exploring.
python

import subprocess

import time
def shutdown_with_delay(delay):
# Convert delay to seconds
delay_seconds = delay * 60
# Schedule shutdown command
subprocess.call(['shutdown', '/s', '/t', str(delay_seconds)])
# Prompt user for delay in minutes
delay_minutes = int(input("Enter the shutdown delay in minutes: "))
# Call the function to initiate shutdown
shutdown_with_delay(delay_minutes)
# Wait for the delay before displaying a message
print(f"Shutdown scheduled in {delay_minutes} minutes.")
print("Press any key to cancel...")
# Delay for user interaction (to cancel shutdown)
time.sleep(delay_minutes * 60)
# If any key is pressed, cancel the shutdown
subprocess.call(['shutdown', '/a'])
print("Shutdown canceled.")
This sample code allows the user to input a delay in minutes, schedules a shutdown command with that delay, and provides an option to cancel the shutdown by pressing any key within the specified delay period.
Repair system files
To resolve the Windows 10 shutdown delay problem, users can repair system files using the DISM utility. Here’s how you can do it:
1. Press the Windows key and type “Command Prompt” in the search bar. Right-click on the Command Prompt app and select “Run as administrator.”
2. In the Command Prompt window, type “dism /online /cleanup-image /restorehealth” and press Enter. This will repair any corrupted system files.
3. Wait for the process to complete. It may take some time.
4. Once the repair is finished, restart your device and check if the shutdown issue has been resolved.
Repairing system files using DISM can fix various issues that cause slow shutdowns, such as driver conflicts or software bugs. It’s a quick and effective way to get your computer back to normal.
Update drivers
To update drivers and resolve the Windows 10 shutdown delay problem, follow these steps:
1. Press the Windows key + X and select Device Manager.
2. Expand the categories and right-click on the device you want to update.
3. Select Update Driver Software and choose the option to search automatically for updated driver software.
4. If Windows doesn’t find any updates, go to the manufacturer’s website and download the latest drivers for your device.
5. Install the drivers and restart your computer.
If the issue persists, you can try other fixes like:
1. Running the System File Checker tool: Open Command Prompt as an administrator and type “sfc /scannow“. This will check for corrupt Windows files and repair them if necessary.
2. Checking for software conflicts: Uninstall any recently installed software that may be causing the slow shutdown.
3. Disabling unnecessary startup programs: Open Task Manager, go to the Startup tab, and disable any programs you don’t need to start with Windows.
Remember to back up your important files before making any changes. If you’re not comfortable with these steps, it’s recommended to seek assistance from a qualified technician.
Run SFC scan and DISM repair
To resolve the Windows 10 shutdown delay problem, you can try running an SFC scan and DISM repair. These steps can help fix any issues with your system files and resolve the slow shutdown.
Here’s how you can do it:
1. Press the Windows key + X and select “Command Prompt (Admin)”.
2. In the Command Prompt window, type sfc /scannow and press Enter. This will initiate the System File Checker (SFC) scan, which will check for and repair any corrupted system files.
3. Once the SFC scan is complete, type dism /online /cleanup-image /restorehealth and press Enter. This will run the Deployment Image Servicing and Management (DISM) tool to repair any issues with the Windows image.
4. After the DISM repair is finished, restart your computer.
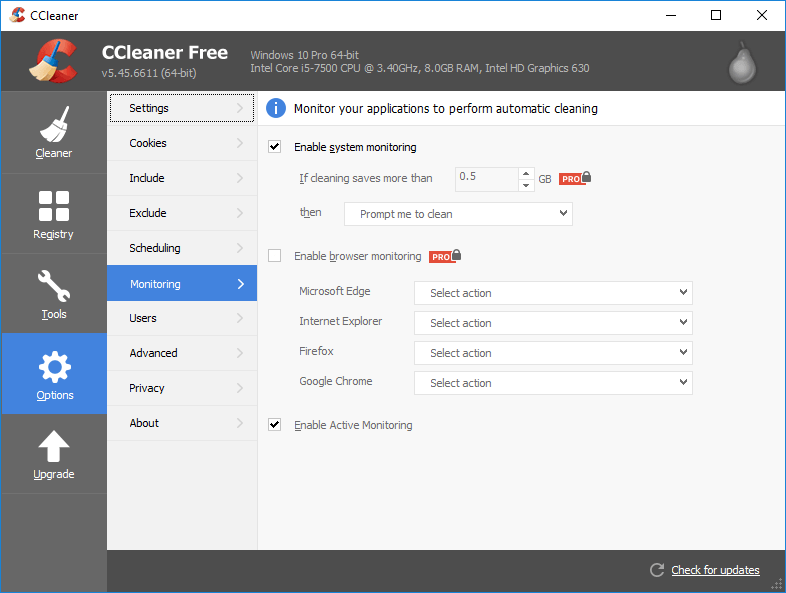
Run CCleaner, Malwarebytes, and System Maintenance
- Open CCleaner by double-clicking on its desktop icon or searching for it in the Start menu.
- Once CCleaner is open, click on the “Cleaner” tab on the left side of the window.
- Under the “Windows” tab, check the boxes next to the types of files you want CCleaner to clean, such as “Temporary files” and “Recycle Bin”.
- Click on the “Applications” tab and select any specific applications you want CCleaner to clean, such as web browsers or media players.
- Click on the “Run Cleaner” button at the bottom right corner of the window to start the cleaning process.
- Wait for CCleaner to finish cleaning your system, which may take a few minutes.
- Once the cleaning process is complete, close CCleaner and restart your computer to see if the shutdown delay problem is resolved.
Run Malwarebytes
- Open Malwarebytes by double-clicking on its desktop icon or searching for it in the Start menu.
- Once Malwarebytes is open, click on the “Scan” tab on the left side of the window.

- Click on the “Start Scan” button to initiate a scan of your system for any potential malware or viruses.
- Wait for Malwarebytes to complete the scan, which may take some time depending on the size of your system and the number of files to be scanned.
- If any threats are detected during the scan, click on the “Quarantine” button to remove them from your system.
- Once the quarantine process is complete, close Malwarebytes and restart your computer to check if the shutdown delay problem is resolved.
Perform System Maintenance
- Open the Start menu and type “Control Panel” to search for it.
- Click on the “Control Panel” search result to open the Control Panel window.
- In the Control Panel, click on the “System and Security” category.
- Under the “Security and Maintenance” section, click on the “Maintenance” option.
- In the Maintenance window, click on the “Start Maintenance” button to initiate the system maintenance process.
- Wait for the maintenance process to complete, which may take some time depending on the tasks being performed.
- Once the maintenance process is finished, close the Control Panel window and restart your computer to see if the shutdown delay problem is resolved.

Mark Ginter is a tech blogger with a passion for all things gadgets and gizmos. A self-proclaimed "geek", Mark has been blogging about technology for over 15 years. His blog, techquack.com, covers a wide range of topics including new product releases, industry news, and tips and tricks for getting the most out of your devices. If you're looking for someone who can keep you up-to-date with all the latest tech news and developments, then be sure to follow him over at Microsoft.