- This error message can appear when you start any application, program, or game.
- It occurs in almost every version of Windows, whether it’s Windows 10, 8, or 7.
- Even if the error leads you to think it’s related to the program itself, the problem lies in your Windows.
- The problem is in Windows itself, not the application, although the error message suggests that it is.
In the realm of digital dilemmas, encountering a program stop working error on Windows 10 can be quite vexing. Fear not, for this article aims to be your trusty troubleshooter, shedding light on the causes behind this pesky issue and guiding you towards a resolution. So, let us embark on a journey to unravel the mysteries that obstruct the smooth functioning of your beloved programs.
Using Windows Compatibility mode
1. Right-click on the program’s shortcut or executable file.
2. Select “Properties” from the context menu.
3. In the Properties window, go to the “Compatibility” tab.
4. Check the box that says “Run this program in compatibility mode for:”
5. From the drop-down menu, select the operating system version that the program was designed for (e.g., Windows XP, Windows Vista).
6. Click “Apply” and then “OK” to save the changes.
7. Try running the program again and see if the error persists.
Using Windows Compatibility mode can often resolve compatibility issues and allow programs to run correctly on newer versions of Windows. If the error message continues to appear, there may be other underlying issues that need to be addressed, such as outdated drivers or conflicts with other applications.
Update your graphic card drivers
If you are experiencing a “Program Stop Working” error on your Windows 10 PC, it could be due to outdated or incompatible graphic card drivers. To resolve this issue, you need to update your graphic card drivers.
Here are the steps to update your graphic card drivers:
1. Press the Windows key + X and select “Device Manager” from the menu.
2. In the Device Manager window, expand the “Display adapters” category.
3. Right-click on your graphic card and select “Properties.”
4. In the Properties window, navigate to the “Driver” tab.
5. Click on the “Update Driver” button.
6. Choose the option to automatically search for updated driver software.
7. Wait for Windows to search and install the latest driver for your graphic card.
8. Once the driver is updated, restart your computer.
Updating your graphic card drivers can help resolve the “Program Stop Working” error and improve the performance of your PC.
Remove conflicting software
If you’re encountering a program stop working error in Windows 10, it could be due to conflicting software on your computer. To resolve this issue, follow these steps:
1. Identify conflicting software: Check if any recently installed programs or updates might be causing the problem. Remove or disable them temporarily to see if the error persists.
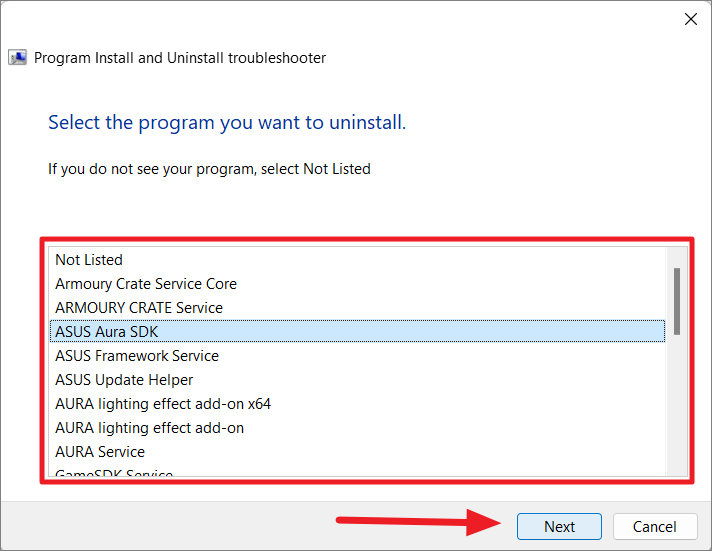
2. Uninstall conflicting software: Go to the Control Panel and open the “Programs and Features” or “Apps & Features” section. Locate the conflicting software and uninstall it.
3. Use the clean boot method: Perform a clean boot to start Windows with only essential services and programs. This helps identify if third-party software is causing the error. Follow the steps outlined by Microsoft to perform a clean boot.
4. Update or reinstall the application: If the program stop working error persists, try updating or reinstalling the affected application. Visit the manufacturer’s website for the latest version or use the original installation media.
5. Run a reliable antivirus scan: Malware or viruses can also cause program errors. Use a trusted antivirus program to scan your computer and remove any potential threats.
By following these steps, you can eliminate conflicting software as a potential cause for the program stop working error in Windows 10.
Update DirectX
To troubleshoot a program stop working error in Windows 10, one possible solution is to update DirectX.
Step 1: Download the latest version of DirectX from the official Microsoft website.
Method 1: Install DirectX using the web installer. This method is recommended for most users.
Method 2: If you are experiencing a specific error message related to DirectX, you can try using the DirectX End-User Runtime Web Installer. This tool will help you diagnose and fix any DirectX-related issues.
Method 3: In some cases, manually updating DirectX files may be necessary. To do this, download the DirectX End-User Runtimes (June 2010) from the Microsoft Download Center. Run the downloaded file and follow the on-screen instructions.
Updating DirectX can help resolve compatibility issues and ensure that your applications and games run correctly. By following these methods, you can effectively troubleshoot the program stop working error in Windows 10.
Repair Corrupted System Files with SFC
If you’re experiencing a “Program Stop Working” error on Windows 10, it could be due to corrupted system files. Fortunately, you can use the System File Checker (SFC) tool to repair these files and resolve the issue. Here’s how:
1. Press the Windows key + X and select “Command Prompt (Admin)” or “Windows PowerShell (Admin)”.
2. In the command prompt window, type “sfc /scannow” and press Enter.
3. The tool will scan your system for any corrupted files and automatically repair them if possible.
4. Once the scan is complete, restart your computer and check if the error has been resolved.
Running the SFC tool is a simple and effective solution for fixing corrupted system files that may be causing program stop working errors. Give it a try and see if it resolves your issue.
Uninstall Third-Party Antivirus Programs
Uninstalling third-party antivirus programs can help troubleshoot program stop working errors on Windows 10. Here are the steps:
Step 1: Open the Start menu and search for “Control Panel.” Click on it to open.
Step 2: In the Control Panel, select “Programs” and then “Programs and Features.”
Step 3: Look for the third-party antivirus program you want to uninstall and click on it.
Step 4: Click on the “Uninstall” button and follow the on-screen instructions to remove the program.
Step 5: After uninstalling the antivirus program, restart your computer.
Note: It’s important to have another antivirus program installed on your computer to ensure its protection. Windows Defender, which is built into Windows 10, is a reliable option.
By following these steps, you can resolve program stop working errors caused by third-party antivirus programs and improve the performance of your Windows 10 computer.
Clean Boot Your PC
Clean booting your PC can help troubleshoot and fix program stop working errors in Windows 10. This method allows you to start your computer with only the essential programs and services, preventing any third-party applications from causing conflicts.
To clean boot your PC in Windows 10, follow these steps:
1. Press the Windows key + R to open the Run dialog box.
2. Type “msconfig” and press Enter to open the System Configuration window.
3. In the General tab, select “Selective startup” and uncheck the “Load startup items” box.
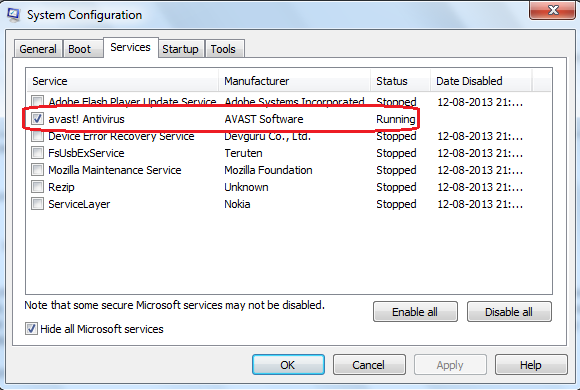
4. Go to the Services tab and check the “Hide all Microsoft services” box.
5. Click “Disable all” to disable all non-Microsoft services.
6. Go to the Startup tab and click “Open Task Manager.”
7. In the Task Manager, disable any startup programs by right-clicking and selecting “Disable.”
8. Close the Task Manager and click “OK” in the System Configuration window.
9. Restart your computer.
By clean booting your PC, you can determine if the program stop working error is caused by a conflicting application or service. Once you identify the problematic program, you can take appropriate steps to fix the issue, such as updating or reinstalling the program.
Remember to re-enable your startup items and services after troubleshooting to ensure normal operation of your PC.
Uninstall specific updates and software
- Open Control Panel by clicking on the Start button and typing “Control Panel” in the search bar. Select it from the search results.
- Click on Programs or Programs and Features.
- In the list of installed programs, locate the specific software or update that may be causing the problem.
- Right-click on the software or update and select Uninstall. Follow the on-screen prompts to complete the uninstallation process.
- Restart your computer to apply the changes.
Update graphics card drivers and disable certain programs
- Update graphics card drivers: Ensure that you have the latest drivers installed for your graphics card. Outdated drivers can cause compatibility issues and lead to program stop working errors.
- Disable unnecessary programs:
- Temporarily disable antivirus software:
- Check for conflicting software: Certain programs may conflict with each other and cause program stop working errors. Identify and disable any conflicting software.
- Clean up temporary files:
- Run a system scan: Perform a thorough scan of your system to check for any malware or viruses that could be causing program stop working errors.
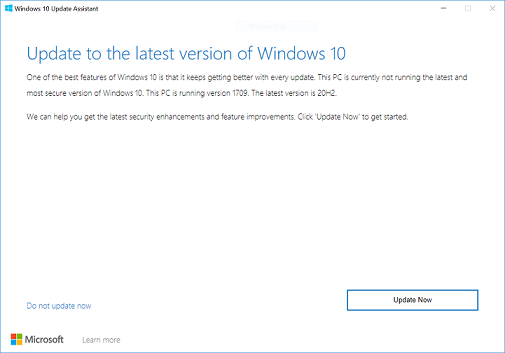
- Update Windows:
- Check for software updates: Ensure that all your installed software is up to date. Developers often release updates to fix bugs and improve compatibility.
- Perform a clean boot:
- Reset the program: If a specific program is causing the error, try resetting it to its default settings. This can resolve any configuration issues that may be causing the program stop working error.
- Reinstall the program:
- Seek professional help: If none of the above steps solve the problem, consider seeking assistance from a technical expert or contacting customer support for further troubleshooting.

Mark Ginter is a tech blogger with a passion for all things gadgets and gizmos. A self-proclaimed "geek", Mark has been blogging about technology for over 15 years. His blog, techquack.com, covers a wide range of topics including new product releases, industry news, and tips and tricks for getting the most out of your devices. If you're looking for someone who can keep you up-to-date with all the latest tech news and developments, then be sure to follow him over at Microsoft.