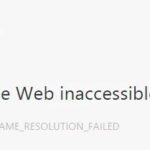
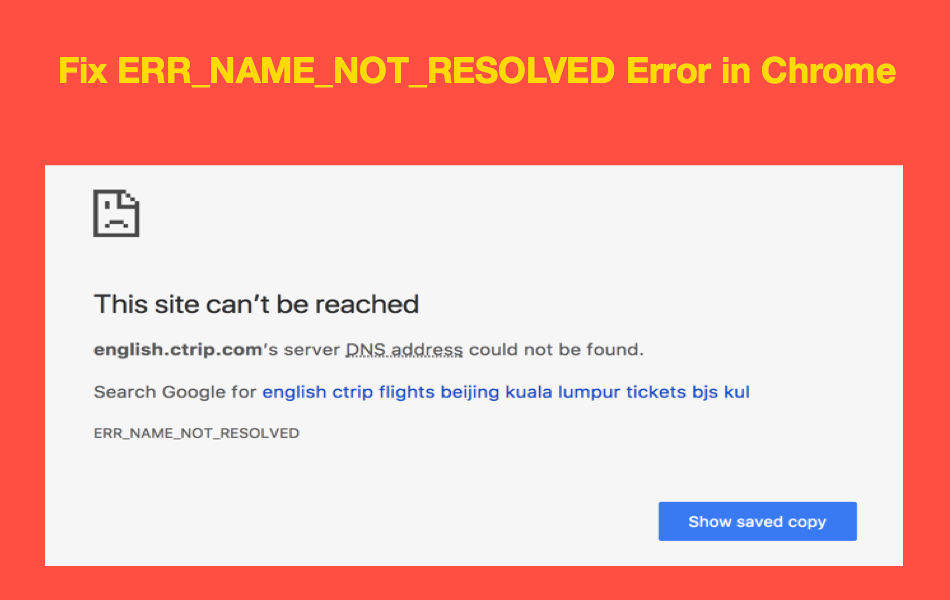
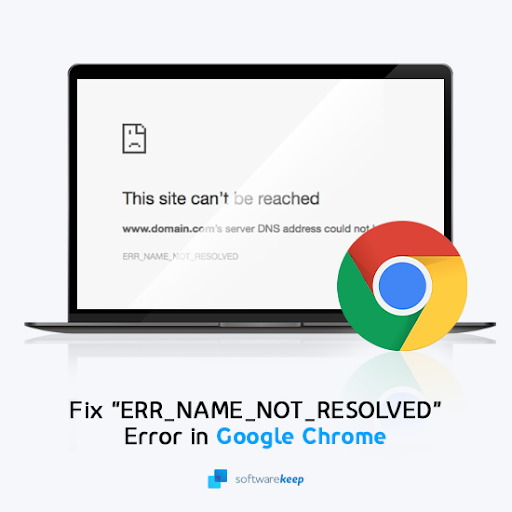
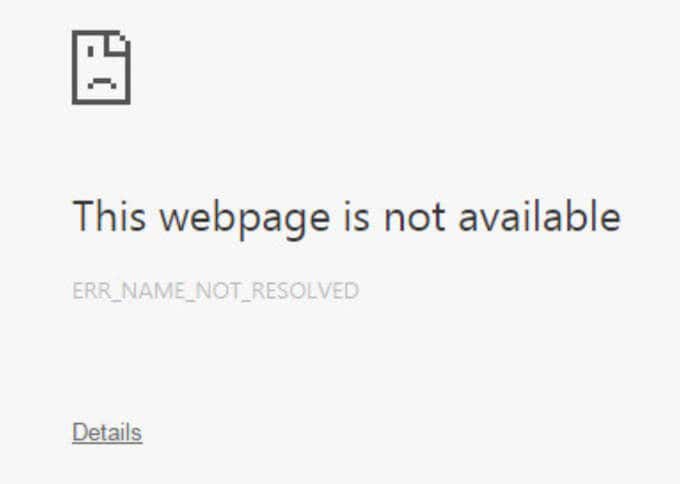
- The ERR_NAME_NOT_RESOLVED error usually occurs when you try to log in to a website.
- When this error occurs, you will also see a message stating that the site is unavailable.
- In fact, the error is due to problems with your DNS address.
- The most likely cause of this error is a problem with your computer or browser, or the site you want to visit may be unavailable and impossible to view.
Troubleshooting internet connection issues can be frustrating, especially when confronted with the ERR_NAME_NOT_RESOLVED error in Google Chrome. In this article, we will explore effective solutions to resolve this error and get your browsing experience back on track.
Understanding the ERR_NAME_NOT_RESOLVED Error
The ERR_NAME_NOT_RESOLVED error in Google Chrome occurs when the browser is unable to resolve the domain name of a website. This can be caused by various reasons such as a DNS misconfiguration, issues with the DNS server, or problems with the internet connection.
To fix this error, try the following methods:
1. Check your internet connection: Ensure that you have a stable internet connection and try accessing the website again.
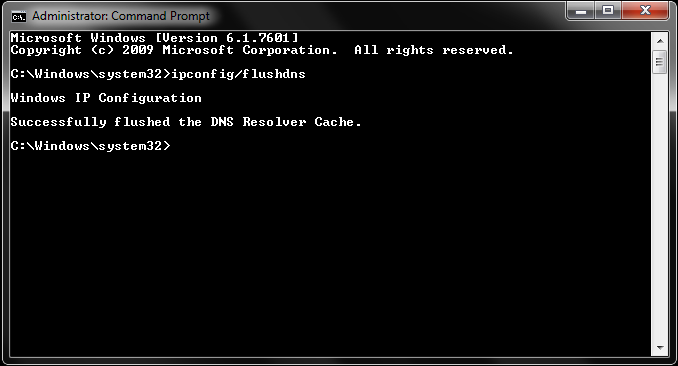
2. Clear DNS cache: Clearing the DNS cache can help resolve any DNS-related issues. Open Command Prompt and type “ipconfig /flushdns” then press Enter.
3. Change DNS server: Try using a different DNS server by going to your network settings and changing the DNS settings to Google’s public DNS (8.8.8.8 and 8.8.4.4) or any other reliable DNS server.
4. Disable VPN or proxy: If you are using a VPN or proxy, disable them and check if the error persists.
By following these steps, you should be able to fix the ERR_NAME_NOT_RESOLVED error and access the desired website without any issues.
Common Causes of the ERR_NAME_NOT_RESOLVED Error
- Incorrect DNS settings: Misconfigured DNS settings can prevent your browser from resolving the domain name, leading to the ERR_NAME_NOT_RESOLVED error.
- Firewall or antivirus blocking: Sometimes, your firewall or antivirus software may block certain websites or interfere with the DNS resolution process, causing the error.
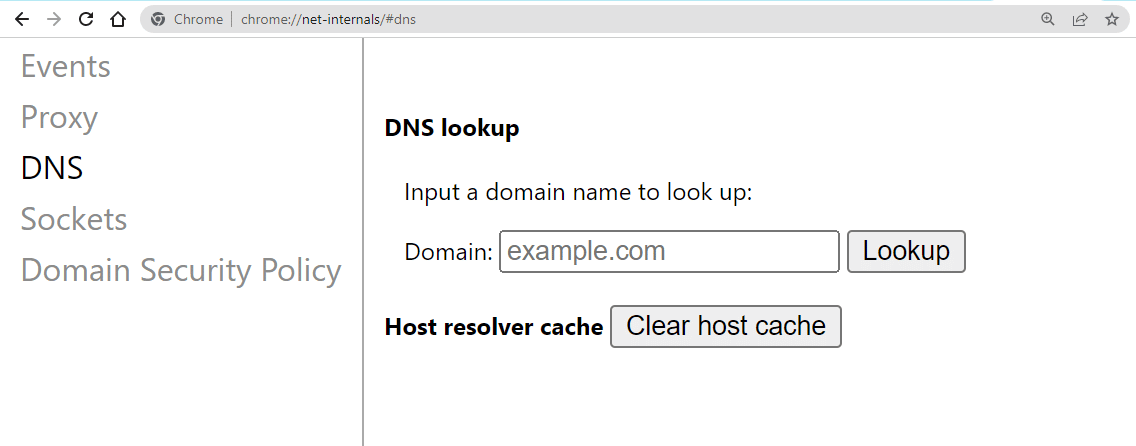
- DNS cache issue: Cached DNS records can become outdated or corrupted, resulting in the error. Clearing the DNS cache can often resolve the issue.
- Incorrect proxy settings: If you have proxy settings enabled, an incorrect configuration can prevent your browser from connecting to the intended website, leading to the error.
- Internet connectivity problems: A weak or unstable internet connection can cause DNS lookup failures, resulting in the ERR_NAME_NOT_RESOLVED error.
- Blocked website by ISP or network administrator: Your ISP or network administrator may have blocked access to certain websites, leading to the error when you try to visit them.
- Domain name misconfiguration: In some cases, the domain name itself may be misconfigured, causing the error. This can occur due to incorrect DNS records or improper domain settings.
- Browser cache or cookies issue: Outdated or corrupted cache files or cookies in your browser can sometimes interfere with the DNS resolution, triggering the ERR_NAME_NOT_RESOLVED error.
- Software conflicts: Certain applications or software installed on your system can conflict with the DNS resolution process, resulting in the error.
Proven Methods to Fix the ERR_NAME_NOT_RESOLVED Error
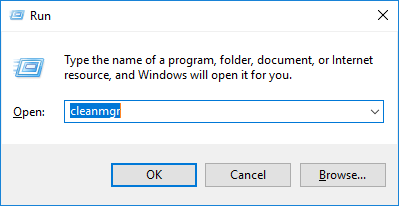
- Open the Command Prompt by pressing Windows Key + R, typing cmd, and hitting Enter.
- Type the following command and press Enter: ipconfig /flushdns
- Wait for the confirmation message that the DNS Resolver Cache has been successfully flushed.
- Restart your computer and check if the ERR_NAME_NOT_RESOLVED error is resolved.

Method 2: Change DNS Servers
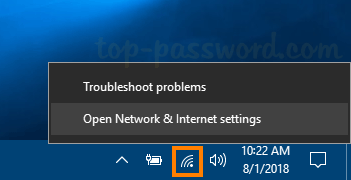
- Right-click on the Network icon in the system tray and select Open Network & Internet settings.
- Click on Change adapter options.
- Right-click on your active network connection and select Properties.
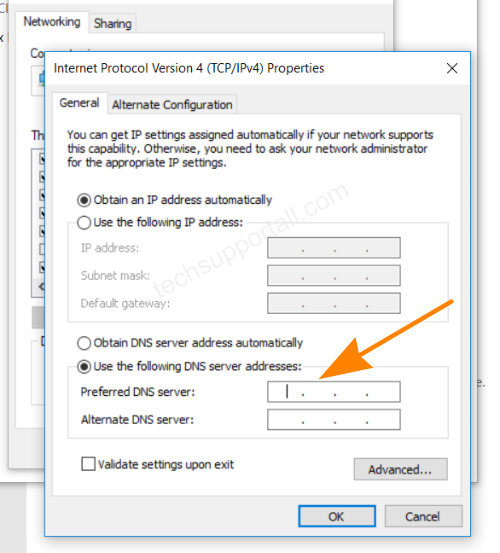
- Double-click on Internet Protocol Version 4 (TCP/IPv4).
- Select Use the following DNS server addresses.
- Enter the following DNS server addresses:
- Preferred DNS server: 8.8.8.8
- Alternate DNS server: 8.8.4.4
- Click OK to save the changes.
- Restart your computer and check if the ERR_NAME_NOT_RESOLVED error is resolved.
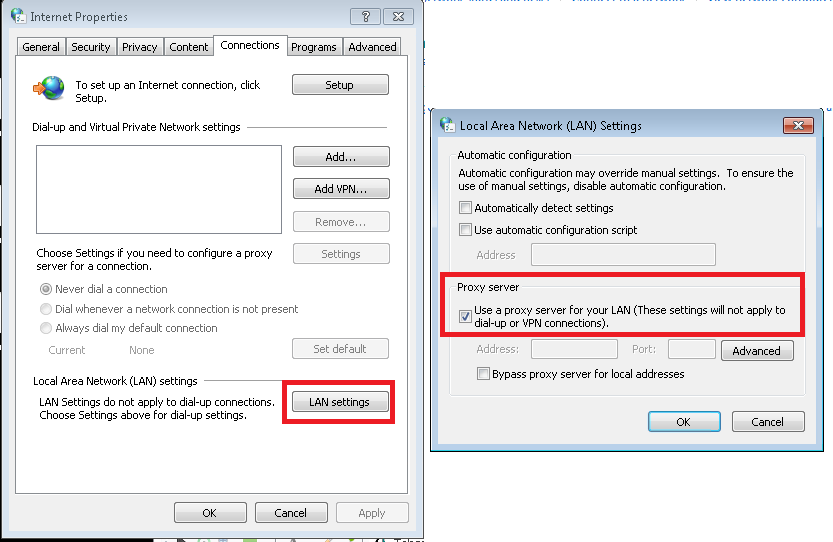
Method 3: Disable Proxy Settings
- Press Windows Key + R to open the Run dialog box.
- Type inetcpl.cpl and press Enter to open the Internet Properties window.
- Go to the Connections tab and click on LAN settings.
- Uncheck the box next to Use a proxy server for your LAN.
- Click OK and then Apply to save the changes.
- Restart your computer and check if the ERR_NAME_NOT_RESOLVED error is resolved.
Method 4: Disable VPN or Antivirus
- If you are using a VPN or antivirus software, temporarily disable it.
- Restart your computer and check if the ERR_NAME_NOT_RESOLVED error is resolved.
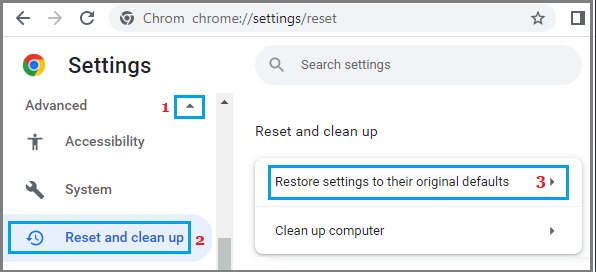
Method 5: Reset Google Chrome
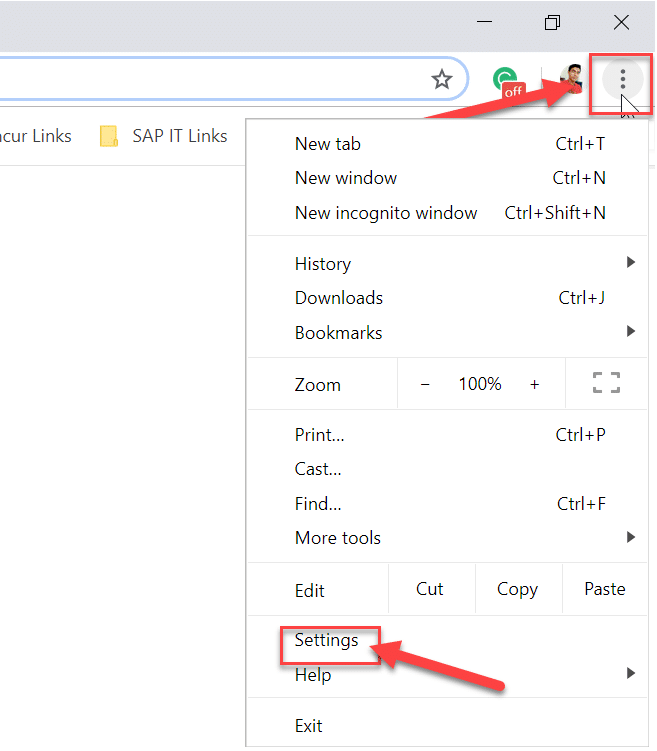
- Open Google Chrome and click on the three-dot menu in the top right corner.
- Go to Settings.
- Scroll down and click on Advanced to expand the advanced settings.
- Scroll down further and click on Restore settings to their original defaults.
- Click Reset settings to confirm.
- Restart Google Chrome and check if the ERR_NAME_NOT_RESOLVED error is resolved.
python

import socket
def check_domain_resolution(domain):
try:
ip_address = socket.gethostbyname(domain)
print(f"Domain '{domain}' resolves to IP address: {ip_address}")
except socket.gaierror:
print(f"Domain '{domain}' cannot be resolved.")
# Example usage
check_domain_resolution("example.com")
In this code, we use the `socket` module in Python to perform a DNS lookup for a given domain name. If the lookup is successful, it returns the IP address associated with the domain. Otherwise, if the domain cannot be resolved, it raises a `socket.gaierror` exception. The `check_domain_resolution` function takes a domain name as an argument and tries to resolve it. It then prints the IP address if successful or displays an error message if the domain cannot be resolved.
Please note that this code only checks for domain resolution and does not fix or troubleshoot the error within Google Chrome itself. It is merely a sample code to demonstrate a tool associated with the given error.
Test Your Internet Connection
To test your internet connection and fix the “ERR_NAME_NOT_RESOLVED” error in Google Chrome, follow these steps:
Step 1: Check your internet connection by opening a different webpage or using another app. If you can’t access any websites or apps, there may be a problem with your internet connection.
Step 2: Clear your browser cache and cookies. Open Chrome, click on the three-dot menu at the top right, go to “More tools,” and select “Clear browsing data.” Make sure to check the boxes for “Cookies and other site data” and “Cached images and files” before clicking “Clear data.”
Step 3: Reset your DNS settings. Press the Windows key + R to open the Run dialog box, type “cmd,” and press Enter. In the Command Prompt, type “ipconfig /flushdns” and press Enter.
Step 4: Restart your router. Unplug the power cord from your router, wait for 30 seconds, and then plug it back in.
Step 5: Try using a different DNS server. Go to your network adapter settings, select “Properties,” and double-click on “Internet Protocol Version 4 (TCP/IPv4).” Choose the option to use the following DNS server addresses and enter the preferred and alternate DNS server addresses (for example, 8.8.8.8 and 8.8.4.4 for Google Public DNS).
By following these steps, you should be able to resolve the “ERR_NAME_NOT_RESOLVED” error and regain access to websites and apps in Google Chrome.
Clear the DNS Cache on Your Computer
To clear the DNS cache on your computer and fix the ERR_NAME_NOT_RESOLVED error in Google Chrome, follow these steps:
1. Open the Command Prompt by pressing the Windows key + R, typing “cmd,” and pressing Enter.
2. In the Command Prompt window, type “ipconfig /flushdns” and press Enter. This command will clear the DNS cache on your computer.
3. After the command is executed successfully, close the Command Prompt.
4. Restart your computer to ensure the changes take effect.
5. Open Google Chrome and try accessing the webpage that was previously showing the ERR_NAME_NOT_RESOLVED error.
If the error persists, try other solution strategies such as checking your internet connection, disabling any VPN or proxy settings, or restarting your router.
Remember, clearing the DNS cache can help resolve various DNS-related issues, and it’s a simple step you can take to fix the ERR_NAME_NOT_RESOLVED error in Google Chrome.
Check the Browser Settings
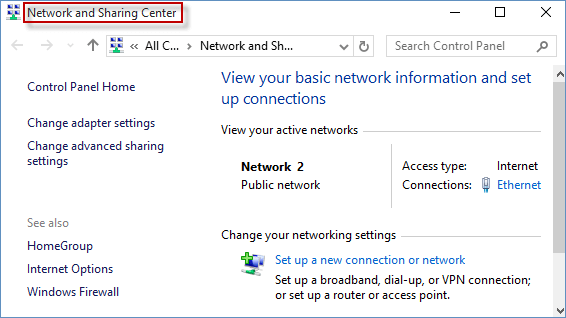
To fix the ERR_NAME_NOT_RESOLVED error in Google Chrome, you should check your browser settings. First, make sure your DNS settings are correct. Open the Control Panel and go to Network and Internet > Network and Sharing Center. Click on Change adapter settings and select your active network connection. Right-click on it and choose Properties. Select Internet Protocol Version 4 (TCP/IPv4) and click on Properties. Make sure the “Obtain DNS server address automatically” option is selected. If not, select it and click OK.
Next, clear your browser cache and cookies. Open Chrome and click on the three dots in the top right corner. Go to More tools > Clear browsing data. Select the time range and check the boxes for “Cookies and other site data” and “Cached images and files”. Click on Clear data.
If the issue persists, try resetting your Chrome settings. Open Chrome and click on the three dots in the top right corner. Go to Settings > Advanced > Reset and clean up. Click on Restore settings to their original defaults and confirm.
Remember to restart your computer after making these changes. Hopefully, this will resolve the ERR_NAME_NOT_RESOLVED error and allow you to browse without any issues.
Reset Your Firewall Settings
Resetting your firewall settings can help fix the ERR_NAME_NOT_RESOLVED error in Google Chrome. Follow these steps to reset your firewall settings:
1. Press the Windows key + R to open the Run dialog box.
2. Type “control” and press Enter to open the Control Panel.
3. Click on “System and Security” and then select “Windows Defender Firewall.”
4. In the left pane, click on “Restore defaults.”
5. Click on the “Restore defaults” button and confirm the action.
6. Restart your computer to apply the changes.
Note: Resetting your firewall settings may allow all incoming connections, so make sure you have other security measures in place. If the error persists, consider checking for other solutions or contacting Microsoft support.
Remember, resetting your firewall settings can help resolve DNS errors and other connection issues in Google Chrome.
Configure the DNS Server on Your Computer
Configure the DNS Server on Your Computer
If you are encountering the ERR_NAME_NOT_RESOLVED error in Google Chrome, it might be due to issues with your DNS server configuration. Follow the steps below to configure the DNS server on your computer:
| Step | Description |
|---|---|
| Step 1 | Open the Control Panel on your computer. |
| Step 2 | Click on “Network and Internet” or “Network and Sharing Center”. |
| Step 3 | Click on “Change adapter settings” on the left-hand side. |
| Step 4 | Right-click on your network connection and select “Properties”. |
| Step 5 | Double-click on “Internet Protocol Version 4 (TCP/IPv4)”. |
| Step 6 | Select “Use the following DNS server addresses”. |
| Step 7 | Enter the preferred DNS server and alternate DNS server addresses provided by your Internet Service Provider (ISP) or use public DNS servers like Google DNS (8.8.8.8 and 8.8.4.4). |
| Step 8 | Click “OK” to save the changes. |
| Step 9 | Restart your computer and check if the ERR_NAME_NOT_RESOLVED error is resolved. |
Disable DNSSEC for Your Domain
To disable DNSSEC for your domain and fix the ERR_NAME_NOT_RESOLVED error in Google Chrome, follow these steps:
1. Open the Microsoft Edge browser and go to your domain’s DNS settings.
2. Locate the DNSSEC settings for your domain.
3. Disable DNSSEC by unchecking the box or toggling the switch.
4. Save the changes and exit the DNS settings.
5. Restart your computer and open Google Chrome.
6. Try accessing the website again to see if the error is resolved.
If you continue to experience the ERR_NAME_NOT_RESOLVED error, try clearing your browser cache and cookies. You can also try resetting your network settings or contacting your DNS provider for further assistance. Remember, disabling DNSSEC should only be done if you are sure it is causing the issue.
Fixing ERR_NAME_NOT_RESOLVED on Android
If you’re encountering the ERR_NAME_NOT_RESOLVED error on your Android device while using Google Chrome, there are a few simple steps you can take to fix it.
First, check your internet connection and make sure it’s stable. Restart your router if necessary.
Next, clear the cache and cookies in your Chrome browser. This can help resolve any temporary issues that may be causing the error.
If the problem persists, try resetting your DNS settings. Go to your device’s settings, then Wi-Fi, and long-press on your network. Select “Modify network” and then check the box that says “Show advanced options.” Change the IP settings to “Static” and enter the DNS addresses provided by your internet service provider.
If none of these steps work, try using a different browser or contacting your internet service provider for further assistance. Remember to always keep your Android device and Chrome browser up to date to avoid any future errors.
Other Common DNS Errors
- Clear DNS Cache
- Open the Command Prompt by pressing Win+R and typing cmd.
- Type ipconfig /flushdns and press Enter.
- Restart your computer and check if the error is resolved.
- Change DNS Server
- Open the Network and Sharing Center by right-clicking the network icon in the taskbar and selecting Open Network and Sharing Center.
- Click on your active network connection.
- Click on Properties.
- Select Internet Protocol Version 4 (TCP/IPv4) and click on Properties.
- Check the option Use the following DNS server addresses.
- Enter the Preferred DNS server and Alternate DNS server addresses provided by your internet service provider.
- Click OK and then Close to save the changes.
- Restart your computer and check if the error is resolved.
- Disable Proxy Settings
- Open Google Chrome and click on the three dots in the top-right corner.
- Select Settings.
- Scroll down and click on Advanced.
- Under the System section, click on Open proxy settings.
- In the Internet Properties window, go to the Connections tab.
- Click on LAN settings.
- Uncheck the box Use a proxy server for your LAN.
- Click OK and then Apply to save the changes.
- Restart your computer and check if the error is resolved.
- Disable Antivirus or Firewall
- Open your Antivirus or Firewall software.
- Find the settings or options related to Web Protection or Firewall.
- Temporarily disable these features or add an exception for Google Chrome.
- Restart your computer and check if the error is resolved.
- Reset Chrome Settings
- Open Google Chrome and click on the three dots in the top-right corner.
- Select Settings.
- Scroll down and click on Advanced.
- Scroll down to the Reset and clean up section.
- Click on Restore settings to their original defaults.
- Click Reset settings to confirm.
- Restart your computer and check if the error is resolved.
Restarting Your Router
To fix the ERR_NAME_NOT_RESOLVED error in Google Chrome, try restarting your router. This simple solution can resolve issues related to DNS domain name resolution.
To restart your router, follow these steps:
1. Locate the power source for your router and unplug it.
2. Wait for about 30 seconds, then plug it back in.
3. Allow your router to fully power up and establish a connection.
Restarting your router can help refresh its settings and resolve any temporary connectivity issues. Once your router is restarted, try accessing the web page again in Google Chrome to see if the error is resolved.
If the issue persists, you may need to explore other solution strategies or contact your internet service provider for further assistance. Remember to always check for any error messages or codes that can provide more specific information about the problem you’re experiencing.
Additional Tips to Fix Errors in Google Chrome
1. Clear the DNS cache: Sometimes, the DNS cache can become corrupted and cause the ERR_NAME_NOT_RESOLVED error. To fix this, open the Command Prompt as an administrator and type “ipconfig/flushdns” and press Enter. This will clear the DNS cache.
2. Disable DNS prefetching: DNS prefetching can sometimes cause conflicts and lead to the error. To disable it, open Chrome and go to Settings > Advanced > Privacy and security > Use a prediction service to load pages more quickly. Toggle off the option.
3. Reset Chrome settings: Resetting Chrome settings to their default values can resolve various errors. Go to Settings > Advanced > Reset and clean up > Restore settings to their original defaults. Click on “Reset settings” to proceed.
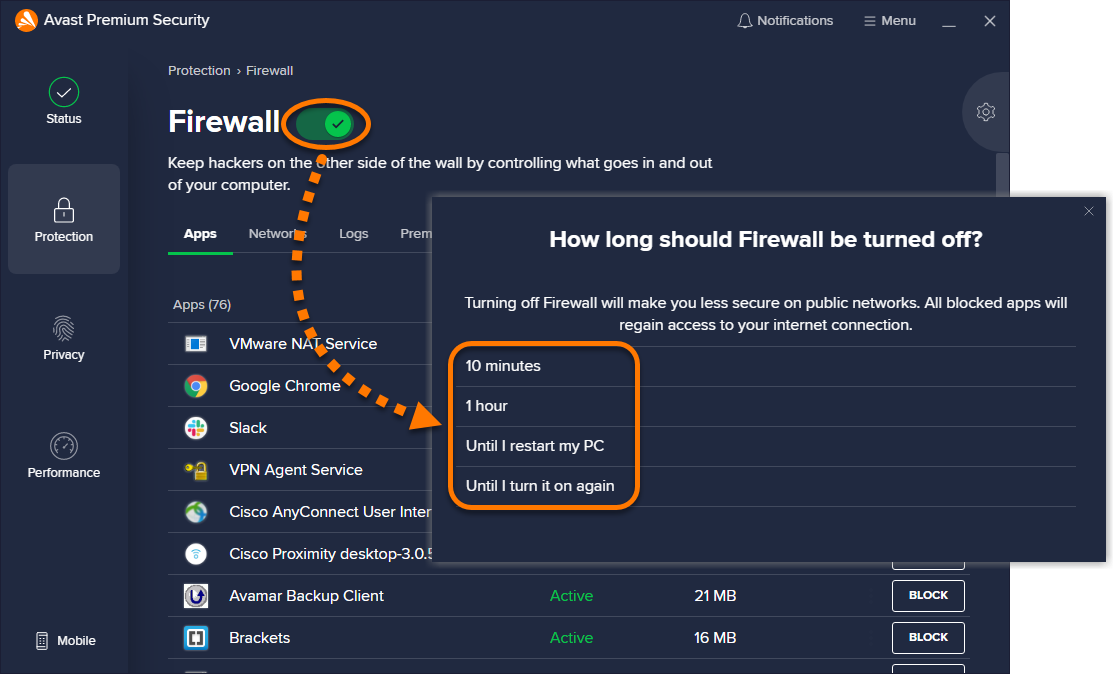
4. Check firewall and antivirus settings: Firewalls and antivirus software can sometimes block certain websites, causing the error. Temporarily disable them and check if the error persists.
5. Use a different DNS server: Changing your DNS server can help resolve DNS-related errors. Open the Control Panel and go to Network and Internet > Network and Sharing Center > Change adapter settings. Right-click on your network connection, select Properties, and double-click on Internet Protocol Version 4 (TCP/IPv4). Choose “Use the following DNS server addresses” and enter a different DNS server address like Google’s Public DNS (8.8.8.8 and 8.8.4.4).
Remember to restart your computer after applying these fixes. If the error still persists, it might be a more complex issue that requires further investigation or assistance from technical support.

Mark Ginter is a tech blogger with a passion for all things gadgets and gizmos. A self-proclaimed "geek", Mark has been blogging about technology for over 15 years. His blog, techquack.com, covers a wide range of topics including new product releases, industry news, and tips and tricks for getting the most out of your devices. If you're looking for someone who can keep you up-to-date with all the latest tech news and developments, then be sure to follow him over at Microsoft.