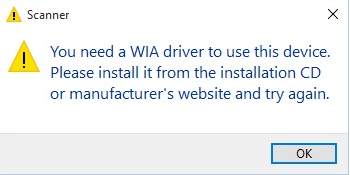
- Many Windows users get the following error message when connecting a scanner, printer, or other devices to a Windows computer: You need a WIA driver to use this device.
- The error does not allow the computer to install the necessary driver for the device connected to it.
- In this article, we will look at some solutions that you can use to fix the error without much effort.
Unveiling the Key Solution to Resolve WIA Driver Recognition Issues on Windows
Understanding the WIA Driver: A Guide to Scanner Errors
If you’re experiencing scanner errors related to the WIA driver on your Windows device, follow these steps to fix the issue:
1. Check the scanner: Make sure it’s properly connected to your PC and turned on. Press the power button if necessary.
2. Restart the PC: Sometimes a simple restart can resolve driver recognition issues.
3. Update the driver: Visit the scanner manufacturer’s website and download the latest driver for your device. Install it on your PC.
4. Troubleshoot the WIA service: Open the Services app, locate the Windows Image Acquisition (WIA) service, right-click on it, and select “Restart” or “Start”.
5. Use driver management tools: Consider using third-party software like Outbyte or MiniTool to scan and update your drivers automatically.
Installing and Updating the WIA Driver for Scanners
Installing and updating the WIA driver for scanners is crucial for resolving scanner errors on Windows. To fix WIA driver recognition issues, follow these steps:
1. First, ensure that your scanner is connected to your PC and powered on.
2. Press the Windows key + R to open the Run dialog box. Type “devmgmt.msc” and press Enter to open Device Manager.
3. In Device Manager, locate and expand the “Imaging devices” category.
4. Right-click on your scanner and select “Update driver.”
5. Choose the option to search automatically for updated driver software.
6. Windows will now search for the latest driver software online and install it if available.
7. If Windows doesn’t find an updated driver, visit the website of your scanner manufacturer and download the latest driver manually. Then, follow the on-screen instructions to install it.
Troubleshooting: Resolving the “You Need a WIA Driver to Use This Device” Error
If you encounter the “You Need a WIA Driver to Use This Device” error while trying to use your scanner on Windows, follow these steps to fix the issue:
1. Restart your computer and scanner. Sometimes a simple restart can resolve driver recognition problems.
2. Update the scanner driver. Visit the manufacturer’s website or use a trusted driver updater tool to download and install the latest driver for your scanner.
3. Check the scanner’s connection. Ensure that the scanner is properly connected to your computer and that the USB cable is functioning correctly.
4. Verify the Windows Image Acquisition (WIA) service is running. Press the Windows key + R, type “services.msc”, and hit Enter. Locate the “Windows Image Acquisition” service, right-click it, and select “Start” if it is not already running.
5. Reinstall the scanner software. Uninstall the current scanner software, restart your computer, and then reinstall the software from the manufacturer’s website.
Exploring TWAIN Drivers for Scanners
If you’re experiencing a scanner error related to WIA driver recognition on Windows, there are a few steps you can take to troubleshoot the issue.
First, make sure that your scanner’s TWAIN driver is installed correctly. To do this, go to the manufacturer’s website and download the latest driver for your specific scanner model.
Next, ensure that the scanner is properly connected to your computer and turned on. If it is, try restarting your computer and then launching the scanning software again.
If the issue persists, you can try resetting the Windows Image Acquisition (WIA) service. Open the Run dialog by pressing the Windows key + R, type “services.msc” and hit Enter. Locate the “Windows Image Acquisition” service, right-click on it, and select “Restart”.
If none of these steps resolve the issue, you may need to seek further assistance from the scanner manufacturer or a professional technician. Remember, the specific steps may vary depending on your scanner model and operating system.
Dealing with Blocked Access to thegeekpage.com: Common Causes and Solutions
-
Scanner Error – Fix WIA Driver Recognition on Windows
- Check the connection between the scanner and the computer.
- Make sure the scanner is turned on and properly powered.
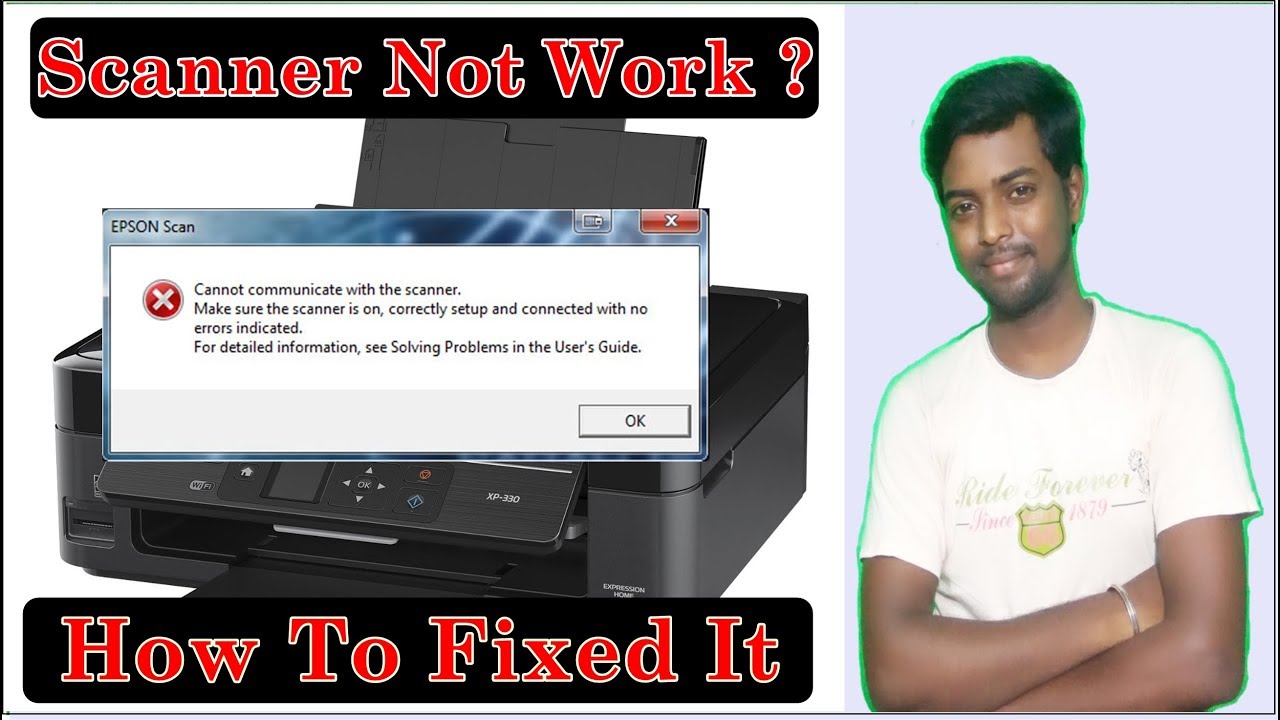
- Verify that the scanner is recognized by the computer:
- Open Device Manager by pressing Win+X and selecting Device Manager.
- Expand the Imaging devices or Printers category.
- Look for the scanner name or any device with a yellow exclamation mark.
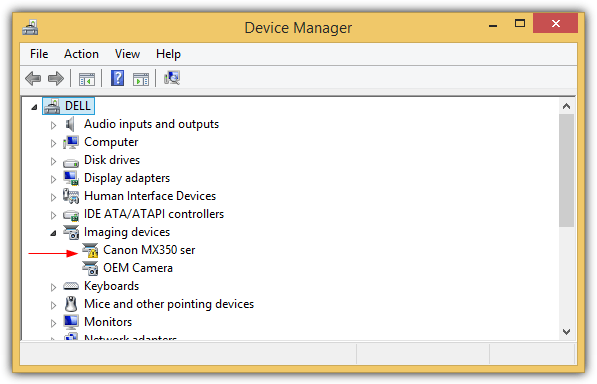
- If there is a yellow exclamation mark, right-click on the device and select Update driver.
- Restart the computer and the scanner.
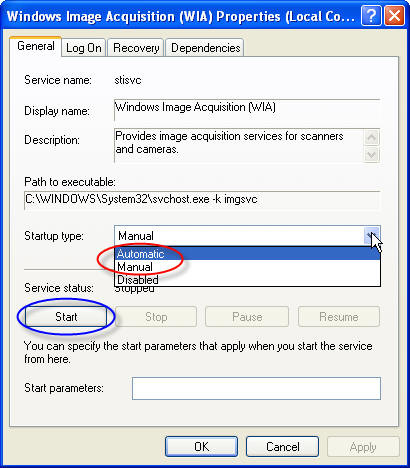
- Check if the Windows Image Acquisition (WIA) service is running:
- Press Win+R to open the Run dialog box.
- Type services.msc and press Enter.
- Scroll down and locate Windows Image Acquisition (WIA) in the list of services.
- If it is not running, right-click on it and select Start.
- Update or reinstall the scanner driver:
- Visit the manufacturer’s website and download the latest driver for your scanner model.
- Uninstall the current scanner driver from the Device Manager.
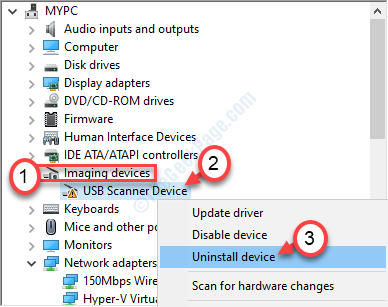
- Install the downloaded driver and follow the on-screen instructions.
- Disable any conflicting software or firewall blocking the scanner:
- Temporarily disable your antivirus software or firewall.
- Check if the scanner works without any issues.
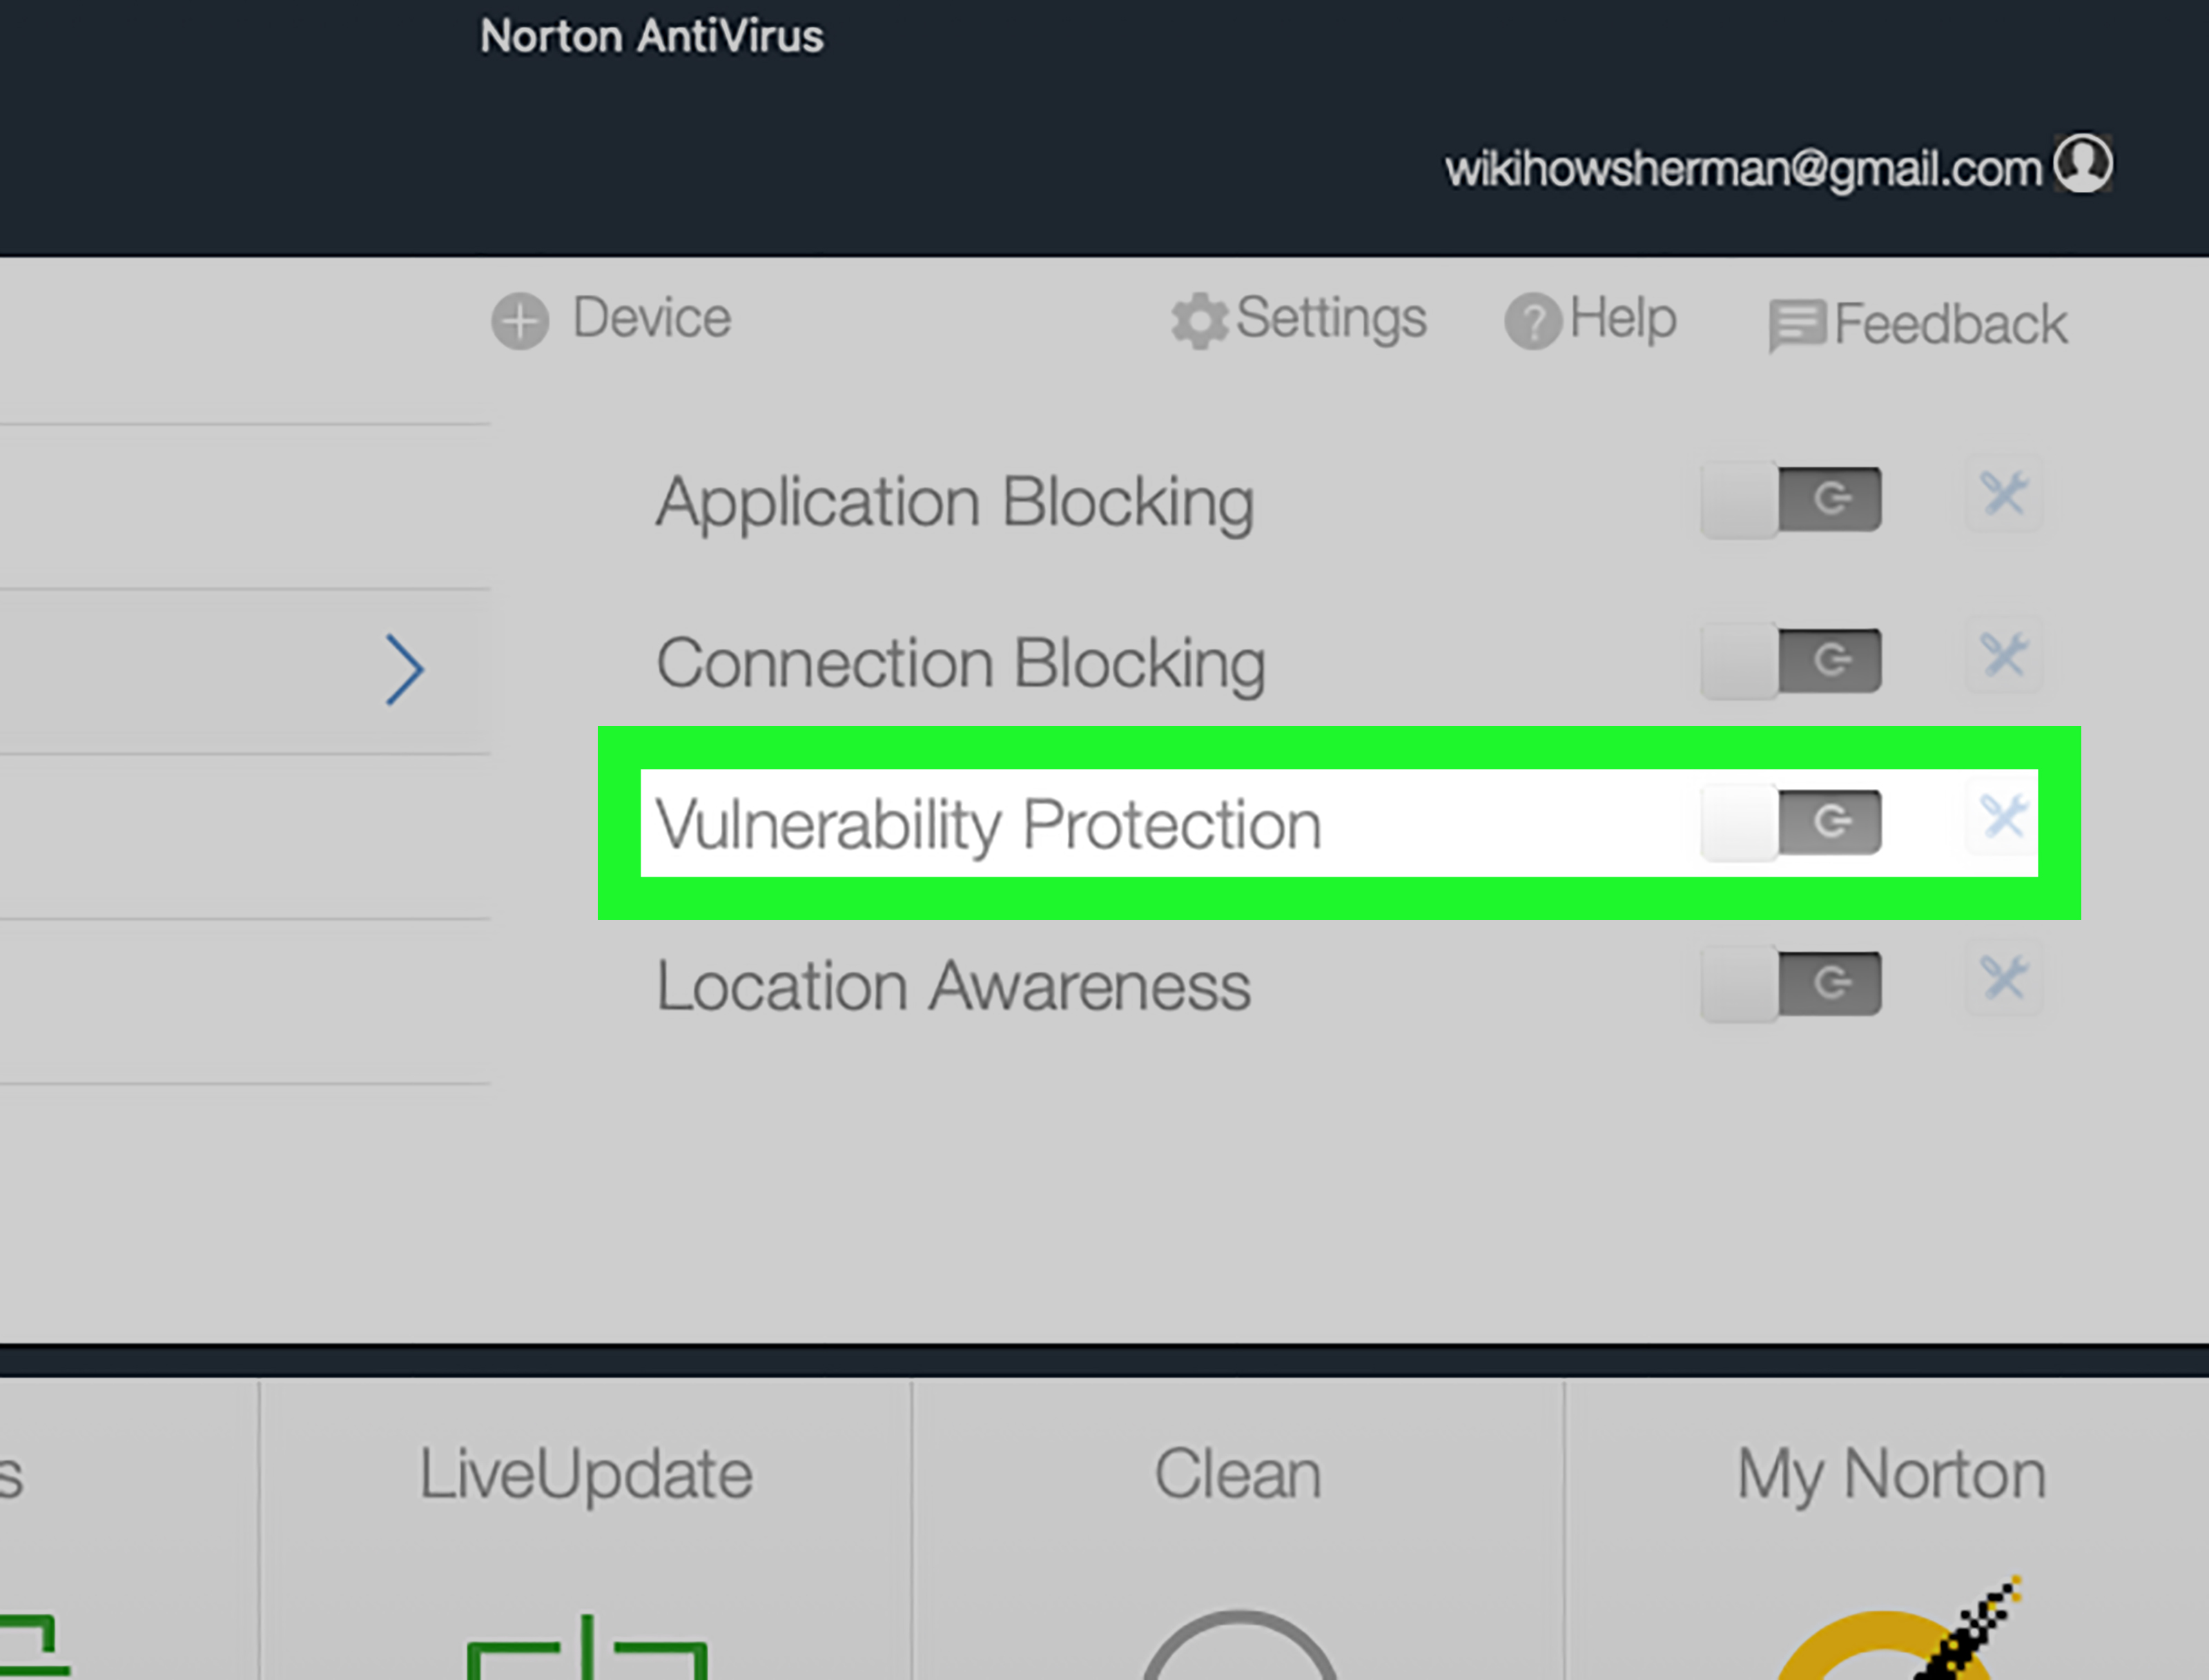
- If it works, add an exception or configure the software/firewall to allow the scanner.
- Perform a system restore:
- Open the Control Panel.
- Select Recovery and then choose Open System Restore.
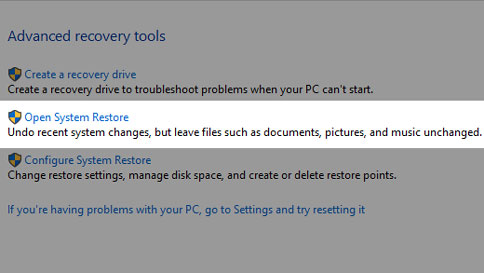
- Follow the on-screen instructions to restore your system to a previous working state.
- Contact technical support or the scanner manufacturer for further assistance.
Resolving Blocked Access Issues: Steps to Regain Access to thegeekpage.com
Steps to Regain Access to thegeekpage.com:
1. Check your internet connection: Ensure that you have a stable internet connection to access thegeekpage.com.
2. Clear your browser cache and cookies: Press Ctrl + Shift + Delete to open the clearing options in your browser. Select the options to clear cache and cookies, then click on “Clear” or “Delete”.
3. Disable security software temporarily: Temporarily disable any security software, such as antivirus or firewall, that may be blocking access to the website.
4. Restart your router and device: Turn off your router and device, wait for a few seconds, then turn them back on. This can help resolve any temporary network issues.
5. Contact your internet service provider (ISP): If you’re still unable to access thegeekpage.com, reach out to your ISP for assistance. They may be able to provide further troubleshooting steps.
Following these steps should help you regain access to thegeekpage.com. If the issue persists, consider reaching out to the site owner for further assistance.
Mark Ginter is a tech blogger with a passion for all things gadgets and gizmos. A self-proclaimed "geek", Mark has been blogging about technology for over 15 years. His blog, techquack.com, covers a wide range of topics including new product releases, industry news, and tips and tricks for getting the most out of your devices. If you're looking for someone who can keep you up-to-date with all the latest tech news and developments, then be sure to follow him over at Microsoft.
