- The Nvidia Control Panel is software that allows you to easily configure the hardware settings of your graphics card (GPU) and media processor (MCP) It is a popular software for gamers, video editors, and other media professionals.
- It can be a little tricky if you don’t know what you’re doing.
- To update drivers manually, you need to find the right driver online, download it and install it step by step.
Navigating the realm of graphics settings can be a daunting task, especially when you encounter roadblocks along the way. One such hindrance that users often face is the frustration of being unable to download the Nvidia Control Panel. In this article, we will delve into the possible reasons behind this issue and explore potential solutions to help you regain control over your graphics settings. So, buckle up as we embark on a troubleshooting journey to conquer this perplexity.
Troubleshooting methods for unable to download Nvidia Control Panel
If you’re having trouble downloading the Nvidia Control Panel, there are a few troubleshooting methods you can try.
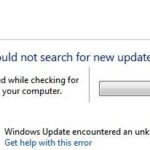
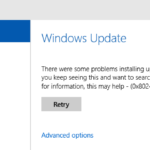
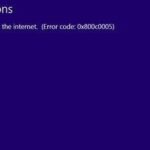
First, ensure that your Windows operating system is up to date with the latest updates. Sometimes, outdated systems can cause issues with downloading certain components.
Next, perform a disk cleanup to remove any unnecessary files that may be interfering with the installation process. To do this, open the Start Menu and type “disk cleanup” in the search bar. Select the option and follow the prompts to clean up your system files.
If you’re still experiencing issues, try temporarily disabling your antivirus software. Some antivirus programs may mistakenly identify the Nvidia installer as a threat and block the download. Remember to re-enable your antivirus after the installation is complete.
If none of these methods work, you may need to reach out to Nvidia support for further assistance. They can provide more specific troubleshooting steps based on your system’s configuration.
Restarting and updating Nvidia services and drivers
If you’re unable to download Nvidia Control Panel, it may be necessary to restart and update Nvidia services and drivers. This can help resolve any issues that may be preventing the download.
To restart Nvidia services, follow these steps:
1. Press the Windows key on your keyboard to open the Start Menu.
2. Type “services.msc” and press Enter to open the Services window.
3. In the Services window, scroll down and locate Nvidia Display Container LS and Nvidia LocalSystem Container.
4. Right-click on each of these services and select Restart.
To update Nvidia drivers, follow these steps:
1. Go to the Nvidia website and download the latest driver for your graphics card.
2. Once the driver is downloaded, double-click on the installer file.
3. Follow the on-screen instructions to install the driver.
4. Once the installation is complete, restart your computer.
By restarting and updating Nvidia services and drivers, you should be able to download Nvidia Control Panel successfully. If you continue to experience issues, it may be helpful to seek further assistance from Nvidia support or consult online forums for additional troubleshooting steps.
Deleting temporary files and enabling automatic downloads
To resolve the issue of being unable to download Nvidia Control Panel, follow these steps:
1. Delete temporary files:
– Press the Start button and search for “Disk Cleanup”.
– Open the tool and select the drive where Windows is installed.
– Check the “Temporary files” option and click “OK” to delete them.
2. Enable automatic downloads:
– Open Nvidia GeForce Experience.
– Click on the gear icon to access settings.
– Under the “General” tab, enable the “Automatically download driver updates” option.
By cleaning up temporary files, you can free up space on your system and potentially resolve downloading issues. Enabling automatic downloads in Nvidia GeForce Experience ensures that you receive the latest driver updates automatically, improving your graphics card’s performance and compatibility with games and applications.
python

import os
nvidia_control_panel_path = r"C:\Program Files\NVIDIA Corporation\Control Panel Client\nvcplui.exe"
if os.path.isfile(nvidia_control_panel_path):
print("NVIDIA Control Panel is installed.")
else:
print("NVIDIA Control Panel is not found.")
Please note that the `nvidia_control_panel_path` variable in the code snippet assumes a default installation path on a Windows system. You may need to modify it if the control panel is installed in a different location.
Although this code snippet checks for the presence of the NVIDIA Control Panel, it does not provide any functionality beyond that.
Manually downloading and installing Nvidia drivers
If you’re unable to download the Nvidia Control Panel, you can manually download and install the Nvidia drivers. Follow these steps to get started:
1. Visit the Nvidia website and navigate to the drivers section.
2. Use the search filters to find the appropriate drivers for your graphics card and operating system. Make sure to select the correct model and version.
3. Download the driver package to your computer.
4. Right-click on the downloaded file and select “Run as administrator” to ensure proper installation.
5. Follow the on-screen instructions to complete the installation process.
6. Once installed, restart your computer to apply the changes.
It’s important to note that manually installing drivers requires some technical knowledge. If you encounter any errors or issues during the process, refer to the specific error message or consult the Nvidia support website for troubleshooting steps.
Resolving issues with Nvidia drivers not installing on Windows
If you’re unable to download Nvidia Control Panel or encountering issues with Nvidia drivers not installing on Windows, follow these steps to resolve the problem:
1. Start by cleaning up your system files. Press Start, search for “Disk Cleanup” and run the tool to remove unnecessary files that may be interfering with the installation process.
2. Ensure that you have the latest version of Windows 10 or Windows 11 installed on your system. Keeping your operating system up to date is crucial for proper driver installation and compatibility.
3. Check if you have any other graphics drivers or GPU components installed on your system. Remove any conflicting components or drivers to avoid errors during installation.
4. Download the latest Nvidia graphics driver from the official Nvidia website. Make sure to select the correct GPU model and file type for your system.
5. Before installing the driver, temporarily disable any antivirus or firewall software that may be blocking the installation process.
6. Right-click on the downloaded driver file and select “Run as administrator” to ensure proper installation permissions.
7. Follow the installation wizard and allow the process to complete. If you encounter any errors or issues, refer to the Nvidia support website for troubleshooting guidance.
Remember, it is important to periodically update your Nvidia drivers to ensure optimal performance and compatibility with the latest games and applications.
Resolving compatibility issues and installing older driver versions
To resolve compatibility issues and install older driver versions for Nvidia Control Panel, follow these steps:
1. Cleanup system files: Press Start and search for “Disk Cleanup.” Select your system drive and check the boxes for “Temporary files” and “Previous Windows installations.” Click “OK” to clean up unnecessary files.
2. Download and install the older driver version: Visit the Nvidia website and search for the driver version compatible with your graphics card. Download the driver and save it to your computer.
3. Uninstall the current driver: Press Start, search for “Device Manager,” and open it. Expand the “Display adapters” category, right-click your graphics card, and select “Uninstall device.” Check the box for “Delete the driver software for this device” and click “Uninstall.”
4. Install the older driver version: Open the downloaded driver file and follow the on-screen instructions to install it. Restart your computer when prompted.
5. Access Nvidia Control Panel: After restarting, right-click on your desktop and select “Nvidia Control Panel” from the context menu. If it’s still missing, press Start, search for “Nvidia Control Panel,” and open it.
Reinstalling the GeForce Experience Client for smooth Nvidia driver downloads and installations
To reinstall the GeForce Experience Client and resolve issues with Nvidia driver downloads and installations, follow these steps:
1. First, ensure that you have administrative privileges on your Windows 10 or Windows 11 computer.
2. Open the Control Panel and navigate to “Programs” or “Apps” and locate “GeForce Experience.”
3. Right-click on “GeForce Experience” and select “Uninstall” from the context menu. Follow any prompts to complete the uninstallation process.
4. Visit the official Nvidia website and download the latest version of the GeForce Experience Client.
5. Once the download is complete, locate the downloaded file and double-click on it to initiate the installation process.
6. Follow the on-screen instructions to install the GeForce Experience Client.
7. After installation, launch the GeForce Experience Client and log in to your Nvidia account.
8. With the client open, navigate to the “Drivers” tab and click on “Check for updates” to download the latest Nvidia graphics driver.
9. Once the driver is downloaded, click on “Express installation” to proceed with the installation process.
10. Restart your computer to complete the installation and ensure the smooth operation of Nvidia drivers and the Nvidia Control Panel.
By reinstalling the GeForce Experience Client, you can resolve issues such as “access denied” or “nvidia installer failed” errors, missing Nvidia Control Panel, and improve overall graphics card performance.

Mark Ginter is a tech blogger with a passion for all things gadgets and gizmos. A self-proclaimed "geek", Mark has been blogging about technology for over 15 years. His blog, techquack.com, covers a wide range of topics including new product releases, industry news, and tips and tricks for getting the most out of your devices. If you're looking for someone who can keep you up-to-date with all the latest tech news and developments, then be sure to follow him over at Microsoft.