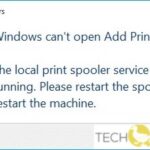
- Windows has a program called Print Spooler that manages all print jobs on your computer system.
- The print spooler service can sometimes crash, resulting in error 0x800706B9.
- This article will show you some possible solutions to solve the error.
- A third-party antivirus or firewall is blocking the print spoolser from starting.
- A system restore restore point can be used to complete the recovery process following the on-screen instructions on your printer.
Troubleshooting printer issues can be a tedious task, especially when encountering the notorious Print Spooler Error 0x800706b9 on Windows 10/11. In this article, we delve into effective solutions to overcome this frustrating error, ensuring a seamless printing experience without the need for exclamation marks.
Update printer drivers
To update printer drivers and fix the Print Spooler Error 0x800706b9 on Windows 10/11, follow these steps:
1. Open the Start menu and search for “Device Manager” to access the device management tool.
2. Expand the “Print queues” category to view your installed printers.
3. Right-click on the printer causing the error and select “Update driver.”
4. Choose the option to automatically search for updated driver software.
5. If an update is found, follow the on-screen instructions to install it.
6. If no updates are available, you can try uninstalling the printer driver and then reinstalling it using the latest version from the manufacturer’s website.
7. Once the driver update or reinstallation is complete, restart your computer.
Updating your printer drivers can often resolve issues with the Print Spooler service and error 0x800706b9. If the problem persists, you may need to seek further assistance from a professional or consult additional resources.
Check for malware
If you’re encountering the Printer Spooler Error 0x800706b9 on your Windows 10/11 computer, there are a few steps you can take to fix it.
First, try using the built-in Printer Troubleshooter. To do this, press the Windows key + I to open the Settings app, then go to “Update & Security” > “Troubleshoot” > “Additional Troubleshooters” and select “Printer”.
If that doesn’t resolve the issue, you can try updating your printer drivers. Use a reliable tool like Driver Updater to automatically scan and update your drivers.
Another option is to check if the Printer Spooler service is running properly. Press the Windows key + R, type “services.msc“, and press Enter. Look for the “Print Spooler” service, right-click on it, and select “Restart”.
If all else fails, you can try performing a system restore to a point before the error occurred. Press the Windows key + R, type “rstrui“, and press Enter to open the System Restore window. Follow the on-screen instructions to restore your system.
These steps should help you fix the Printer Spooler Error 0x800706b9 and get your printer working again.
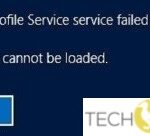
Create a new user account
To create a new user account for fixing the Print Spooler Error 0x800706b9 on Windows 10/11, follow these steps:
1. Press the Windows key + R to open the Run dialog box.
2. Type “netplwiz” and click OK to open the User Accounts window.
3. Click on the “Add” button to create a new user account.
4. Enter the necessary information for the new account, such as username and password.
5. Click Next and select the account type (Administrator or Standard user).
6. Click Finish to complete the account creation process.
Once the new user account is created, you can try using it to fix the Print Spooler Error. If the issue persists, you may need to try other solutions or consult a professional for further assistance.
Modify registry settings
Modify Registry Settings to Fix Print Spooler Error 0x800706b9 on Windows 10/11
If you’re encountering the Print Spooler Error 0x800706b9 on your Windows 10/11 computer, modifying the registry settings can often resolve the issue. Here’s how to do it:
1. Press the Windows key + R to open the Run dialog box.
2. Type “regedit” and press Enter to open the Registry Editor.
3. Navigate to the following registry key: HKEY_LOCAL_MACHINE\SYSTEM\CurrentControlSet\Services\Spooler.
4. Double-click on the “DependOnService” value on the right-hand side.
5. Remove any entries that are not “RPCSS” and click OK.
6. Restart your computer for the changes to take effect.
This simple modification can help fix the Print Spooler Error 0x800706b9 and allow you to resume printing without any issues. Remember to always create a backup of your registry before making any changes.
Reset winsock
To fix the Print Spooler Error 0x800706b9 on Windows 10/11, you can try resetting the Winsock. Here’s how:
1. Press the Windows key + X and select “Command Prompt (Admin)” from the menu.
2. In the command prompt window, type the following command and press Enter:
netsh winsock reset
3. Restart your computer.
4. Check if the Print Spooler Error 0x800706b9 is resolved.
Resetting the Winsock can help resolve network-related issues that may be causing the error. If this method doesn’t work, you can also try running the Printer Troubleshooter or updating your printer drivers using a reliable Driver Updater tool. Remember to ensure that your printer has enough resources and storage to perform its operations smoothly.
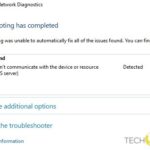
Run printer troubleshooter
To fix the Print Spooler Error 0x800706b9 on Windows 10/11, you can run the printer troubleshooter. Here’s how:
1. Press the Windows key + R to open the Run dialog box.
2. Type “ms-settings:troubleshoot” and press Enter to open the Troubleshoot settings.
3. Scroll down and click on “Printer” under the “Find and fix other problems” section.
4. Click on the “Run the troubleshooter” button.
5. Follow the on-screen instructions to complete the troubleshooting process.
6. Once the troubleshooter finishes, check if the error is resolved.
Running the printer troubleshooter can help identify and resolve any issues with the Print Spooler service. It will automatically detect and fix common problems, such as driver issues or print job errors.
Stop Print Spooler service
To fix the Print Spooler Error 0x800706b9 on Windows 10/11, you need to stop the Print Spooler service. Here’s how you can do it:
1. Press the Windows key + R to open the Run dialog box.
2. Type “services.msc” and press Enter to open the Services window.
3. Scroll down and find the “Print Spooler” service.
4. Right-click on it and select “Stop” from the context menu.
5. Wait for a few seconds and then right-click on it again and select “Start” from the context menu to restart the service.
If you still encounter the error, try restarting your computer and then follow the steps again. This should resolve the Print Spooler Error 0x800706b9 and allow you to print without any issues.
Perform a System Restore
To perform a System Restore and fix the Print Spooler Error 0x800706b9 on Windows 10/11, follow these steps:
1. Press the Windows key and type “System Restore” in the search bar.
2. Open the System Restore tool.
3. Click “Next” and select a restore point before the error occurred.
4. Click “Next” and then “Finish” to start the restore process.
5. Your system will restart and the restore process will begin.
6. Once the restore is complete, check if the Print Spooler Error 0x800706b9 is resolved.
If the error persists, you may need to try other troubleshooting methods such as updating printer drivers or checking for corrupted print spooler files. Remember to create a restore point before making any changes to ensure you can revert back if needed.
Set Print Spooler service startup type to Automatic
To fix the Print Spooler Error 0x800706b9 on Windows 10/11, you need to set the Print Spooler service startup type to Automatic. Follow these steps:
1. Press the Windows key + R to open the Run dialog box.
2. Type “services.msc” and press Enter to open the Services window.
3. Scroll down and find the “Print Spooler” service.
4. Right-click on it and select “Properties”.
5. In the General tab, locate the “Startup type” section.
6. Change the startup type to “Automatic” from the drop-down menu.
7. Click on “Apply” and then “OK” to save the changes.
8. Restart your computer.
By setting the Print Spooler service startup type to Automatic, it ensures that the service starts automatically with your computer and prevents the error from occurring.
Uninstall third-party system protection programs
To fix the Print Spooler Error 0x800706b9 on Windows 10/11, you may need to uninstall third-party system protection programs. These programs can sometimes interfere with the operation of the Print Spooler service, causing the error to occur.
To uninstall third-party system protection programs, follow these steps:
1. Press the Windows key + R to open the Run dialog box.
2. Type “appwiz.cpl” and press Enter to open the Programs and Features window.
3. Scroll through the list of installed programs and locate any third-party system protection programs.
4. Right-click on the program and select “Uninstall” from the context menu.
5. Follow the on-screen prompts to complete the uninstallation process.
After uninstalling the third-party system protection programs, restart your computer and check if the Print Spooler Error 0x800706b9 has been resolved.
Note: It’s important to only uninstall third-party programs and not any essential system files or drivers. If you’re unsure about a program, it’s best to seek guidance from a professional or consult the program’s documentation.
If you continue to experience issues with the Print Spooler service, you may need to troubleshoot further or seek additional support.
Refresh Windows 10 computer
To fix the Print Spooler Error 0x800706b9 on Windows 10/11, you can refresh your computer. This will help resolve any issues with the Print Spooler service and get your printer working again. Here’s how to do it:
1. Press the Windows key + I to open the Settings app.
2. Go to Update & Security and select Recovery.
3. Under Reset this PC, click on the Get started button.
4. Choose the option to Keep my files.
5. Follow the on-screen instructions to complete the reset process.
Important: This process will remove any apps and settings you’ve installed or modified, so make sure to back up any important files before proceeding.
Once the reset is complete, your computer will be restored to its default settings, and the Print Spooler error should be resolved. You can then reinstall your printer driver and try printing again.
If you continue to experience issues, it may be necessary to update your printer driver or seek further assistance from the printer manufacturer or a professional technician.
Restart Windows Print Spooler Service
To fix the Print Spooler Error 0x800706b9 on Windows 10/11, you may need to restart the Windows Print Spooler service. Follow these steps:
1. Press the Windows key + R to open the Run dialog box.
2. Type “services.msc” and press Enter to open the Services window.
3. Scroll down and locate the “Print Spooler” service.
4. Right-click on it and select “Stop” from the context menu.
5. Open File Explorer and navigate to the following location: C:\Windows\System32\spool\printers.
6. Delete all files in this folder.
7. Go back to the Services window, right-click on the “Print Spooler” service, and select “Start”.
8. Restart your computer.
This should resolve the Print Spooler Error 0x800706b9 and allow you to print again. If you continue to experience issues, you may need to update your printer drivers or check for any other software conflicts.
Fix dependency information for the Spooler service
To fix dependency information for the Spooler service and resolve the Print Spooler Error 0x800706b9 on Windows 10/11, follow these steps:
1. Press the Windows key + R to open the Run dialog box.
2. Type “services.msc” and press Enter to open the Services window.
3. Scroll down and locate the “Print Spooler” service.
4. Right-click on the “Print Spooler” service and select Properties.
5. In the Properties window, go to the Dependencies tab.
6. Review the list of services that the Print Spooler service depends on.
7. Make sure all the required services are running. If any are not running, start them by right-clicking and selecting Start.
8. If a service is missing or not running, it may indicate a problem with your system. Consider running a reliable system optimization tool like Outbyte PC Repair to fix any underlying issues.
9. Restart your computer and check if the Print Spooler Error 0x800706b9 is resolved.
These steps should help fix any dependency issues with the Spooler service and resolve the print spooler error.
Use Registry Editor to fix error
To fix the Print Spooler Error 0x800706b9 on Windows 10/11, you can use Registry Editor. Follow these steps:
1. Press the Windows key + R to open the Run dialog box.
2. Type “regedit” and press Enter to open Registry Editor.
3. In Registry Editor, navigate to the following location: HKEY_LOCAL_MACHINE\SYSTEM\CurrentControlSet\Services\Spooler.
4. In the right pane, double-click on the “DependOnService” value.
5. Remove any entries except for “RPCSS” and click OK.
6. Close Registry Editor.
7. Restart your computer.
These steps will help you resolve the Print Spooler Error 0x800706b9 by editing the registry settings related to the Print Spooler service. Remember to be cautious while making changes in the registry, as incorrect modifications can cause system instability.

Mark Ginter is a tech blogger with a passion for all things gadgets and gizmos. A self-proclaimed "geek", Mark has been blogging about technology for over 15 years. His blog, techquack.com, covers a wide range of topics including new product releases, industry news, and tips and tricks for getting the most out of your devices. If you're looking for someone who can keep you up-to-date with all the latest tech news and developments, then be sure to follow him over at Microsoft.