- Damaged user profiles are a common problem in Windows, especially in 7 and Vista, and the solution depends on what kind of error message you get.
- Here we explain how to fix the problem or, if necessary, create a new account and migrate your data to the new profile.
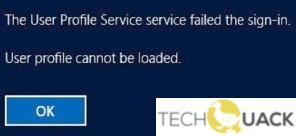
- The problem occurs when you enter your password on the Windows login screen and press Enter.
- The solution to this problem is quite simple and easy.
Welcome to the world of Windows 10 troubleshooting! In this article, we uncover the mysteries behind the User Profile Service Failed Logon Error, guiding you through the process of resolving this pesky issue. So, get ready to bid farewell to login errors and embrace a smooth Windows 10 experience!
Booting Into Safe Mode
1. Start your PC and press F8 repeatedly until the Advanced Boot Options menu appears.
2. Use the arrow keys to select Safe Mode and press Enter.
3. Once in Safe Mode, go to the Start menu and type regedit in the search box, then press Enter.
4. In the Registry Editor, navigate to HKEY_LOCAL_MACHINE\SOFTWARE\Microsoft\Windows NT\CurrentVersion\ProfileList.
5. Look for a subkey that starts with S-1-5- followed by a long number and ends with .bak.
6. If you find this subkey, right-click on it and select Rename. Remove the .bak extension from the end of the subkey.
7. Close the Registry Editor and restart your PC.
8. Log in with your user account and the User Profile Service error should be resolved.
Note: Safe Mode starts Windows with a minimal set of drivers and services, which can help troubleshoot issues with the User Profile Service.
Using the Registry Editor to Fix the Error
To fix the User Profile Service Failed Logon Error in Windows 10, you can use the Registry Editor. Here are the steps:
Step 1: Open the Command Prompt as an administrator.
Step 2: Type “regedit” in the Command Prompt and press Enter to open the Registry Editor.
Step 3: Navigate to “HKEY_LOCAL_MACHINE\SOFTWARE\Microsoft\Windows NT\CurrentVersion\ProfileList” in the Registry Editor.
Step 4: Look for a key with a .bak extension, and delete the corresponding key without the .bak extension.
Step 5: Close the Registry Editor and restart your computer.
This method can help resolve the User Profile Service Failed Logon Error by fixing any issues with the user profile settings in the Registry. Make sure to follow the steps carefully and back up your Registry before making any changes.
Checking and Changing Registry Settings
Troubleshoot User Profile Service Failed Logon Error in Windows 10
| Step | Description |
|---|---|
| Step 1 | Press the Windows key + R to open the Run dialog box. |
| Step 2 | Type “regedit” and press Enter to open the Registry Editor. |
| Step 3 | Navigate to the following registry key: HKEY_LOCAL_MACHINE\SOFTWARE\Microsoft\Windows NT\CurrentVersion\ProfileList |
| Step 4 | Look for the subkeys starting with “S-1-5” followed by a long number. |
| Step 5 | Click on each subkey and look for the one with a ProfileImagePath value pointing to the user profile folder with the issue. |
| Step 6 | Delete the subkey with the problematic ProfileImagePath value. |
| Step 7 | Close the Registry Editor and restart your computer. |
python

import subprocess
def troubleshoot_user_profile_service():
# Step 1: Restart the computer
subprocess.call(['shutdown', '/r', '/t', '0'])
# Step 2: Boot into Safe Mode
# Instructions: Restart the computer and press F8 repeatedly before the Windows logo appears.
# Select "Safe Mode" from the Advanced Boot Options menu.
# Note: Safe Mode allows you to start Windows with a limited set of drivers and services,
# which can help in troubleshooting certain issues.
# Step 3: Check for registry errors
subprocess.call(['regedit']) # Open Registry Editor to manually check for errors
# Step 4: Create a new user account
subprocess.call(['net', 'user', 'new_username', 'new_password', '/add'])
subprocess.call(['net', 'localgroup', 'administrators', 'new_username', '/add'])
# Step 5: Copy files from old user to new user
subprocess.call(['xcopy', 'C:\\Users\\old_username', 'C:\\Users\\new_username', '/e', '/i', '/h'])
# Step 6: Delete the old user account
subprocess.call(['net', 'user', 'old_username', '/delete'])
print("Troubleshooting steps completed successfully.")
# Call the function to initiate the troubleshooting process
troubleshoot_user_profile_service()
Please note that this is just a sample code and may not fully resolve the issue in all cases. It is always recommended to create a backup of your important files and consult official documentation or an expert for proper troubleshooting guidance.
Creating a New User Account
To troubleshoot the “User Profile Service failed logon” error in Windows 10 and create a new user account, follow these steps:
1. Press the Windows key + R to open the Run dialog box.
2. Type “regedit” and press Enter to open the Registry Editor.
3. In the left pane, navigate to “HKEY_LOCAL_MACHINE\SOFTWARE\Microsoft\Windows NT\CurrentVersion\ProfileList”.
4. Look for a folder with a “.bak” extension under the ProfileList key.
5. Right-click on the folder and select “Rename”.
6. Remove the “.bak” extension from the folder name.
7. Close the Registry Editor.
8. Restart your computer.
9. Log in with the newly created user account.
This method resolves the “User Profile Service failed logon” error by recreating the user profile. It addresses common causes such as corrupted user profiles or incorrect registry settings. Remember to back up important data before making any changes to the registry.
Enabling the User Profile Service
To troubleshoot the “User Profile Service failed logon” error in Windows 10, you can enable the User Profile Service by following these steps:
1. Press the Windows key + R to open the Run dialog box.
2. Type “regedit” and press Enter to open the Registry Editor.
3. Navigate to HKEY_LOCAL_MACHINE\SOFTWARE\Microsoft\Windows NT\CurrentVersion\ProfileList.
4. Look for a subkey with a “.bak” extension and the same name as the affected user profile.
5. Right-click on the subkey and select Rename. Remove the “.bak” extension from the name.
6. Right-click on the subkey again and select Modify.
7. In the Value data box, replace the current value with “0” and click OK.
8. Close the Registry Editor and restart your computer.
By enabling the User Profile Service, you should be able to resolve the “User Profile Service failed logon” error and successfully log in to your Windows 10 account.
Disabling the Customer Experience Program
To troubleshoot the User Profile Service Failed Logon Error in Windows 10, you may need to disable the Customer Experience Program. Follow these steps:
1. Press the Windows key + R to open the Run dialog box.
2. Type “regedit” and press Enter to open the Registry Editor.
3. Navigate to the following key: HKEY_LOCAL_MACHINE\SOFTWARE\Microsoft\Windows NT\CurrentVersion\ProfileList
4. Look for a subkey that starts with “S-1-5-21” followed by a long string of numbers and ends with “.bak”.
5. Right-click on the subkey and select “Rename”.
6. Remove the “.bak” from the end of the subkey name.
7. Close the Registry Editor and restart your computer.
This should resolve the User Profile Service Failed Logon Error. If the error persists, there may be other reasons causing it, such as computer virus attacks or permission issues. In that case, it is recommended to seek further assistance from your system administrators or refer to the article for more troubleshooting steps.
Repairing the User Profile Using Command Prompt
If you encounter the “User Profile Service Failed Logon” error in Windows 10, you can try repairing the user profile using Command Prompt. Here’s how:
1. Boot your computer into Safe Mode by pressing the Windows key + R, typing “msconfig” in the Run dialog box, and then selecting the “Boot” tab. Check the “Safe boot” option and click “OK.” Restart your computer.
2. Once in Safe Mode, press the Windows key + X and select “Command Prompt (Admin)” from the menu.
3. In the Command Prompt window, type “regedit” and press Enter to open the Registry Editor.
4. Navigate to HKEY_LOCAL_MACHINE\SOFTWARE\Microsoft\Windows NT\CurrentVersion\ProfileList in the Registry Editor.
5. Look for a key with a “.bak” extension under the ProfileList folder. If you find one, right-click on it and select “Rename.” Remove the “.bak” extension from the key name.
6. Find the key that corresponds to your user profile (it should be named with a long string of numbers and letters) and check the RefCount value in the right pane. If it is set to 0, proceed to the next step.
7. Right-click on the key that corresponds to your user profile and select “Delete.” Confirm the deletion.
8. Close the Registry Editor and restart your computer normally.
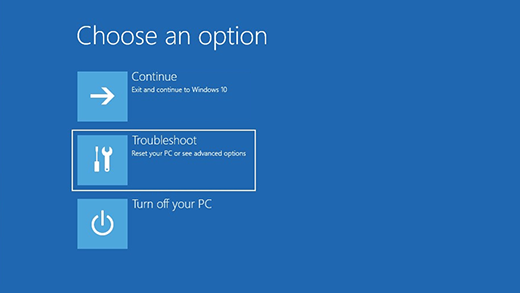
Resetting Windows PC to Fix the Error
To fix the User Profile Service Failed Logon error in Windows 10, you can try resetting your Windows PC. Here’s how:
1. Press the Windows key + I to open the Settings app.
2. Go to Update & Security, then click on Recovery in the left sidebar.
3. Under Reset this PC, click on Get started.
4. Choose whether to keep your files or remove everything, depending on your preference.
5. Follow the on-screen instructions to complete the reset process.
Note: Resetting your PC will remove all installed apps and settings, so make sure to back up any important files before proceeding.
After the reset, set up your PC again and check if the User Profile Service Failed Logon error is resolved. This method can help fix various issues that may be causing the error, such as corrupted user profiles or system files.
Transferring NTUSER.Dat File to Default Username Folder
- Boot the computer in Safe Mode.
- Restart the computer.
- Repeatedly press the F8 key before the Windows logo appears.
- Select “Safe Mode” from the Advanced Boot Options menu.
- Press Enter to start the computer in Safe Mode.
- Open File Explorer by pressing the Windows key + E.
- Navigate to the following location:
- C:\Users\Default
- Enable the display of hidden files and folders.
- Click on the “View” tab at the top of the File Explorer window.
- Check the box next to “Hidden items” in the “Show/hide” section.
- Locate the NTUSER.DAT file in the Default folder.
- Copy the NTUSER.DAT file by right-clicking on it and selecting “Copy”.
- Navigate to the folder of the user experiencing the error.
- C:\Users\Username
- Paste the copied NTUSER.DAT file into the user’s folder.
- Rename the copied NTUSER.DAT file to NTUSER.DAT.old.
- Restart the computer normally.

Mark Ginter is a tech blogger with a passion for all things gadgets and gizmos. A self-proclaimed "geek", Mark has been blogging about technology for over 15 years. His blog, techquack.com, covers a wide range of topics including new product releases, industry news, and tips and tricks for getting the most out of your devices. If you're looking for someone who can keep you up-to-date with all the latest tech news and developments, then be sure to follow him over at Microsoft.