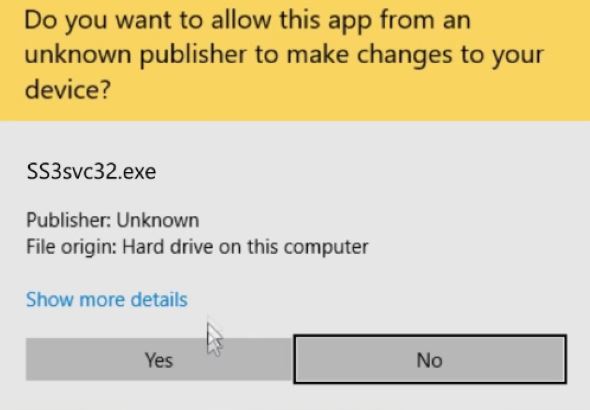
- SS3svc32.exe is not a trusted service, as it can use old certificates.
- Old certificates are not validated and are detected by new Windows updates.
- The latest patches for Windows 10 (KB4522738 and KB4517211) can cause additional warnings and pop-ups.
- If you follow the instructions below, you should be able to fix the problem on Windows 10.
Unveiling the Intriguing Mystery of SS3svc32.exe: A Startup Annoyance
Understanding Ss3svc32.exe and its Pop-up Issue
If you are experiencing pop-up issues with the SS3svc32.exe on startup, there are a few methods you can try to resolve this.
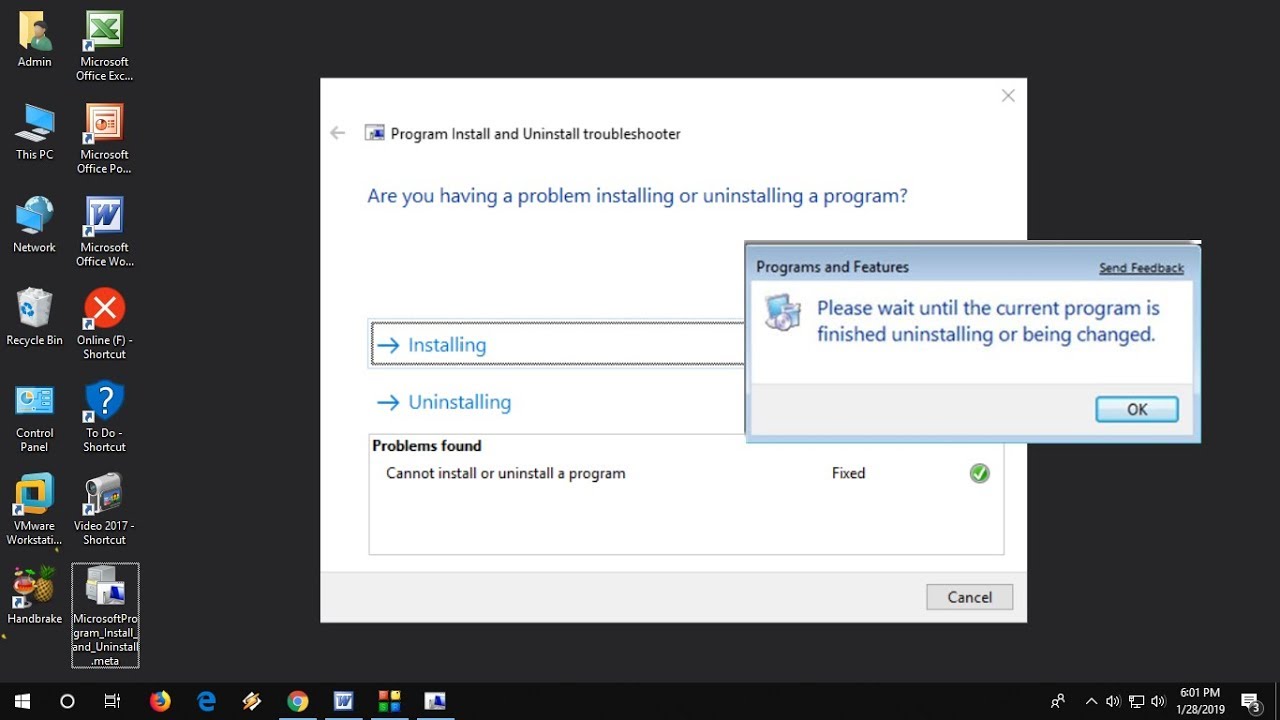
First, you can uninstall Sonic Studio from your computer. This can be done through the Control Panel by navigating to Programs and Features, finding Sonic Studio in the list of installed programs, and selecting Uninstall.
Another method is to check for any updates or patches for Sonic Studio. You can do this by visiting the Asus Republic of Gamers website and looking for any updates specific to your motherboard or audio software.
If the pop-ups continue, you can try using IObit Uninstaller to completely remove any remaining files related to Sonic Studio.
Lastly, if you recently updated to Windows 10 version 1903, there is a known issue with SS3svc32.exe pop-ups. To fix this, you can try uninstalling the KB4522738 or KB4517211 update from your computer.
Remember to always exercise caution when making changes to your computer’s software and seek assistance from the software’s publisher or knowledgeable people if needed.
Methods to Resolve the Ss3svc32.exe Startup Problem
- Open Task Manager by pressing Ctrl+Shift+Esc.
- Click on the Startup tab.
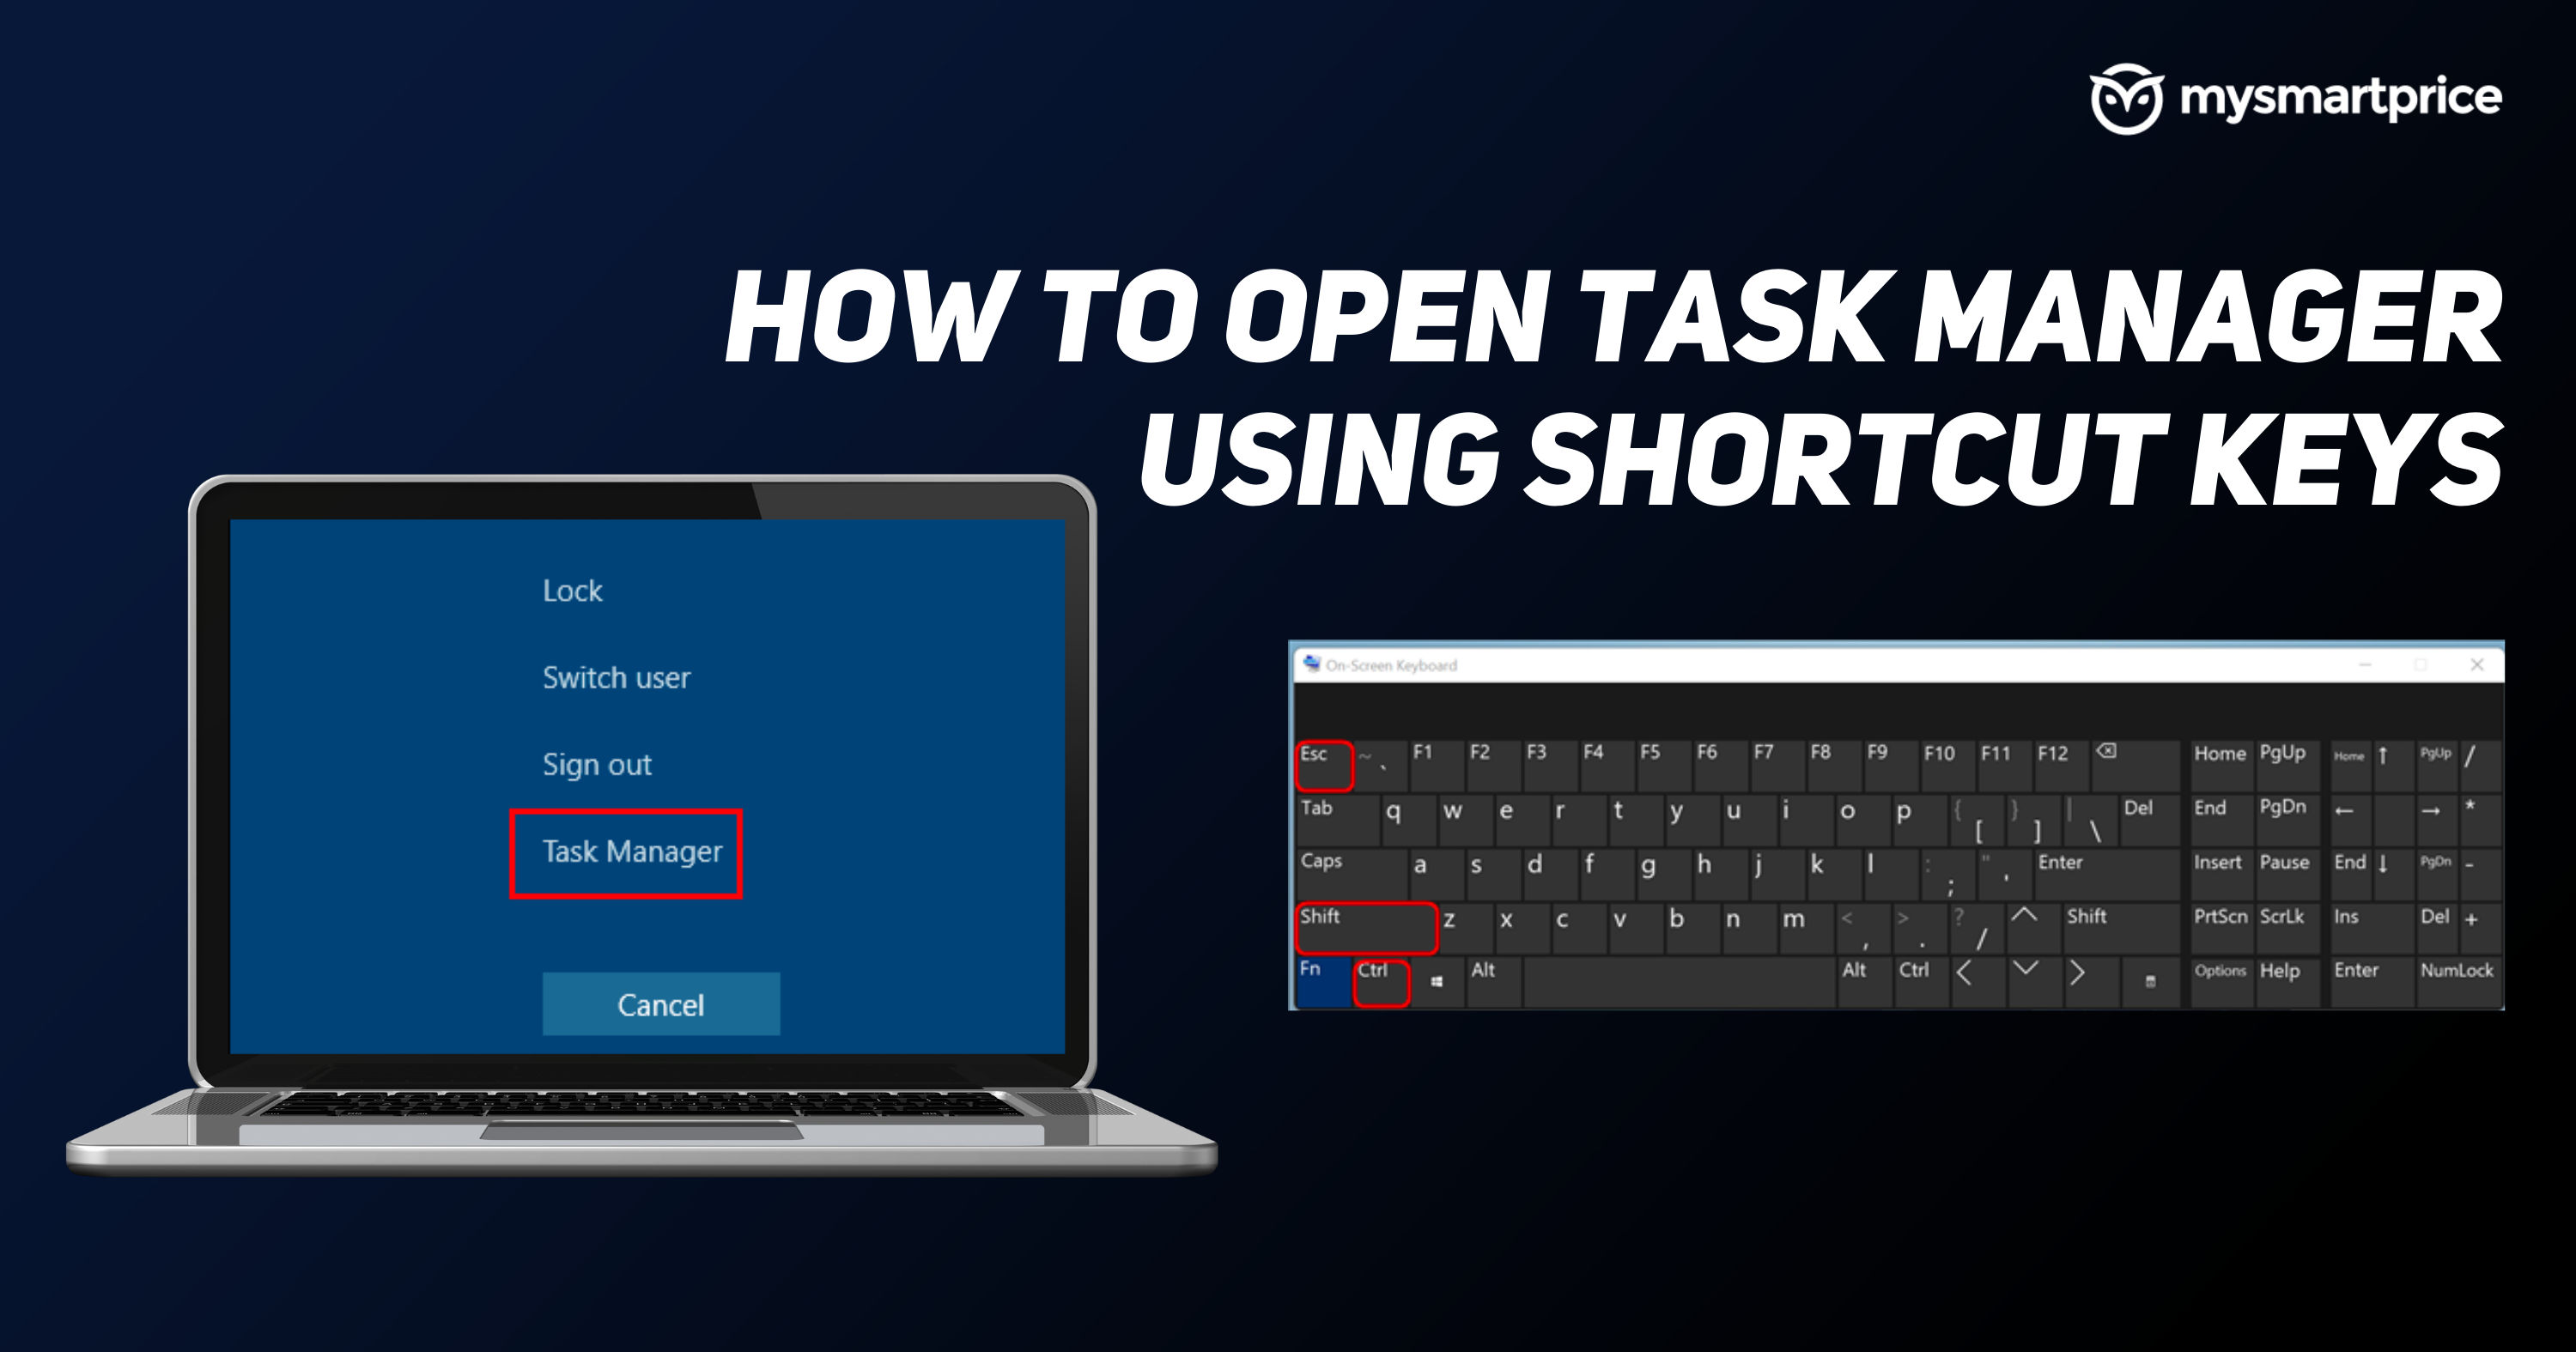
- Locate and select the SS3svc32.exe program.
- Click on the Disable button.
- Restart your computer to see if the problem is resolved.
Method 2: Remove the SS3svc32.exe Startup Entry from Registry
- Press Windows Key + R to open the Run dialog box.
- Type regedit and press Enter to open the Registry Editor.
- Navigate to the following key: HKEY_CURRENT_USER\Software\Microsoft\Windows\CurrentVersion\Run.
- Locate the SS3svc32.exe entry in the right pane.
- Right-click on it and select Delete.
- Close the Registry Editor and restart your computer.
Method 3: Perform a Malware Scan
- Install a reputable anti-malware software if you don’t have one already.
- Update the software to ensure it has the latest virus definitions.
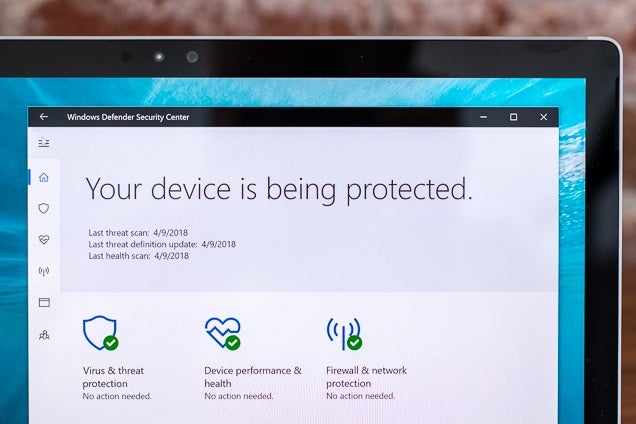
- Run a full system scan to detect and remove any malware or viruses.
- Follow the prompts to quarantine or delete any threats found.
- Restart your computer to see if the SS3svc32.exe problem is resolved.
Method 4: Reinstall or Update the Associated Software
- Identify the software associated with the SS3svc32.exe file.
- Visit the official website of the software.
- Download and install the latest version of the software.
- If you already have the latest version, consider reinstalling it.
- Restart your computer and check if the SS3svc32.exe issue persists.
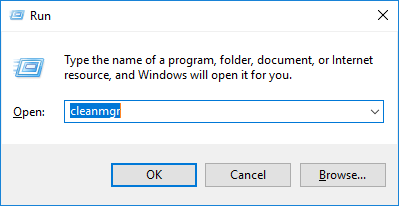
Method 5: Perform a System Restore
- Press Windows Key + R to open the Run dialog box.
- Type rstrui and press Enter to open the System Restore window.
- Select a restore point when the SS3svc32.exe problem was not present.
- Follow the on-screen instructions to complete the system restore process.
- After the restoration, restart your computer and see if the issue is resolved.
Uninstalling Sonic Studio as a Solution
To resolve the SS3svc32.exe popping up on startup issue, you can uninstall Sonic Studio from your Asus ROG computer. Here are the steps:
1. Open the Start menu and type “Control Panel” to search for it. Open the Control Panel.
2. In the Control Panel, click on “Programs” or “Programs and Features” depending on your Windows version.
3. Locate Sonic Studio in the list of installed programs and click on it.
4. Click on the “Uninstall” button at the top of the window.
5. Follow the on-screen instructions to complete the uninstallation process.
If you encounter any permission or warning messages during the uninstallation, make sure to grant the necessary permissions or seek assistance from the software publisher.
Removing Sonic Studio should resolve the SS3svc32.exe popup message on startup. If you still experience the issue after uninstalling Sonic Studio, you may need to explore other solutions or seek further assistance from Asus or knowledgeable friends.
python

import winreg
def disable_startup_entry():
key_path = r"Software\Microsoft\Windows\CurrentVersion\Run"
entry_name = "ss3svc32"
try:
# Open the registry key
key = winreg.OpenKey(winreg.HKEY_CURRENT_USER, key_path, 0, winreg.KEY_ALL_ACCESS)
# Check if the entry exists
if winreg.QueryValueEx(key, entry_name):
# Delete the startup entry
winreg.DeleteValue(key, entry_name)
print(f"Disabled {entry_name} from startup.")
else:
print(f"{entry_name} is not set to run at startup.")
# Close the registry key
winreg.CloseKey(key)
except FileNotFoundError:
print("Registry key not found.")
# Call the function to disable the startup entry
disable_startup_entry()
Please note that modifying the Windows registry can have unintended consequences if not done correctly. Ensure you understand the implications and take appropriate precautions before making any changes. It is advisable to create a backup of the registry or consult with a professional if you are unfamiliar with registry modifications.
Running Sonic Studio as Administrator to Fix the Issue
To resolve the issue of SS3svc32.exe popping up on startup, you can try running Sonic Studio as an administrator. Here’s how:
1. Right-click on the Sonic Studio 3 program icon.
2. Select “Run as administrator” from the context menu. This will give the program elevated permissions to make necessary changes.
Running Sonic Studio as an administrator can help fix any startup-related issues you may be experiencing. It allows the program to execute with the required permissions and resolve any conflicts that may be causing the popup message.
By following these steps, you can regain control over your Asus ROG computer and ensure a smoother startup experience. Remember to always run trusted software products with caution and keep your system updated with the latest patches and updates from Windows 10.
If the issue persists, it’s recommended to reach out to Asus support or consult knowledgeable friends for further assistance.
Changing the File Name as a Workaround
To resolve the SS3svc32.exe popping up on startup issue, you can try changing the file name as a workaround. Here are the steps:
1. Open File Explorer and navigate to the following location: C:\Windows\System32
2. Look for the SS3svc32.exe file.
3. Right-click on the file and select “Rename”.
4. Add a suffix like “.old” to the end of the file name (e.g., SS3svc32.exe.old).
5. Press Enter to save the new file name.
By changing the file name, you are preventing the execution of the SS3svc32.exe file on startup, which should resolve the issue. Keep in mind that this is just a workaround and not a permanent solution.
If you still experience the issue after renaming the file, consider seeking further assistance from Asus Republic of Gamers support or knowledgeable friends who are familiar with Sonic Studio 3.
Remember to exercise caution when renaming system files and always make sure to have a backup of your important files before making any changes.
Additional Solutions for Resolving the Ss3svc32.exe Pop-up Issue
Additional Solutions for Resolving the Ss3svc32.exe Pop-up Issue
| Solution | Description |
|---|---|
| 1. Update Drivers | Ensure that all your device drivers are up to date, especially those related to your audio and video devices. Outdated drivers can cause conflicts and lead to the Ss3svc32.exe pop-up issue. |
| 2. Scan for Malware | Perform a thorough scan of your computer using reputable antivirus software to check for any malware or viruses that could be causing the Ss3svc32.exe pop-up. Malware infections can trigger unwanted pop-ups and other system issues. |
| 3. Disable Startup Programs | Review the list of programs that launch at startup and disable any unnecessary ones. Sometimes, certain programs can conflict with the Ss3svc32.exe process, leading to the pop-up issue. Disabling unnecessary startup programs can help resolve the problem. |
| 4. Clean Registry | Use a reliable registry cleaner tool to scan and clean your Windows registry. Invalid or corrupt registry entries can cause various system issues, including pop-ups. Cleaning the registry can help eliminate such problems. |
| 5. Perform System Restore | If the Ss3svc32.exe pop-up issue started recently, you can try performing a system restore to revert your computer’s settings to a previous state when the problem did not occur. System restore can help undo recent changes that might have triggered the pop-up. |
| 6. Contact Support | If none of the above solutions work, it is recommended to reach out to the software or hardware manufacturer’s support team for further assistance. They can provide specific guidance based on your system configuration and help resolve the Ss3svc32.exe pop-up issue. |

Mark Ginter is a tech blogger with a passion for all things gadgets and gizmos. A self-proclaimed "geek", Mark has been blogging about technology for over 15 years. His blog, techquack.com, covers a wide range of topics including new product releases, industry news, and tips and tricks for getting the most out of your devices. If you're looking for someone who can keep you up-to-date with all the latest tech news and developments, then be sure to follow him over at Microsoft.