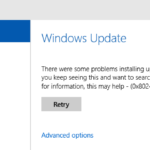
- Error code 0x80244007 means that the Windows Update Service (WUService) cannot contact Microsoft Update Server (MUServer) This could happen because the WU Service does not have access to the network connection or because there are problems with the server itself.
- This error code usually occurs because of an underlying OS corruption issue, and it might occur even if you’re running Windows 10 Home Edition.
- Running the Update troubleshooter scans your computer for problems and attempts to fix them automatically.
Unlocking the secrets to resolving Windows Update Error 0x80244007, this article unveils effective solutions to overcome this frustrating issue on Windows 11 and Windows 10. Explore the step-by-step guide and bid farewell to update errors once and for all.
Symptoms and Causes of Error 0x80244007
If you’re encountering Error 0x80244007 while trying to update Windows 11/10, there are a few symptoms and causes to be aware of.
Symptoms:
1. Windows Update fails to install updates.
2. Error code 0x80244007 appears on the screen.
3. The update process abruptly stops.
Causes:
1. Connectivity issues with the server hosting the updates.
2. Corrupted Windows Update components.
3. Misconfiguration of the Windows Update service.
4. Interference from third-party software or antivirus programs.
To fix Error 0x80244007, follow these steps:
1. Run the Windows Update Troubleshooter to identify and resolve any issues automatically.
2. Check your internet connection and ensure it is stable.
3. Disable any third-party software or antivirus programs temporarily.
4. Clear the Windows Update cache using Disk Cleanup.
5. Reset the Windows Update components using the Command Prompt.
Running Windows Update Troubleshooter to Fix Error 0x80244007
To fix Windows Update Error 0x80244007 on Windows 11/10, you can try running the Windows Update Troubleshooter. The troubleshooter is a built-in tool that can automatically detect and fix common Windows Update issues.
To run the Windows Update Troubleshooter, follow these steps:
1. Press the Windows key + X and select “Settings”.
2. Go to “Update & Security” and click on “Troubleshoot” in the left-hand menu.
3. Scroll down and click on “Additional troubleshooters”.
4. Select “Windows Update” and click on “Run the troubleshooter”.
5. Follow the on-screen instructions to complete the troubleshooting process.
The Windows Update Troubleshooter will scan your system for any errors and attempt to fix them. Once the troubleshooter is finished, restart your PC and check if the issue is resolved.
If the problem persists, you may need to try other fixes or seek further assistance from Microsoft or a professional technician.
Deleting Junk Files with Disk Cleanup to Resolve Error 0x80244007
Deleting Junk Files with Disk Cleanup can help resolve Error 0x80244007 on Windows 11/10. To do this, follow these steps:
1. Press the Windows key + R to open the Run dialog box.
2. Type “cleanmgr” and press Enter to open Disk Cleanup.
3. Select the drive you want to clean up (usually the C: drive) and click OK.
4. Disk Cleanup will calculate how much space can be freed up.
5. Check the boxes next to the types of files you want to delete, such as Temporary files and Recycle Bin.
6. Click OK, then click Delete Files to confirm.
7. Once the cleanup is complete, restart your computer.
8. Try updating Windows again to see if the error has been resolved.
By deleting junk files with Disk Cleanup, you can free up space on your computer and potentially fix Error 0x80244007.
Resetting Windows Update Components to Fix Error 0x80244007
If you’re experiencing Error 0x80244007 while trying to update Windows, resetting the Windows Update components can help resolve the issue. Follow these steps to fix the error:
1. Press the Windows key + X and select “Command Prompt (Admin)” from the menu.
2. In the command prompt window, type the following commands one by one and press Enter after each:
net stop wuauserv
net stop cryptSvc
net stop bits
net stop msiserver
3. Now, rename the SoftwareDistribution and Catroot2 folders. To do this, enter the following commands:
ren C:\Windows\SoftwareDistribution SoftwareDistribution.old
ren C:\Windows\System32\catroot2 Catroot2.old
4. Restart the services you stopped earlier by entering the following commands:
net start wuauserv
net start cryptSvc
net start bits
net start msiserver
5. Finally, restart your PC and try updating Windows again.
This method has proven effective in resolving Error 0x80244007 for many users. By resetting the Windows Update components, you can overcome this obstacle and enjoy a smooth updating experience on your Windows PC.
Running DISM and SFC Scan to Resolve Error 0x80244007
To fix Windows Update Error 0x80244007 on Windows 11/10, you can use the DISM and SFC scan tools. These tools help identify and repair issues with Windows system files.
1. Open Command Prompt as an administrator.
2. To run the Deployment Image Servicing and Management (DISM) tool, enter the following command and press Enter:
dism /online /cleanup-image /restorehealth
3. Wait for the process to complete. It may take some time.
4. Once the DISM tool finishes, run the System File Checker (SFC) scan. Enter the following command and press Enter:
sfc /scannow
5. The SFC scan will check for and repair any corrupted system files.
6. Restart your computer and try running Windows Update again.
These steps should help resolve Error 0x80244007 and allow you to install updates successfully.
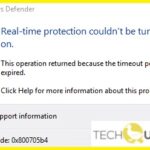
Uninstalling Third-party Antivirus to Fix Error 0x80244007
To fix Windows Update Error 0x80244007 on Windows 11/10, uninstall any third-party antivirus software that may be conflicting with the update process. Third-party antivirus programs can sometimes interfere with Windows Update and cause error code 0x80244007.
To uninstall the antivirus software, follow these steps:
1. Open the Control Panel and navigate to the “Programs” or “Programs and Features” section.
2. Locate the third-party antivirus software in the list of installed programs.
3. Right-click on the antivirus software and select “Uninstall” or “Remove”.
4. Follow the on-screen instructions to complete the uninstallation process.
5. Once the antivirus software is uninstalled, restart your computer.
After restarting, check Windows Update again to see if the error 0x80244007 is resolved. If the issue persists, you may need to further troubleshoot or seek additional assistance.
Additional Steps to Fix Error 0x80244007: Backing up System Drive and Reinstalling OS
To fix Error 0x80244007 on Windows 11/10, you may need to take additional steps such as backing up your system drive and reinstalling the operating system. This can help resolve any underlying issues that may be causing the error.
1. Backing up your System Drive:
Before reinstalling the OS, it’s crucial to backup your important files and data. Use a reliable backup tool like MiniTool Partition Wizard to create a backup of your system drive.
2. Reinstalling the OS:
Once you’ve backed up your data, reinstalling the OS can help resolve the error. Follow these steps:
– Insert the Windows installation media and restart your computer.
– Select your language preferences and click “Next.”
– Click “Install now” and follow the on-screen instructions.
– Choose the “Custom: Install Windows only (advanced)” option.
– Select the partition where you want to install Windows and click “Next.”
– Wait for the installation process to complete.
– Once installed, restore your files and data from the backup.
By following these steps, you can fix Error 0x80244007 on Windows 11/10 and ensure the stability of your PC.

Mark Ginter is a tech blogger with a passion for all things gadgets and gizmos. A self-proclaimed "geek", Mark has been blogging about technology for over 15 years. His blog, techquack.com, covers a wide range of topics including new product releases, industry news, and tips and tricks for getting the most out of your devices. If you're looking for someone who can keep you up-to-date with all the latest tech news and developments, then be sure to follow him over at Microsoft.