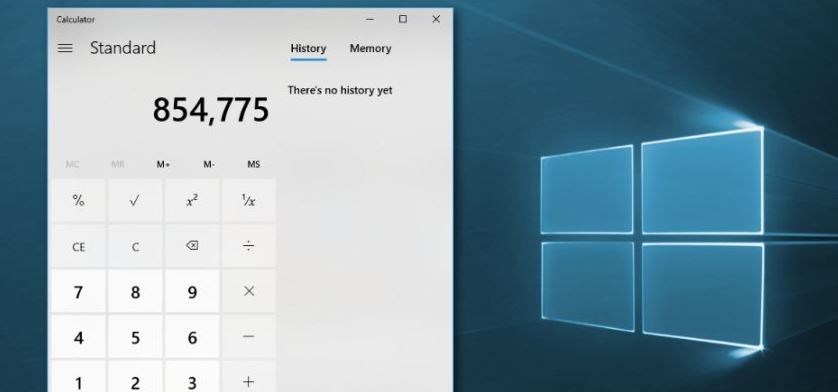
- Windows Calculator is a pre-installed application available on every Windows desktop and laptop.
- Pre-installed apps include Windows Store, 3D Builder, Maps, Camera, Microsoft Calendar, Microsoft Edge, Groove Music, and many others.
- An outdated calculator, a missing or corrupt system and registry files, and a user account conflict are some of the reasons why the Windows 10 calculator doesn’t work.
In the realm of digital dilemmas and software snags, encountering the “Windows 10 Calculator Not Installed” error can be quite perplexing. Fret not! This article presents you with a comprehensive guide comprising ten ingenious methods to swiftly resolve this vexing issue. So, bid farewell to the frustration and let’s embark on a journey to restore the calculator functionality on your Windows 10.
Causes of Windows 10 Calculator Uninstallation
If you’re experiencing the “Windows 10 Calculator Not Installed” error, there are several possible causes for this issue. One common reason is a corrupted installation or update process. To fix this, you can try reinstalling the Calculator application from the Microsoft Store. Another option is to reset the Calculator app in the Windows Settings. Additionally, you can use the Command Prompt to run a command that will restore the Calculator app. If these methods don’t work, you can also try reinstalling Windows to resolve any underlying system issues. Remember to back up your data before doing so.
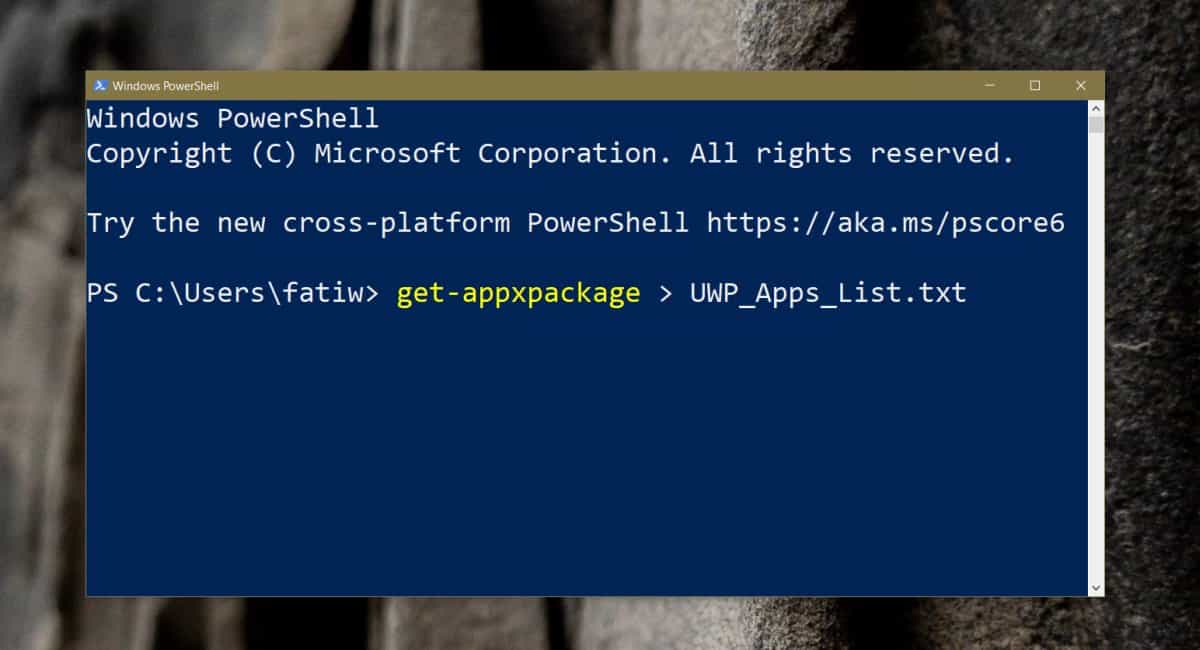
Reinstalling Windows 10 Calculator using PowerShell Command
To reinstall the Windows 10 Calculator using PowerShell Command, follow these steps:
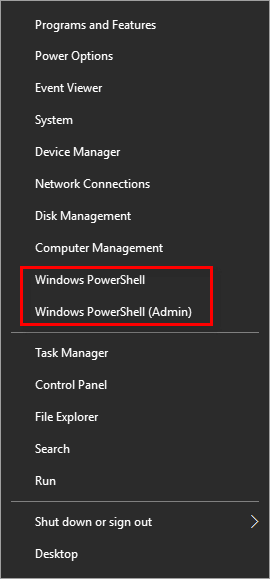
1. Open PowerShell by pressing the Windows key + X and selecting “Windows PowerShell (Admin).”
2. Type the following command and press Enter to uninstall the Calculator app: Get-AppxPackage Microsoft.WindowsCalculator | Remove-AppxPackage
3. After the uninstallation is complete, type the following command and press Enter to reinstall the Calculator app from the Windows Store: Get-AppxPackage -AllUsers Microsoft.WindowsCalculator | Foreach {Add-AppxPackage -DisableDevelopmentMode -Register “$($_.InstallLocation)\AppXManifest.xml”}
4. Once the installation is finished, you can open the Calculator app from the Start menu or by searching for it.
By using PowerShell, you can easily reinstall the Calculator application and resolve any issues you may be experiencing.
Enabling Windows Defender Firewall
To enable Windows Defender Firewall, follow these steps:
1. Click on the Start button and type “Windows Defender Firewall” in the search bar.
2. Click on the “Windows Defender Firewall” app from the search results.
3. In the Windows Defender Firewall window, click on the “Turn Windows Defender Firewall on or off” option on the left side.
4. Select the “Turn on Windows Defender Firewall” option for both public and private networks.
5. Click on the “OK” button to save the changes.
By enabling Windows Defender Firewall, you can enhance the security of your PC and protect it from potential threats.
If you’re still experiencing issues with your Windows 10 Calculator, consider trying the following solutions:
1. Download and run the Windows Store Apps troubleshooter from Microsoft’s website.
2. Reinstall the Calculator app from the Microsoft Store.
3. Open the Command Prompt as an administrator and run the following command: Get-AppxPackage *windowscalculator* | Remove-AppxPackage
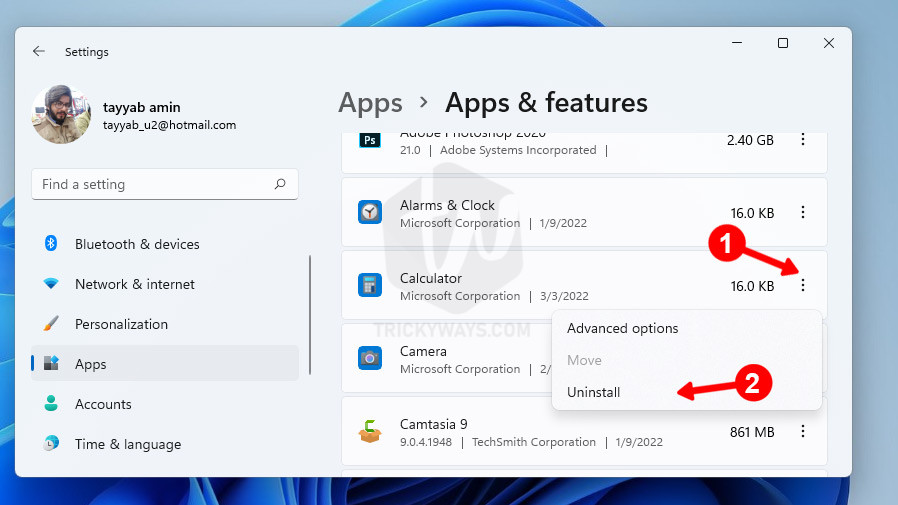
4. Reset the Calculator app by going to Settings > Apps > Apps & features, locating the Calculator app, and selecting “Advanced options”. Then click on the “Reset” button.
5. If all else fails, you can reinstall Windows 10 to fix any underlying system issues.
Remember to back up your important data before attempting any major changes to your computer.
Resetting Calculator Data
To reset calculator data on Windows 10, follow these steps:
1. Close the calculator app if it’s open.
2. Press the Windows key on your keyboard and type “PowerShell” to search for Windows PowerShell.
3. Right-click on Windows PowerShell in the search results and select “Run as administrator”.
4. In the Windows PowerShell window, type or copy and paste the following command: Get-AppxPackage Microsoft.WindowsCalculator | Remove-AppxPackage
5. Press the Enter key to execute the command.
6. Once the command is executed, restart your computer.
7. After the restart, open the Microsoft Store app on your computer.
8. Search for “Calculator” in the Microsoft Store and click on the “Get” button to reinstall the calculator app.
9. Once the calculator is installed, you can open it and it should be reset to its default settings.
By following these steps, you can easily reset the calculator data and resolve any issues you may be experiencing with the calculator app on your Windows 10 computer.
Deleting Certain Registry Keys
If you’re experiencing the “Windows 10 Calculator Not Installed” error, one possible solution is to delete certain registry keys. This method can be effective in resolving the issue and getting your calculator up and running again.
Before proceeding, make sure to back up your registry in case of any unforeseen issues.
1. Press the Windows key + R to open the Run dialog box.
2. Type “regedit” and press Enter to open the Registry Editor.
3. Navigate to the following path: HKEY_LOCAL_MACHINE\SOFTWARE\Microsoft\Windows\CurrentVersion\App Model\Calculator\Packages\Microsoft.WindowsCalculator_8wekyb3d8bbwe
4. Right-click on the “Microsoft.WindowsCalculator_8wekyb3d8bbwe” key and select Delete.
5. Confirm the deletion when prompted.
By deleting this specific registry key, you are essentially removing any corrupted or conflicting data related to the Calculator app. This should resolve the “Calculator Not Installed” error and allow you to use the app without any issues.
Remember to restart your PC after deleting the registry key for the changes to take effect.
Performing an In-Place Upgrade
1. Download the Windows 10 installation ISO file from the official Microsoft website.
2. Open the ISO file and run the setup.exe file to start the upgrade process.
3. Follow the on-screen instructions to upgrade your Windows OS to the latest version.
4. Once the upgrade is complete, restart your device.
5. After the restart, check if the Calculator app is now installed and working properly.
6. If the issue persists, try resetting the Calculator app. Press the Windows key + I to open the Settings app, go to “Apps,” and then “Apps & features.” Find the Calculator app, click on it, and select “Advanced options.” Click on the “Reset” button to reset the app.
7. If resetting doesn’t work, reinstalling the Calculator app can be a solution. Open PowerShell as an administrator and run the following command: Get-AppxPackage Microsoft.WindowsCalculator | Remove-AppxPackage. Then, open the Microsoft Store and search for “Calculator.” Install the new app from the Store.
Performing an in-place upgrade can help resolve the Windows 10 Calculator Not Installed error and get your calculator back up and running.
Common Issues with Calculator App
- Calculator App not found: Learn how to troubleshoot and resolve the issue when the Calculator App is missing from your Windows 10 device.
- Calc.exe file corrupted: Discover steps to address a corrupted Calc.exe file that prevents the Calculator App from being installed or functioning properly.
- Windows Update issues: Find out how to deal with Windows Update problems that may prevent the Calculator App from being installed or cause errors during installation.
- Compatibility conflicts: Understand how to resolve compatibility conflicts with other software or applications that could be interfering with the installation or functioning of the Calculator App.
- System file errors: Learn how to fix system file errors that might be causing the Calculator App to not install or work correctly.
- Registry errors: Discover methods to address registry errors that could be preventing the Calculator App from being installed or functioning properly.
- Corrupted user profile: Find out how to fix a corrupted user profile that may be causing issues with the Calculator App.
- Group Policy restrictions: Understand how to overcome Group Policy restrictions that might be blocking the installation or usage of the Calculator App.
- Third-party antivirus or firewall interference: Learn how to configure your antivirus or firewall settings to avoid potential conflicts with the Calculator App.
- Reinstalling the Calculator App: Explore steps to reinstall the Calculator App if all else fails or if the app was mistakenly uninstalled.
Methods to Fix Calculator App Issues
- Save any unsaved work.
- Click on the “Start” button.
- Select “Power”.
- Click on “Restart”.
- Wait for your computer to reboot.
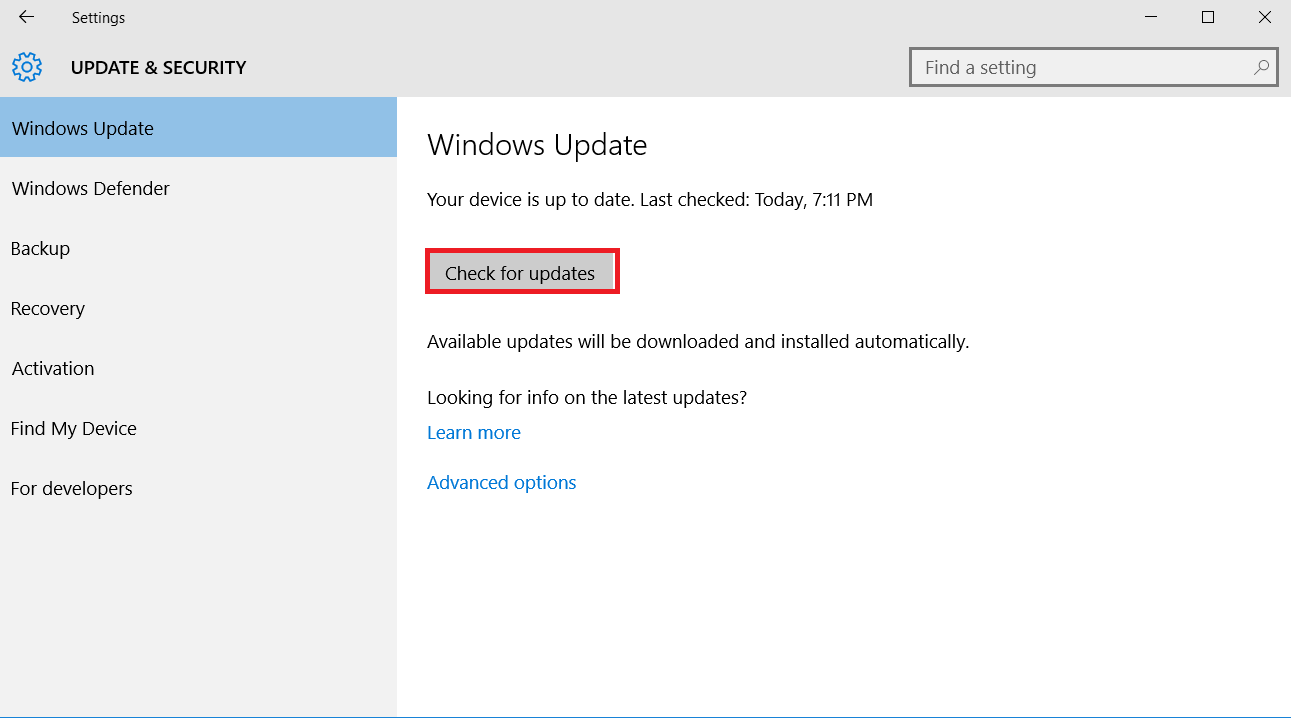
Method 2: Run Windows Updates
- Click on the “Start” button.
- Select “Settings”.
- Click on “Update & Security”.
- Select “Windows Update” from the left menu.
- Click on “Check for updates”.
- Wait for Windows to check for and install any available updates.
Method 3: Reinstall Calculator App
- Click on the “Start” button.
- Select “Settings”.
- Click on “Apps”.
- Select “Apps & features” from the left menu.
- Scroll down and locate “Calculator” in the list of apps.
- Click on “Calculator”.

- Select “Advanced options”.
- Click on “Reset” to reset the app.
- Wait for the reset process to complete.
- Restart your computer.
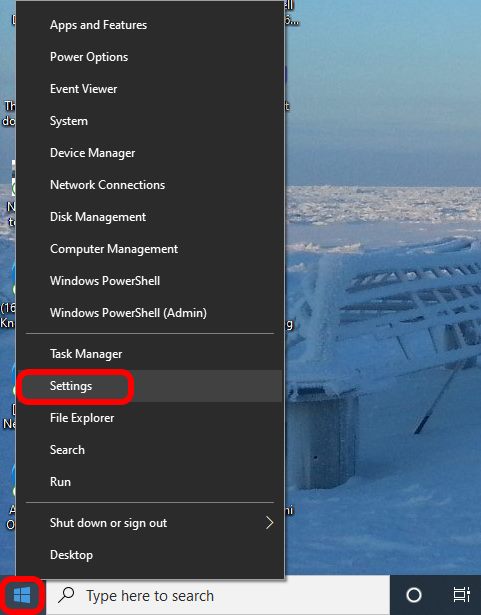
Method 4: Use PowerShell Command
- Press Windows key + X on your keyboard.
- Select “Windows PowerShell (Admin)” from the menu.
- Click on “Yes” if prompted by User Account Control.
- Type Get-AppxPackage -allusers *windowscalculator* | Foreach {Add-AppxPackage -DisableDevelopmentMode -Register “$($_.InstallLocation)\AppXManifest.xml”} in the PowerShell window.
- Press Enter to execute the command.
- Wait for the process to complete.
- Restart your computer.
Method 5: Run System File Checker
- Press Windows key + X on your keyboard.
- Select “Windows PowerShell (Admin)” from the menu.
- Click on “Yes” if prompted by User Account Control.
- Type sfc /scannow in the PowerShell window.
- Press Enter to start the system file checker scan.
- Wait for the scan to complete and any issues to be repaired.
- Restart your computer.
Method 6: Create a New User Account
- Click on the “Start” button.
- Select “Settings”.
- Click on “Accounts”.
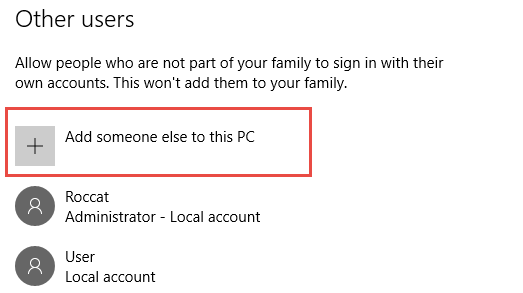
- Select “Family & other users” from the left menu.
- Click on “Add someone else to this PC” under “Other users”.
- Follow the prompts to create a new user account.
- Login to the newly created user account.
Method 7: Perform a System Restore
- Click on the “Start” button.
- Type “System Restore” in the search bar.
- Select “Create a restore point” from the search results.
- Click on “System Restore” in the System Properties window.
- Click on “Next”.
- Select a restore point from the list.
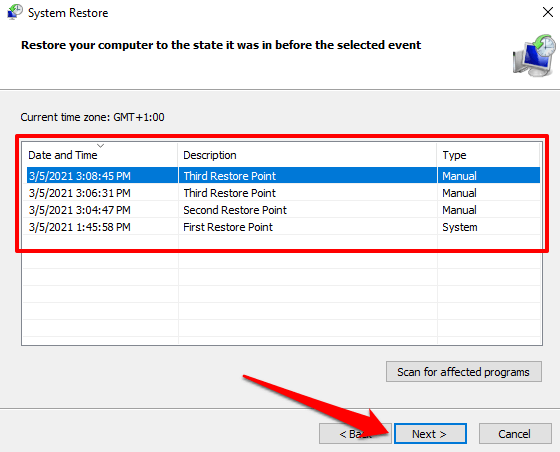
- Click on “Next”.
- Follow the prompts to restore your system to the selected restore point.
- Wait for the process to complete.
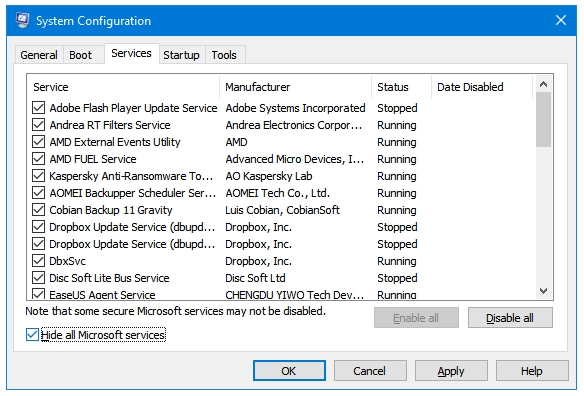
Method 8: Perform a Clean Boot
- Press Windows key + R on your keyboard.
- Type “msconfig” in the Run window.
- Click on “OK” or press Enter.
- In the System Configuration window, click on the “Services” tab.
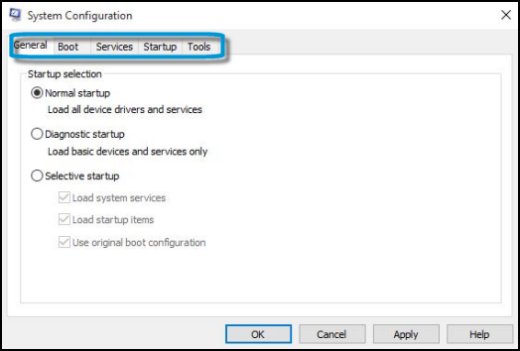
- Check the box next to “Hide all Microsoft services”.
- Click on “Disable all”.
- Go to the “Startup” tab.
- Click on “Open Task Manager”.
- Disable all the startup items by right-clicking on each and selecting “Disable”.
- Close the Task Manager.
- Go back to the System Configuration window.
- Click on “OK”.

- Restart your computer.
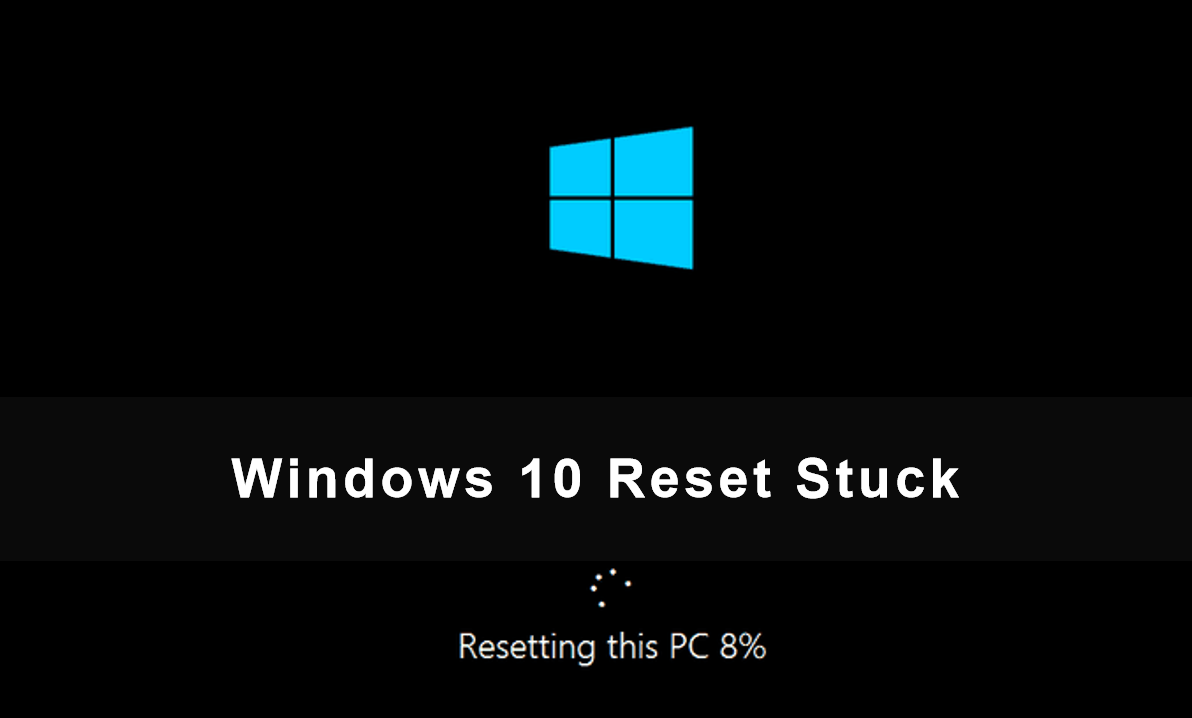
Method 9: Perform a System Reset
- Click on the “Start” button.
- Select “Settings”.
- Click on “Update & Security”.
- Select “Recovery” from the left menu.
- Under “Reset this PC”, click on “Get started”.
- Follow the prompts to reset your system.
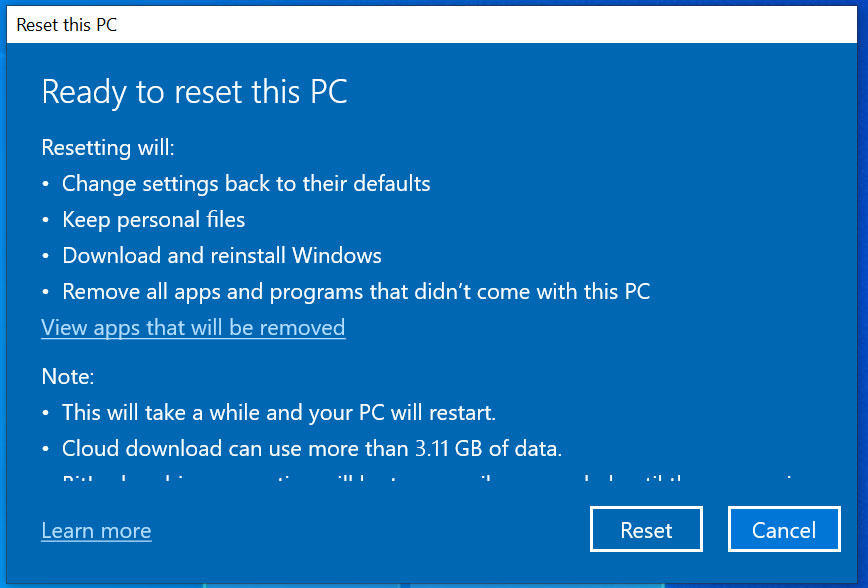
- Wait for the reset process to complete.
Method 10: Contact Microsoft Support
- Visit the Microsoft Support website.
- Click on “Contact us” or “Support”.

- Select your product and issue type.
- Follow the prompts to contact Microsoft Support.
Troubleshooting Steps for Restoring Calculator on Windows 10
- Reset the Calculator App
- Open the Settings app by pressing Win + I on your keyboard.
- Click on Apps and then select Apps & Features from the left sidebar.
- Scroll down and find the Calculator app in the list of installed apps.
- Click on the Calculator app and select Advanced options.
- In the Advanced options menu, click on the Reset button to reset the Calculator app.
- Reinstall the Calculator App
- Open the Microsoft Store app by searching for it in the Start menu.
- In the Microsoft Store, search for Calculator in the search bar.
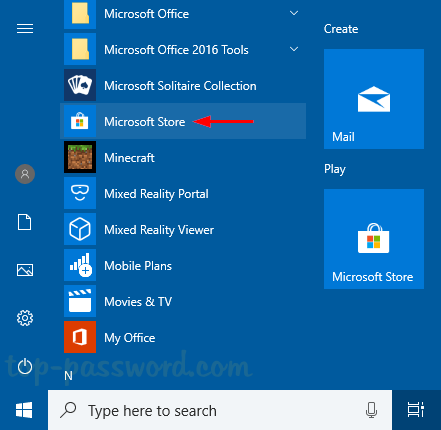
- Locate the Calculator app from the search results and click on it.
- Click on the Install button to reinstall the Calculator app.
- Wait for the installation to complete and then try opening the Calculator app again.
- Run Windows Store Apps Troubleshooter
- Press Win + I to open the Settings app.
- Click on Update & Security and then select Troubleshoot from the left sidebar.
- Scroll down and click on Windows Store Apps.
- Click on the Run the troubleshooter button to start the troubleshooting process.
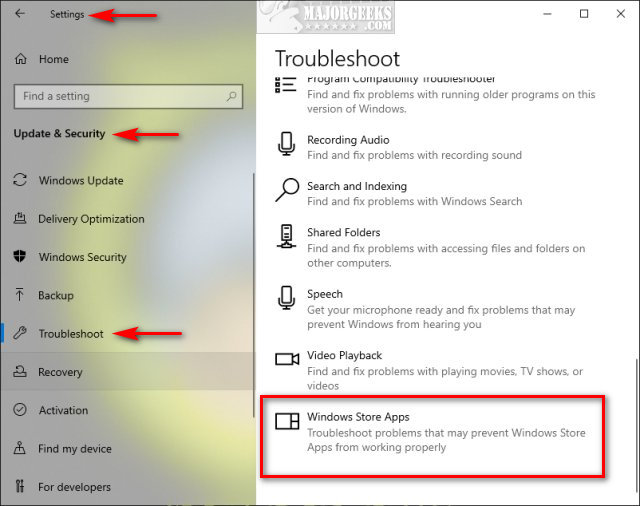
- Follow the instructions provided by the troubleshooter to fix any issues with the Calculator app.
- Re-register the Calculator App
- Press Win + X and select Windows PowerShell (Admin) from the menu.
- In the PowerShell window, type the following command and press Enter: Get-AppXPackage -AllUsers | Foreach {Add-AppxPackage -DisableDevelopmentMode -Register “$($_.InstallLocation)\AppXManifest.xml”}
- Wait for the process to complete and then try opening the Calculator app again.
- Check for Windows Updates
- Open the Settings app by pressing Win + I.
- Click on Update & Security and then select Windows Update from the left sidebar.

- Click on the Check for updates button to search for any available updates.
- If updates are found, click on the Download and Install button to install them.
- After the updates are installed, restart your computer and check if the Calculator app is working.

Mark Ginter is a tech blogger with a passion for all things gadgets and gizmos. A self-proclaimed "geek", Mark has been blogging about technology for over 15 years. His blog, techquack.com, covers a wide range of topics including new product releases, industry news, and tips and tricks for getting the most out of your devices. If you're looking for someone who can keep you up-to-date with all the latest tech news and developments, then be sure to follow him over at Microsoft.