- In this article, you will learn how to fix the “There was a problem with.
- C reset, no changes were made” in Windows 10.
- We recommend backing up your. computer with. the. “Virus’s the reason for the ‘solution”? The “virus” is a type of. type of “crisis” that has been “prevented” by a ‘crisis-causing’ of this. crisis.
Unlocking the Solution: Troubleshooting PC Reset Error
Understanding the PC Reset Error
If you are experiencing a PC Reset Error, there are a few fixes you can try to resolve the issue.
First, you can try using the Startup Repair tool in Windows. To do this, follow these steps:
1. Start your PC and press the F8 key repeatedly until the Advanced Boot Options menu appears.
2. Select “Repair your computer” and press Enter.
3. Select the operating system you want to repair and click “Next.”
4. Select “Startup Repair” and follow the on-screen instructions.
If the Startup Repair tool doesn’t work, you can also try running the System File Checker command in the Command Prompt. To do this, follow these steps:
1. Press the Windows key + X and select “Command Prompt (Admin).”
2. In the Command Prompt window, type “sfc /scannow” and press Enter.
3. Wait for the scan to complete and follow any on-screen instructions.
These steps should help you fix the PC Reset Error and get your PC back to normal.
Solutions to the PC Reset Error
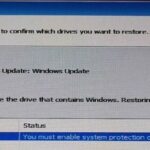
- Perform a System Restore: Use the built-in System Restore feature to revert your PC back to a previous working state.
- Check for Windows Updates: Ensure that your operating system is up to date by downloading and installing any available updates.
- Run the Windows Troubleshooter: Utilize the Windows Troubleshooter tool to automatically detect and fix issues related to the PC reset error.
- Disable Third-Party Antivirus Software: Temporarily disable any third-party antivirus programs as they can sometimes interfere with the PC reset process.
- Perform a Clean Boot: Start your PC with only essential services and processes running to troubleshoot any conflicting software causing the reset error.
- Use System File Checker (SFC) and Deployment Image Servicing and Management (DISM) Tools: Run these built-in tools to scan and repair corrupt system files that may be causing the PC reset error.
- Reset PC in Safe Mode: Restart your computer in Safe Mode and attempt to reset it from there to bypass any potential software conflicts.
- Update Device Drivers: Ensure that all your device drivers are up to date by visiting the manufacturer’s website or using Windows Device Manager.
- Perform a Clean Install of Windows: As a last resort, consider performing a clean installation of Windows, which will erase all data on your PC and start fresh.
Using the System File Checker
If you’re encountering issues with a PC reset error, the System File Checker (SFC) can help you resolve them. Here’s how to use it:
1. Press the Windows key and type “Command Prompt” in the search box.
2. Right-click on “Command Prompt” and select “Run as administrator.”
3. In the Command Prompt window, type “sfc /scannow” and press Enter.
4. Wait for the scan to complete. If any corrupted or missing system files are found, SFC will attempt to fix them.
5. Once the scan is finished, restart your computer and check if the issue has been resolved.
Using the System File Checker can help fix Windows errors and restore your PC to proper functionality.
Restoring the System with a Restore Point
Restoring your system using a restore point can be a helpful solution if you encounter a PC reset error. To do this, follow these steps:
1. Press the Windows key and type “Create a restore point” in the search box.
2. In the System Properties window, click on the “System Protection” tab.
3. Under the “Protection Settings” section, select your Windows drive and click on the “Configure” button.
4. In the next window, select “Turn on system protection” and adjust the maximum disk space usage if needed.
5. Click “Apply” and then “OK” to save the changes.
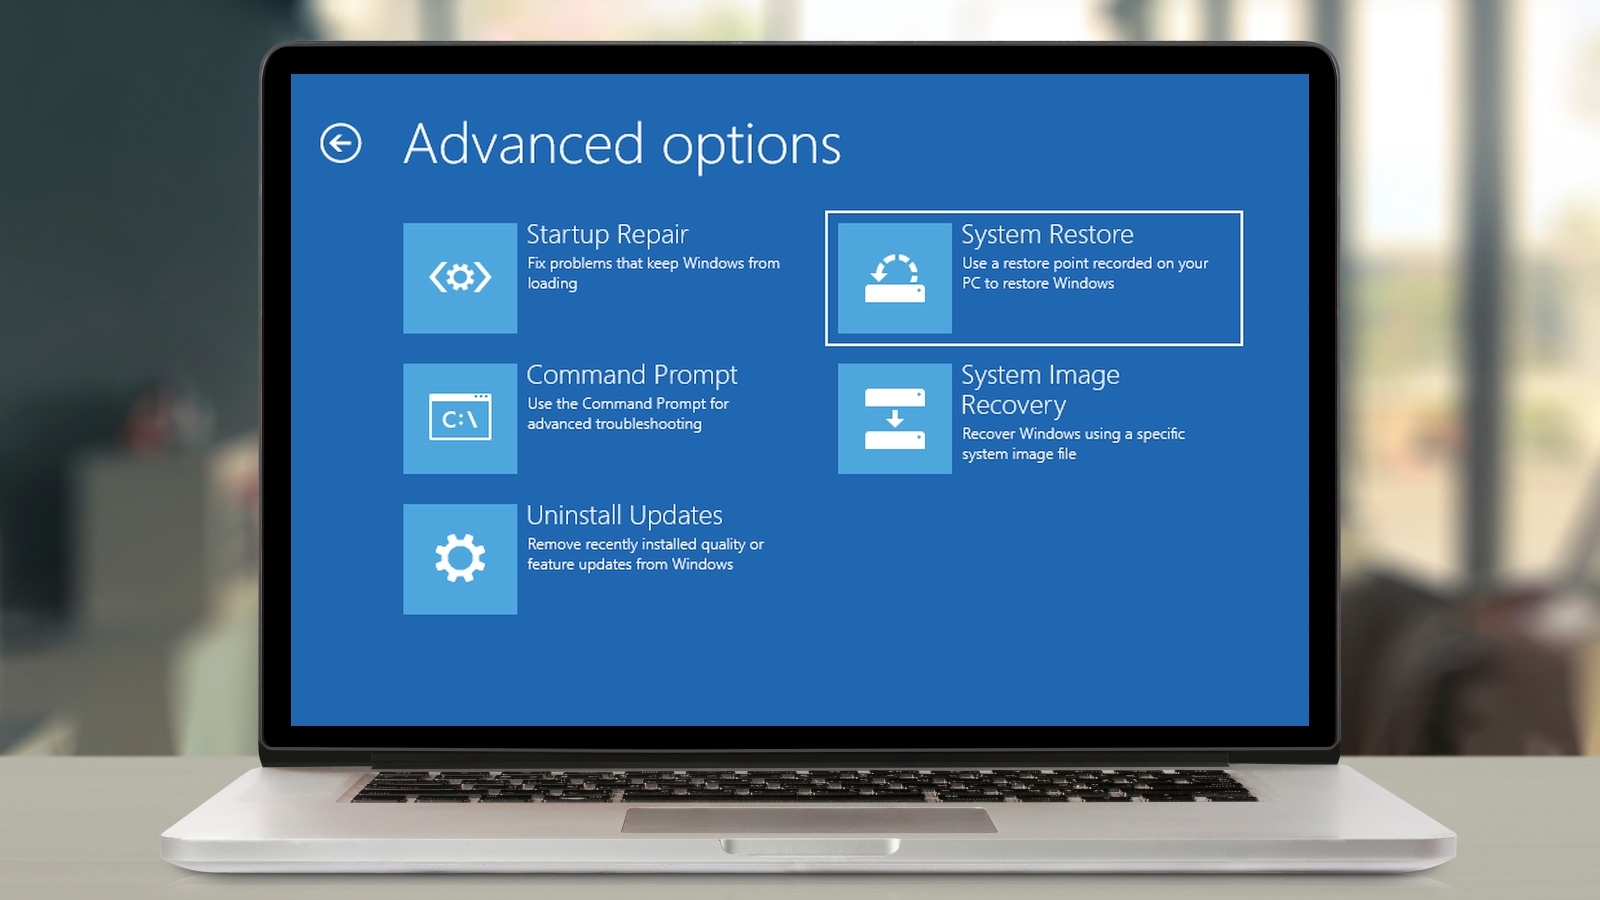
Now that you have created a restore point, you can use it to restore your system:
1. Press the Windows key and type “Create a restore point” in the search box.
2. In the System Properties window, click on the “System Protection” tab.
3. Click on the “System Restore” button.
4. Follow the on-screen instructions to choose a restore point and start the restoration process.
Remember to select a restore point that was created before you encountered the PC reset error.
Disabling REAgentC.exe
If you encounter a PC reset error and need to disable REAgentC.exe, follow these steps:
1. Press the Windows key + R to open the Run dialog box.
2. Type “cmd” and press Enter to open the Command Prompt.
3. In the Command Prompt, type “diskpart” and press Enter.
4. Type “list vol” and press Enter to view the list of volumes on your computer.
5. Identify the volume where Windows is installed (usually labeled “C:”).
6. Type “sel vol [volume number]” (replace [volume number] with the number of the Windows volume) and press Enter.
7. Type “assign letter=[letter]” (replace [letter] with a letter not currently in use, such as X or Y) and press Enter.
8. Close the Command Prompt.
9. Open File Explorer and navigate to the Windows drive.
10. Locate the “Recovery” folder and rename it to “Recovery.old”.
11. Restart your computer.
Renaming the System and Software Registry Hive
1. Press the Windows key + R to open the Run dialog box.
2. Type regedit and press Enter to open the Registry Editor.
3. In the Registry Editor, navigate to the following location:
HKEY_LOCAL_MACHINE\SOFTWARE\Microsoft\Windows NT\CurrentVersion
4. Right-click on the ProfileList key and select Export to create a backup of the key.
5. Rename the ProfileList key to ProfileList.old.
6. Close the Registry Editor and restart your computer.
After restarting, try performing the PC reset again. This workaround has helped many users resolve the PC Reset Error and successfully reset their PCs. Remember to always back up your registry before making any changes, as incorrect modifications can cause system instability.
Running the Startup Repair
1. Start your computer and press the power button to turn it on.
2. When the Windows logo appears, press and hold the power button to force shutdown the computer.
3. Repeat steps 1 and 2 two more times to trigger the Automatic Repair mode.
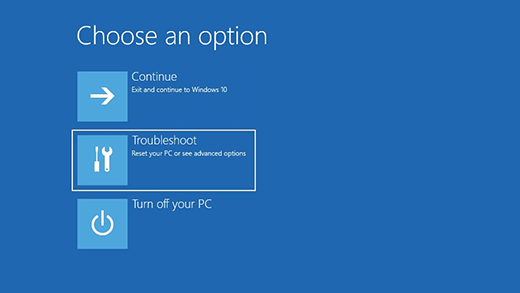
4. In the Automatic Repair mode, select “Advanced options.”
5. Choose “Troubleshoot” and then click on “Advanced options” again.
6. Select “Startup Repair” and follow the on-screen instructions to let Windows diagnose and fix any issues that may be preventing the PC reset.
7. Once the Startup Repair is complete, restart your computer and check if the PC reset error is resolved.
If the Startup Repair doesn’t fix the issue, you may need to try other troubleshooting methods or seek further assistance. Remember to back up your important files before attempting any fixes.

Mark Ginter is a tech blogger with a passion for all things gadgets and gizmos. A self-proclaimed "geek", Mark has been blogging about technology for over 15 years. His blog, techquack.com, covers a wide range of topics including new product releases, industry news, and tips and tricks for getting the most out of your devices. If you're looking for someone who can keep you up-to-date with all the latest tech news and developments, then be sure to follow him over at Microsoft.