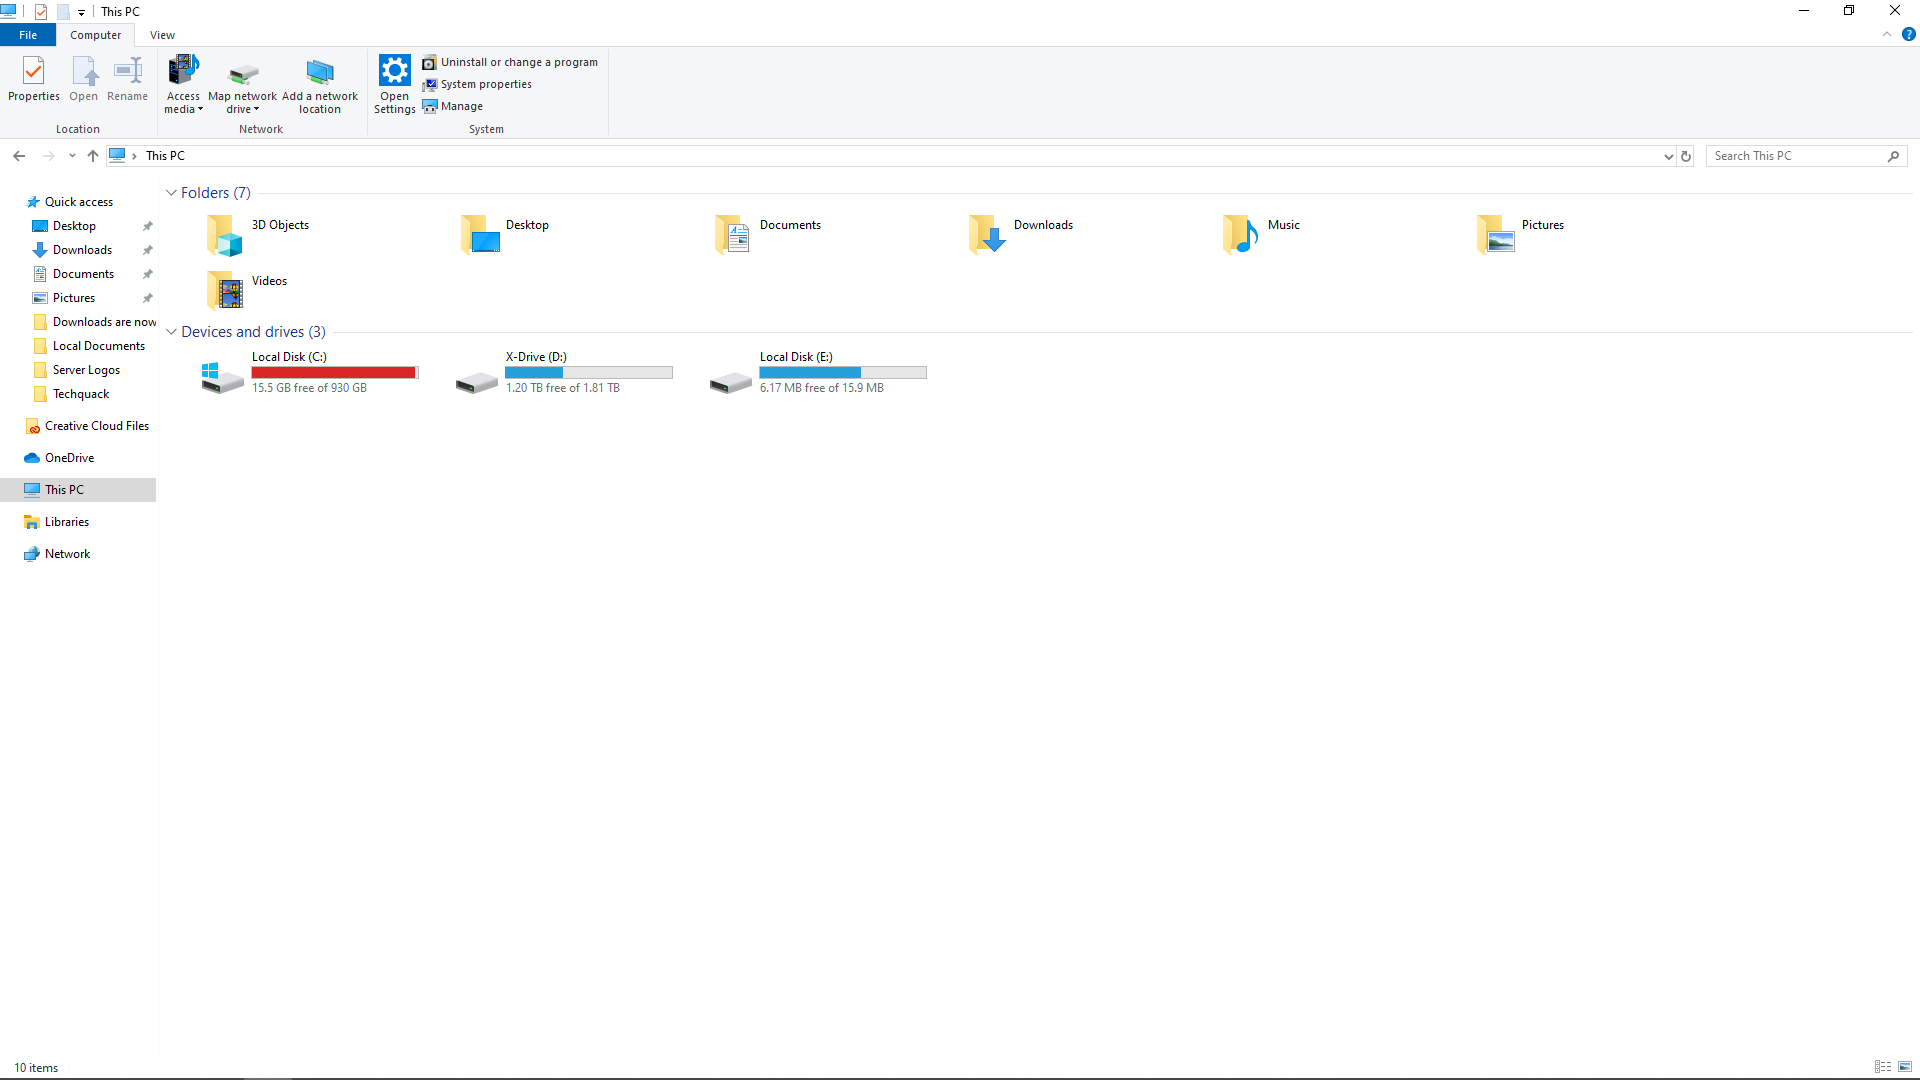
- This is the drive letter of the device you want to clean up, for us, it’s the “C:” drive we want to reduce storage on.
- This was brought in not to only free up space on your PC, but also to allow for files that are no longer needed to be removed.
In a digital world where storage is precious, finding ways to free up drive space on Windows 10 becomes essential. From untangling cluttered folders to optimizing system settings, this article unveils the 12 best methods to declutter and maximize your computer’s storage capacity. Say goodbye to the frustration of running out of space and hello to a streamlined and efficient Windows 10 experience.
Clear Recycle Bin
To clear the Recycle Bin and free up drive space on Windows 10, follow these steps:
1. Open File Explorer and click on “This PC” in the left-hand navigation pane.
2. Right-click on the Recycle Bin and select “Empty Recycle Bin” from the context menu. Alternatively, you can also click on the “Manage” tab in the ribbon at the top of the window and select “Empty Recycle Bin” from there.
3. A confirmation message will appear, asking if you want to permanently delete all items in the Recycle Bin. Click “Yes” to proceed.
4. After emptying the Recycle Bin, you will free up space on your hard drive. You can check the updated disk usage in the Storage settings.
Remember to regularly empty the Recycle Bin to prevent it from taking up unnecessary storage space.
Remove junk files with Storage Sense
To free up drive space on Windows 10, you can use Storage Sense. This handy feature automatically deletes unnecessary files to optimize your hard drive space. Here’s how to use it:
1. Open Storage settings: Click on the Start button, go to Settings, and select System. Then, click on Storage in the left-hand menu.
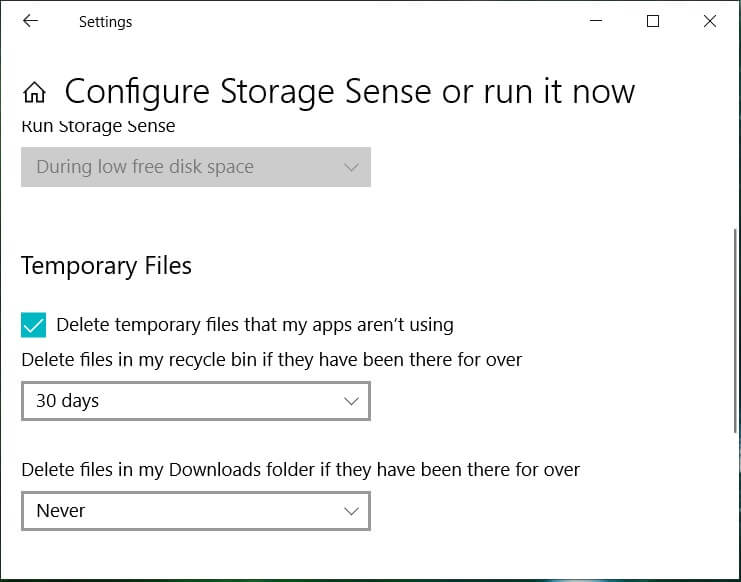
2. Configure Storage Sense: Scroll down to the Storage Sense section and click on “Configure Storage Sense or run it now.” Here, you can choose how Storage Sense clears up space, such as deleting temporary files and emptying the recycle bin.
3. View Storage settings: To see how much space you’ve cleared, click on “View storage usage on other drives” under the “More storage settings” section. This will show you a breakdown of your disk usage.
4. Cut down on OneDrive files: If you use OneDrive, you can enable the “OneDrive Files On-Demand” feature. This allows you to access your files without taking up space on your local disk.
By following these steps, you can easily free up disk space on your Windows 10 PC. Remember to regularly check your storage usage and use Storage Sense to keep your device running smoothly.
Image credit: [Insert Image Credit here if relevant]
Note: This feature is also available on Windows 11.
Delete temporary files using Disk Cleanup
1. Open File Explorer and click on “This PC” or “My Computer” to view your drives.
2. Right-click on the drive you want to free up space on (e.g., Local Disk (C:)) and select “Properties.”
3. In the Properties window, click on the “General” tab and then click on the “Disk Cleanup” button.
4. The Disk Cleanup tool will analyze your drive and present you with a list of files that can be safely deleted.
5. Check the box next to “Temporary files” and any other categories you want to clean up.
6. Click on the “OK” button, and then click on “Delete Files” to confirm.
7. The tool will start deleting the selected files, which may take a few minutes depending on the amount of data.
8. Once the process is complete, you will have freed up valuable disk space on your computer.
Note: Disk Cleanup is a built-in feature in Windows 10 and Windows 11 that helps you remove unnecessary files, including temporary files, to optimize storage space. It is a quick and easy way to clear out clutter and improve the performance of your device.
python

import subprocess
def free_up_disk_space():
try:
# Run the Disk Cleanup utility using the subprocess module
subprocess.run(['cleanmgr', '/dC'], check=True)
print("Disk cleanup completed successfully.")
except subprocess.CalledProcessError as e:
print("An error occurred while running Disk Cleanup:", str(e))
# Call the function to initiate disk cleanup
free_up_disk_space()
Please note that this code simply executes the `cleanmgr` command, which is the executable for Disk Cleanup on Windows. It opens up the Disk Cleanup interface, allowing you to select the drive and perform the cleanup manually.
Remember to exercise caution when using disk cleanup tools, as they may permanently remove files from your system. It’s always recommended to review the items to be deleted and ensure you have backups of any important data before proceeding.
Use OneDrive files on-demand
OneDrive Files On-Demand is a useful feature for freeing up drive space on Windows 10. By using this feature, you can access your OneDrive files without having to download them to your hard drive. To enable this feature, right-click on the OneDrive icon in the taskbar and select “Settings”. In the Settings menu, go to the “Files On-Demand” tab and check the box that says “Save space and download files as you use them”. Once enabled, you can view and access your files in File Explorer just like any other file, but they will only take up space on your hard drive when you need them. This is especially helpful for laptops and desktops with limited storage capacity. If you’re running low on disk space, using OneDrive Files On-Demand is a great way to free up storage without deleting important files or media.
Remove non-essential apps and games
- Open Settings by clicking on the Start button and selecting the Settings gear icon.
- Click on System in the Settings window.
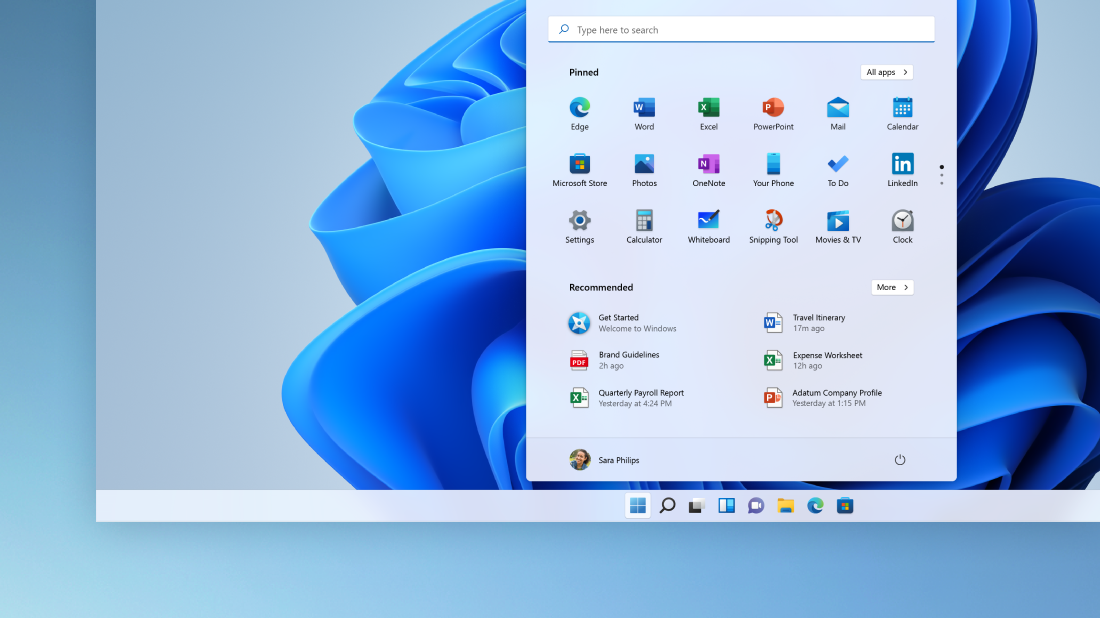
- Select Storage from the left-hand menu.
- Under the “Storage sense” section, click on Change how we free up space automatically.
- Toggle the switch to On next to the “Delete temporary files that my apps aren’t using” option.
- Scroll down and click on Free up space now to run an immediate cleanup.
- Review the list of apps and games under the “Apps & games” section.
- Click on an app or game you want to remove.
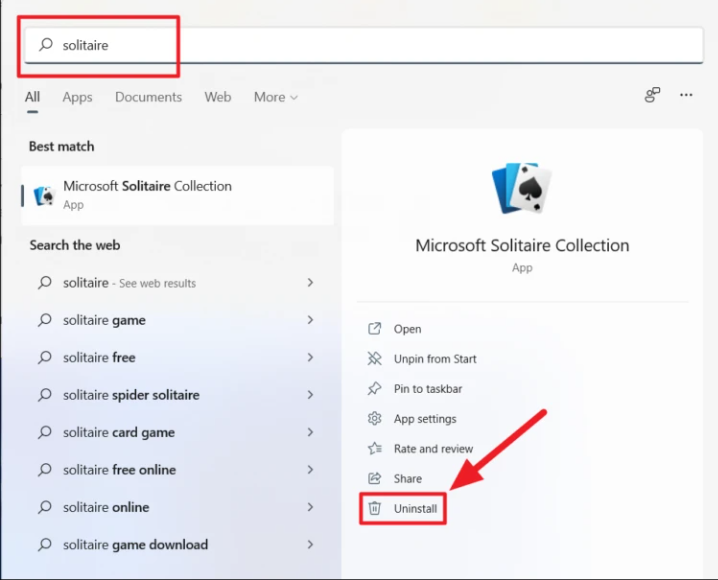
- Click on Uninstall to remove the selected app or game.
- If prompted, confirm the uninstallation by clicking Uninstall again.
- Repeat steps 8-10 for each non-essential app or game you want to remove.
- Close the Settings window when you have finished removing the unwanted apps and games.
Transfer files to external drive
- Connect your external drive to your Windows 10 device.
- Open File Explorer by pressing Windows Key + E.
- Navigate to the files or folders you want to transfer.
- Select the files or folders you want to move.
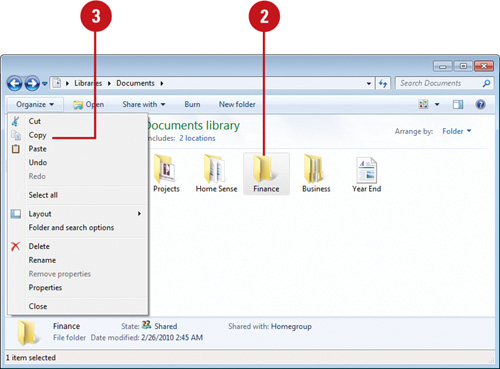
- Right-click on the selected items and choose Copy.
- In File Explorer, locate your external drive under the “This PC” section.
- Right-click on your external drive and select Paste.
- Wait for the transfer process to complete.
- Safely eject your external drive by right-clicking on it and selecting Eject.
- Disconnect your external drive from your Windows 10 device.
Use NTFS compression
If you’re looking to free up drive space on your Windows 10 device, using NTFS compression can be a helpful solution. NTFS compression allows you to compress files and folders, reducing their size and freeing up valuable hard drive space. To enable NTFS compression, follow these steps:
1. Open the “Storage” settings menu by right-clicking on the taskbar and selecting “Open Storage settings.”
2. Under the “Storage” section, click on the “View Storage settings” option.
3. In the “Storage sense” section, click on the “Change how we free up space automatically” link.
4. Scroll down to the “Free up space now” section and click on the “Clean up” button.
5. Check the box next to “Compress your OS drive” and any other drives you want to compress.
6. Click on the “Clean up system files” button and repeat the process.
Remember that enabling NTFS compression may slightly impact the performance of your device, especially when accessing compressed files. However, it can be a useful feature for freeing up space on your hard drive, especially on devices with limited storage, such as laptops or SSD drives.
Disable Hibernation
To disable hibernation on your Windows 10 PC and free up valuable drive space, follow these simple steps:
1. Open the Command Prompt as an administrator by searching for “cmd” in the Start menu, right-clicking on “Command Prompt,” and selecting “Run as administrator.”
2. In the Command Prompt window, type “powercfg.exe /hibernate off” and press Enter. This will disable the hibernation feature.
3. You can verify if hibernation has been disabled by typing “powercfg.exe /a” and pressing Enter. If it shows “The hibernation file is not present,” you have successfully disabled hibernation.
4. By disabling hibernation, you can free up several gigabytes of disk space, especially on devices with limited storage such as SSDs.
5. Remember that disabling hibernation means you won’t be able to use the hibernate feature to save your current session. However, this will not affect your ability to put your PC to sleep or shut it down normally.
Compress installation footprint of Windows
To compress the installation footprint of Windows and free up drive space on Windows 10, follow these 12 best practices:
1. Uninstall unnecessary programs: Go to Settings > Apps > Apps & features, then select and uninstall any applications you no longer need.
2. Remove temporary files: Open the Start menu and type “Disk Cleanup”. Select the drive you want to clean, then check the boxes for the file types you want to remove.
3. Clear the Recycle Bin: Right-click on the Recycle Bin icon on your desktop and select “Empty Recycle Bin” to permanently delete files.
4. Optimize storage: Go to Settings > System > Storage and enable “Storage sense” to automatically free up space by deleting unused files.
5. Move files to the cloud: Consider using OneDrive or other cloud storage services to store your files and free up local disk space.
6. Compress files and folders: Right-click on a file or folder, select “Properties”, and check the “Compress contents to save disk space” option.
7. Disable hibernation: Open Command Prompt as administrator and type “powercfg.exe /hibernate off” to disable hibernation and recover disk space.
8. Shrink virtual memory: Go to Control Panel > System > Advanced system settings > Performance settings > Advanced tab. Click on “Change” under Virtual memory and decrease the allocated space.
9. Remove unnecessary language packs: Open Settings > Time & Language > Language, then select and remove any unwanted language packs.
10. Disable system restore: Right-click on “This PC”, select “Properties”, go to the “System Protection” tab, and disable system restore to free up disk space.
11. Turn off Windows features: Go to Control Panel > Programs > Programs and Features > Turn Windows features on or off. Uncheck any features you don’t use.
12. Consider upgrading to an SSD: Upgrading to a solid-state drive (SSD) can significantly improve performance and provide more efficient use of disk space.
By implementing these steps, you can effectively free up disk space on your Windows 10 PC or laptop, optimizing its performance and storage capacity.
