- The error code 0x80240034 is commonly associated with Windows 10 update issues.
- Microsoft has since released a fix this, but a few people are still reporting this error to be unresolved.
- To resolve the error code, a few users have been using the following list of instructions to resolve their issues.
- You can run the Windows Update Troubleshooter to see if any problems can be resolved through that.
- If not, continue onto the next step.
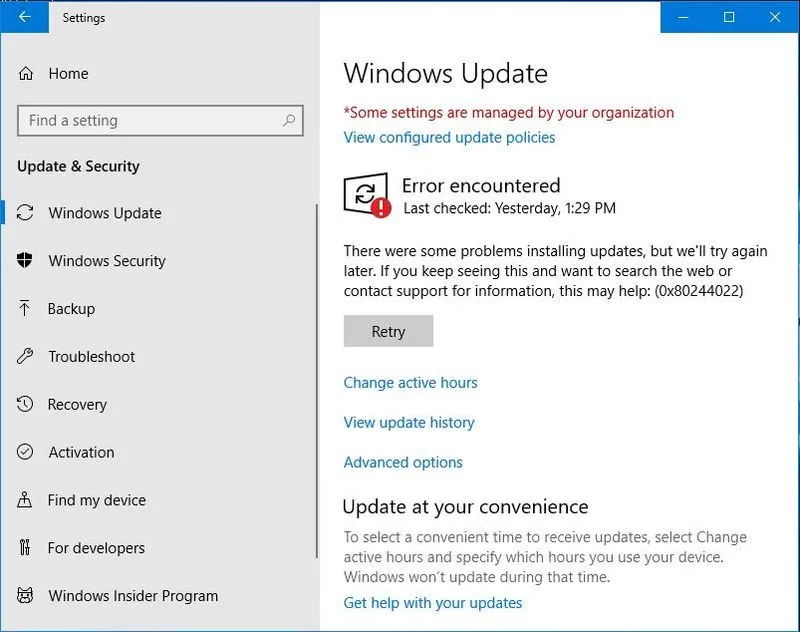
Is your Windows 10 update stuck with error code 0x80240034? Don’t worry, we’ve got you covered! In this article, we will guide you on how to solve this pesky update error and get your system back on track. So, let’s dive right in and bid farewell to error 0x80240034!
Ways to Fix Windows Update Error 0x80240034
1. Run Windows Update Troubleshooter: This built-in tool can automatically detect and fix common Windows Update errors, including error 0x80240034. To use it, go to Settings > Update & Security > Troubleshoot > Windows Update, then click on Run the troubleshooter.
2. Reset Windows Update components: Open Command Prompt as an administrator and run the following commands one by one: net stop wuauserv, net stop bits, net stop cryptsvc, ren C:\Windows\SoftwareDistribution SoftwareDistribution.old, ren C:\Windows\System32\catroot2 catroot2.old, net start wuauserv, net start bits, net start cryptsvc.
3. Use the DISM tool: Open Command Prompt as an administrator and run the command Dism /Online /Cleanup-Image /Restorehealth. This will scan and repair any corrupt system files that may be causing the error.
4. Check for malware: Run a full scan with a reliable antivirus program to check for any malware that might be interfering with Windows Update.
Remember to restart your PC and check for updates after trying each solution. If the error persists, it’s recommended to seek further assistance from Microsoft or a specialized Windows support team.
Use Windows Update Troubleshooter to Fix the Error
If you’re encountering the 0x80240034 error while trying to update your Windows 10 operating system, don’t worry. We have a solution for you. The Windows Update Troubleshooter is a built-in tool that can help fix update-related issues.
Here’s how to use it:
1. Press the Windows key + I to open the Settings app.
2. Go to Update & Security.
3. Select Troubleshoot from the left-hand menu.
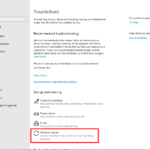
4. Scroll down and click on Additional troubleshooters.
5. Find and select Windows Update.
6. Click on Run the troubleshooter.
The troubleshooter will then scan your system for any issues and attempt to resolve them automatically. It’s a quick and easy way to fix the 0x80240034 error and get your updates back on track.
Remember to regularly run the Windows Update Troubleshooter to ensure your PC stays up to date and free from any update-related issues.
Run SFC and DISM Commands to Resolve the Error
To resolve the Windows 10 Update Error 0x80240034, you can run the SFC (System File Checker) and DISM (Deployment Image Servicing and Management) commands. These commands help fix issues with system files and restore the health of your operating system.
Here are the steps to run SFC and DISM commands:
1. Press the Windows key + R to open the Run window.
2. Type “cmd” and press Enter to open the Command Prompt.
3. In the Command Prompt, type “sfc /scannow” and press Enter to run the System File Checker.
4. Wait for the scan to complete. If any issues are found, the SFC command will automatically fix them.
5. After the SFC scan, type “dism /online /cleanup-image /restorehealth” and press Enter to run the DISM command.
6. Wait for the DISM command to complete. This command will restore any corrupted system files.
Manually Download the Update to Fix the Error
To fix the Windows 10 Update Error 0x80240034, you can manually download the update file. Here’s how:
1. Go to the Microsoft website and search for the update you need. Make sure to download the correct version for your PC.
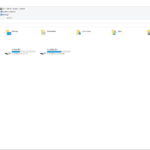
2. Once you’ve found the update, click on the download link and save the file to your computer.
3. After the download is complete, locate the downloaded file and double-click on it to run the installation.
4. Follow the on-screen instructions to complete the installation process.
By manually downloading the update, you can bypass any issues that may have caused the error. This method has been proven to be effective for many users.
Remember to always keep your PC updated to ensure the best performance and security.
Perform a Full System Scan to Fix the Error
Performing a full system scan can help fix the error code 0x80240034 issue in Windows 10. To do this, follow these steps:
1. Open the Run window by pressing the Windows key + R.
2. Type “msconfig” and press Enter.
3. In the System Configuration window, go to the Services tab.
4. Check the “Hide all Microsoft services” box and click on “Disable all.”
5. Go to the Startup tab and click on “Open Task Manager.”
6. In the Task Manager, disable all startup items.
7. Close the Task Manager and go back to the System Configuration window.
8. Click on “Apply” and then “OK.”
9. Restart your computer and perform a full system scan using your preferred antivirus software.
By following these steps, you can fix the error code 0x80240034 and resolve any PC system issues that may be causing the issue.