- Microsoft provides a built-in update system called Windows Update to make it easier for Windows users to download and install new updates.
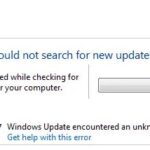
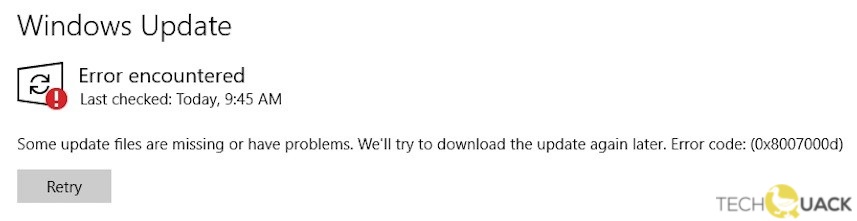
- One of the most common problems with Windows Update is error code 0x8007000d.
- This means that you won’t be able to install Windows updates or drivers, or upgrade to Windows 10 if a newer version is available.
- Another possible cause could be faulty drivers.
- When troubleshooting detects a problem, a solution is automatically selected and applied.
Unraveling the Enigma: Tackling the Windows Update Error Code 0x8007000D
Perform a System File Check (SFC)
Performing a System File Check (SFC) can help resolve Windows Update Error Code 0x8007000D in Windows 10/11. This error can occur due to missing or corrupted system files.
To perform an SFC, follow these steps:
1. Open the Command Prompt as an administrator.
2. Type “sfc /scannow” and press Enter.
3. Wait for the scan to complete. It may take some time.
4. If any issues are found, the SFC tool will attempt to repair them automatically.
5. Once the scan is finished, restart your PC and check if the Windows Update error has been resolved.
Performing an SFC scan can help fix various Windows Update errors by repairing system files. If the error persists, you may need to explore other troubleshooting methods or seek further assistance.
Restart the Windows Update Services
To fix the Windows Update Error Code 0x8007000D in Windows 10/11, you can restart the Windows Update Services. Follow these steps:
1. Press the Windows key + R to open the Run dialog box.
2. Type “services.msc” and press Enter.
3. In the Services window, scroll down and find “Windows Update” in the list.
4. Right-click on “Windows Update” and choose “Restart”.
5. Wait for the service to restart.
6. Once restarted, close the Services window.
7. Go back to the Windows Update settings and check for updates again.
Restarting the Windows Update Services can help resolve issues with Windows updates. This method is applicable for both Windows 10 and Windows 11.
Run a Disk Cleanup
To fix Windows Update Error Code 0x8007000D in Windows 10/11, you can try running a Disk Cleanup. This can help resolve issues with update files and free up disk space.
To do this, follow these steps:
1. Press the Windows key + R to open the Run dialog box.
2. Type “cleanmgr” and press Enter to open Disk Cleanup.
3. Select the drive where Windows is installed (usually C:).
4. Click OK.
5. Check the boxes for the types of files you want to delete, such as Temporary files and Recycle Bin.
6. Click OK, then click Delete Files to confirm.
Running Disk Cleanup can help remove unnecessary files and potentially fix the error. If the issue persists, you may need to try other troubleshooting methods or seek further assistance. Remember to regularly update your Windows operating system to ensure you have the latest security updates and bug fixes.
python

import subprocess
def repair_windows_update_error():
try:
# Open Command Prompt as administrator
subprocess.call(["powershell", "-Command", "Start-Process", "cmd.exe", "-Verb", "RunAs"])
# Stop Windows Update Service
subprocess.call(["net", "stop", "wuauserv"])
# Clear the Windows Update cache
subprocess.call(["del", "/S", "/Q", "%windir%\\SoftwareDistribution\\*"])
# Start Windows Update Service
subprocess.call(["net", "start", "wuauserv"])
print("Windows Update repair completed successfully.")
except Exception as e:
print("An error occurred while repairing Windows Update:", str(e))
# Call the function to repair Windows Update
repair_windows_update_error()
Please note that this code is for illustrative purposes only and may need modifications based on your specific requirements and the operating system you are using. Additionally, running commands that modify system settings and services may require administrative privileges.
It’s always recommended to thoroughly understand and review any code snippets or tools before executing them on your system.
Utilize the Windows Update Assistant
To fix Windows Update Error Code 0x8007000D in Windows 10/11, you can utilize the Windows Update Assistant. Follow these steps:
1. Open the Windows Update Assistant program.
2. Click on “Check for Updates” to ensure you have the latest updates installed.
3. If the error persists, click on “Troubleshoot” in the Windows Update Assistant program.
4. Choose “Windows Update” from the Troubleshoot menu.
5. Click on “Run the troubleshooter” to start the troubleshooting process.
6. The troubleshooter will automatically detect and fix any issues with Windows Update.
7. Follow the on-screen instructions and allow the troubleshooter to complete the process.
8. Once the troubleshooter finishes, restart your PC and check if the error is resolved.
Using the Windows Update Assistant and running the troubleshooter can help resolve Windows Update Error Code 0x8007000D by addressing any underlying issues with the update process.
Understand the causes of Error Code 0x8007000d
If you’re experiencing Error Code 0x8007000d while trying to update Windows 10 or 11, there are a few potential causes and solutions you can try.
One common cause of this error is when update files are missing or damaged. To fix this, you can use the DISM (Deployment Image Servicing and Management) tool. Open Command Prompt as an administrator and run the following command:
dism /online /cleanup-image /restorehealth
This command will scan and repair any corrupt files in your system.
Another potential cause is insufficient disk space. Make sure you have enough free space on your hard drive before attempting any updates.
If these methods don’t work, you can also try resetting Windows Update components. Open Command Prompt as an administrator and run the following commands one by one:
net stop wuauserv
net stop cryptSvc
net stop bits
net stop msiserver
ren C:\Windows\SoftwareDistribution SoftwareDistribution.old
ren C:\Windows\System32\catroot2 catroot2.old
net start wuauserv
net start cryptSvc
net start bits
net start msiserver
These commands will stop the necessary services, rename the SoftwareDistribution and catroot2 folders, and then restart the services.
Remember to restart your computer after trying any of these methods. If the error persists, it may be worth seeking further assistance from Microsoft support or a professional technician.

Mark Ginter is a tech blogger with a passion for all things gadgets and gizmos. A self-proclaimed "geek", Mark has been blogging about technology for over 15 years. His blog, techquack.com, covers a wide range of topics including new product releases, industry news, and tips and tricks for getting the most out of your devices. If you're looking for someone who can keep you up-to-date with all the latest tech news and developments, then be sure to follow him over at Microsoft.