- VirtualBox or Oracle VM Virtual Box is a tool that allows developers to create and manage multiple virtual machines on one powerful computer.
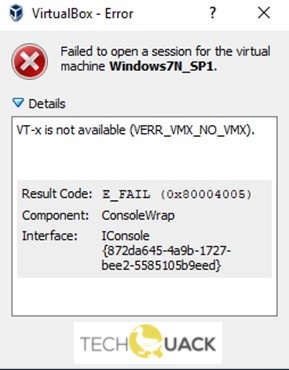
- Some developers have complained about a failure when creating a virtual session, accompanied by the “VERR_VMX_NO_Vt-x” error message.
Unleashing the full potential of your Windows 10 computer can sometimes be hindered by the frustrating VT-x Is Not Available (VERR_VMX_NO_VMX) error. In this article, we delve into the depths of this issue and provide you with effective solutions to overcome it. So, if you’re ready to unlock the power of VT-x, read on!
x Issues on Windows 10
If you encounter the error “VT-x is not available (VERR_VMX_NO_VMX)” on Windows 10 while using VirtualBox, there are a few steps you can take to fix the issue.
First, make sure that your processor supports virtualization technology. Check the Intel or AMD website for more information on your specific processor.
Next, make sure that virtualization is enabled in your BIOS settings. Restart your computer and enter the BIOS by pressing the appropriate key (usually F2 or Delete) during startup. Look for an option related to “Hardware Virtualization” or “SVM Mode” and enable it.
If the issue persists, try updating VirtualBox to the latest version. Visit the VirtualBox website for the download link.
These steps should help resolve the “VT-x is not available (VERR_VMX_NO_VMX)” error and allow you to use VirtualBox without any issues.
Enabling Hardware Virtualization in BIOS
To enable Hardware Virtualization in BIOS on Windows 10 and fix the VT-x Is Not Available (VERR_VMX_NO_VMX) error, follow these steps:
1. Restart your computer and enter the BIOS settings by pressing the designated key during startup (usually Del, F2, or Esc).
2. Navigate to the “Advanced” or “Configuration” tab in the BIOS menu.
3. Look for an option related to “Virtualization Technology,” “Intel Virtualization Technology,” or “AMD SVM Mode.”
4. Enable this option by selecting it and pressing Enter.
5. Save the changes and exit the BIOS settings.
6. Restart your computer and check if the error is resolved.
Note: The option name may vary depending on your motherboard manufacturer and BIOS version. Consult your motherboard’s manual or the manufacturer’s website for specific instructions.
Enabling Hardware Virtualization in the BIOS allows virtual machine software like VirtualBox to utilize the full capabilities of your CPU, enhancing virtualization performance and compatibility.
Disabling Hyper-V
To disable Hyper-V on Windows 10 and fix the VT-x Is Not Available (VERR_VMX_NO_VMX) error, follow these steps:
1. Open the Start menu, search for “Turn Windows features on or off,” and click on the top result.
2. In the Windows Features window, scroll down and locate “Hyper-V.” Uncheck the box next to it.
3. Click “OK” and wait for the changes to apply. You may need to restart your computer.
Disabling Hyper-V should resolve the VT-x Is Not Available error and allow you to use virtualization software like VirtualBox without any conflicts. Remember to re-enable Hyper-V if you need to use it again in the future.
For more detailed instructions or troubleshooting, you can refer to the official Microsoft support documentation or reach out to our partners for further assistance.
Resolving Access Issues on thegeekpage.com
If you are encountering the error message “VT-x is not available (VERR_VMX_NO_VMX)” on Windows 10 while using VirtualBox, here are some steps to resolve the issue.
First, ensure that your CPU supports virtualization technology. Check the BIOS settings of your computer and enable the virtualization feature if it is disabled.
Next, make sure that Hyper-V is not enabled on your Windows 10 system, as it can conflict with VirtualBox. To disable Hyper-V, open the Control Panel, go to “Programs” > “Turn Windows features on or off,” and uncheck “Hyper-V.”
If the issue persists, try running VirtualBox as an administrator. Right-click on the VirtualBox shortcut and select “Run as administrator.”
If none of the above fixes work, consider updating your BIOS and VirtualBox to their latest versions, as outdated software can sometimes cause this error.
Remember to restart your computer after applying any changes. Hopefully, these steps will help you resolve the “VT-x is not available (VERR_VMX_NO_VMX)” error and allow you to use VirtualBox without any issues.

Mark Ginter is a tech blogger with a passion for all things gadgets and gizmos. A self-proclaimed "geek", Mark has been blogging about technology for over 15 years. His blog, techquack.com, covers a wide range of topics including new product releases, industry news, and tips and tricks for getting the most out of your devices. If you're looking for someone who can keep you up-to-date with all the latest tech news and developments, then be sure to follow him over at Microsoft.