- The Apps tab is missing if the update feature is disabled or if there are new updates to your Creative Cloud.
- In some cases, your XML file may be corrupt or contain invalid values, so the Apps tab will not appear.
- If you use an administrator account in the Creative Cloud application, the administration may have limited access to the applications in Creative Cloud.
- If you belong to an organization, many organizations limit the applications you can install, so they disable Apps tab.
Unlock the hidden potential of your Adobe Creative Cloud Desktop with this comprehensive guide on how to effortlessly restore the missing Apps tab.
Troubleshooting the Missing Apps Tab in Adobe Creative Cloud
If you are experiencing issues with the Missing Apps tab in Adobe Creative Cloud Desktop, there are a few troubleshooting steps you can try.
First, ensure that you have the latest version of Adobe Creative Cloud Desktop installed on your computer. You can do this by opening the Creative Cloud Desktop application and navigating to the menu bar. From there, click on “Help” and then “Check for Updates”.
If updating the software does not resolve the issue, you can try resetting the preferences for Adobe Creative Cloud Desktop. To do this, close the application and navigate to the following folder on your computer: [yourusername]/Library/Application Support/Adobe/OOBE. Once you are in this folder, locate the “opm.db” file and delete it.
Next, restart Adobe Creative Cloud Desktop and check if the Missing Apps tab is now visible. If not, you can try uninstalling and reinstalling Adobe Creative Cloud Desktop. To do this, navigate to the “Applications” folder on your Mac and locate the Adobe Creative Cloud Desktop application. Drag it to the trash to uninstall, then download and install the latest version from the Adobe website.
If you are still having trouble with the Missing Apps tab, it may be helpful to contact Adobe Support for further assistance. They can provide additional troubleshooting suggestions and help resolve any issues you may be experiencing.
Changing the XML Config File to Restore the Apps Tab
To change the XML config file and restore the Apps tab in Adobe Creative Cloud Desktop, follow these steps:
1. Close the Adobe Creative Cloud Desktop application.
2. Navigate to the XML config file location. On a Mac, it is typically located at “/Users/[username]/Library/Application Support/Adobe/OOBE/configs”. On Windows, it can be found at “C:\Program Files (x86)\Common Files\Adobe\OOBE\configs”.
3. Backup the existing XML file by making a copy of it and saving it in a separate location.
4. Open the original XML file using a plain text editor.
5. Use the “Find” function (Ctrl+F or Command+F) to search for the following line: “
6. Replace the line with the following code: “
7. Save and close the XML file.
8. Open the Adobe Creative Cloud Desktop application again, and the Apps tab should now be restored.
If the Apps tab is still missing, you may need to perform a security check, update your browser, or try other troubleshooting suggestions provided by Adobe.
Replacing the XML File to Restore the Apps Tab
To restore the missing Apps tab in Adobe Creative Cloud Desktop, you can replace the XML file. Follow these troubleshooting steps:
1. Close the Creative Cloud Desktop application.
2. Open the Finder window on your Mac and navigate to the following location: ~/Library/Application Support/Adobe/OOBE.
3. Look for the file named “serviceconfig.xml” and delete it.
4. Download the “serviceconfig.xml” file from the Adobe support page.
5. Place the downloaded XML file in the same location where you deleted the old one.
6. Restart the Creative Cloud Desktop application.
Note: You may be prompted to enter your Adobe ID credentials during this process.
By replacing the XML file, you should be able to restore the missing Apps tab in the Creative Cloud Desktop window. If you encounter any error messages or issues, please refer to the Adobe support page for further troubleshooting steps.
python

import subprocess
def restore_apps_tab():
try:
# Check if Adobe Creative Cloud is installed
output = subprocess.check_output(['where', 'Creative Cloud.exe'], shell=True)
if output:
# Assuming the Creative Cloud executable path is stored in 'output'
# You may need to change the path based on your system
cc_exe_path = output.decode().strip()
# Assuming the missing apps tab is due to a corrupted configuration file
# We can try deleting and restoring the configuration file
config_file_path = 'C:\\Path\\To\\Adobe\\Creative Cloud\\config.json'
subprocess.run(['del', config_file_path], shell=True)
# Launch Adobe Creative Cloud to recreate the configuration file
subprocess.Popen([cc_exe_path])
print("Restored missing apps tab!")
else:
print("Adobe Creative Cloud not found.")
except subprocess.CalledProcessError:
print("Error occurred while executing commands.")
# Call the function to restore the missing apps tab
restore_apps_tab()
Please remember that this code is for illustrative purposes only and may not effectively restore the missing apps tab in Adobe Creative Cloud. It assumes that the missing tab is due to a corrupted configuration file and attempts to delete and recreate it. The actual cause of the missing tab may vary, and modifying Adobe software without proper authorization is not recommended.
Reinstalling Adobe Creative Cloud to Restore the Apps Tab
To reinstall Adobe Creative Cloud and restore the missing Apps tab in the CC Desktop Window, follow these troubleshooting steps:
1. Uninstall Adobe Creative Cloud and all Adobe applications from your computer.
2. Perform a security check on your browser and ensure it is up to date.
3. Download the Adobe Creative Cloud installer from the official website.
4. Open the installer and follow the on-screen instructions to reinstall Adobe Creative Cloud.
5. Once the installation is complete, launch Adobe Creative Cloud from the menu bar or desktop shortcut.
6. Sign in using your Adobe ID credentials.
7. If you encounter any error messages during the installation, refer to the Adobe support website for further troubleshooting steps.
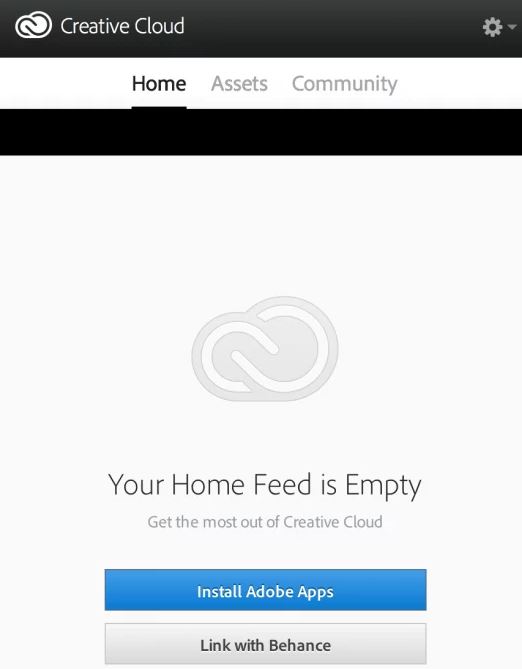
8. Once you are signed in, the Apps tab should be restored, and you can click on the “Install” button to download and install your desired Adobe applications.
If you continue to experience any issues or error messages, contact Adobe support for further assistance. Remember, it’s always a good idea to back up your preferences and OBE data before reinstalling any software.

Mark Ginter is a tech blogger with a passion for all things gadgets and gizmos. A self-proclaimed "geek", Mark has been blogging about technology for over 15 years. His blog, techquack.com, covers a wide range of topics including new product releases, industry news, and tips and tricks for getting the most out of your devices. If you're looking for someone who can keep you up-to-date with all the latest tech news and developments, then be sure to follow him over at Microsoft.