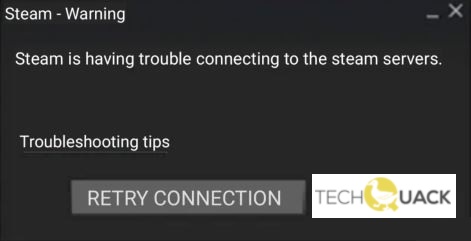
- “Steam is having trouble connecting to Steam servers” is a common problem.
- This tool detects and removes common computer errors, protects you from loss of files, malware, and hardware failures, and optimizes your device for maximum performance.
- It will scan your computer to find problems, then correct the issues that were discovered.
Navigating through the digital realm of gaming, Steam has built an empire of connectivity for gamers worldwide. However, at times, this utopia of virtual entertainment encounters a minor hiccup – trouble connecting to Steam servers. In this article, we unravel the mysteries behind this dilemma and explore potential solutions, ensuring uninterrupted gaming adventures for all.
Check Steam server status
If you’re having trouble connecting to Steam servers, there are a few things you can try to fix the issue. First, make sure your internet connection is working fine and there are no networking problems on your end. Check the Steam server status to see if there are any reported issues.
If the servers are fine, try restarting your computer and launching Steam again. If that doesn’t work, you can try a few troubleshooting steps. First, open the Command Prompt and type “ipconfig /flushdns” to reset your internet connection settings. You can also try resetting Winsock by typing “netsh winsock reset” in the Command Prompt.
If these solutions don’t work, you can also try disabling your Firewall temporarily to see if that’s causing the problem. Make sure you have the latest version of Steam installed and that your login info is correct. If all else fails, you can contact Steam support for further assistance.
Restart network devices
Restarting your network devices can often resolve connectivity issues with Steam servers. To do this, follow these steps:
1. Power off your modem and router by unplugging them from the power source.
2. Wait for about 30 seconds.
3. Plug your modem back in and wait for it to fully restart.
4. Plug your router back in and wait for it to fully restart.
5. On your computer, launch the Steam client.
If you’re still experiencing issues connecting to Steam servers, you can try the following additional steps:
1. Type “cmd” in the Windows search bar and open the Command Prompt.
2. In the Command Prompt, type “netsh winsock reset” and press Enter.
3. Restart your computer.
Update network adapter driver
To troubleshoot connection issues with Steam servers, it may be necessary to update your network adapter driver. Here’s a step-by-step guide on how to do it:
1. Open the Start menu and type “Device Manager” to launch it.
2. In Device Manager, expand the “Network adapters” section.
3. Right-click on your network adapter and select “Update driver.”
4. Choose the option to automatically search for updated driver software.
5. If a new driver is found, follow the on-screen instructions to install it.
6. Once the driver update is complete, restart your computer.
If you’re still experiencing issues connecting to Steam servers:
1. Launch Steam and go to “Steam” in the top-left corner.
2. Select “Settings” from the dropdown menu.
3. Go to the “Downloads” tab and click on the “Clear Download Cache” button.
4. Restart Steam and try connecting again.
If the problem persists, it may be related to other factors such as your internet connection or firewall settings. Make sure your internet connection is stable and that Steam is allowed through your firewall. You can also try temporarily disabling any antivirus or security software to see if that resolves the issue.
Reset WinSock
If you’re having trouble connecting to Steam servers, one possible solution is to reset WinSock. This can help fix networking problems that may be causing the issue. Here’s how you can do it:
1. Close Steam and any other programs that may be running.
2. Press the Windows key + R to open the Run dialog box.
3. Type “cmd” and press Enter to open the Command Prompt.
4. In the Command Prompt, type “netsh winsock reset” and press Enter.
5. Wait for the process to complete, and then restart your computer.
After restarting, try launching Steam again and see if you’re able to connect to the servers. If the problem persists, you may need to troubleshoot other aspects of your network connection or contact Steam support for further assistance. Don’t worry, with these steps you’ll be back to enjoying your favorite games in no time!
Modify Steam properties
To modify Steam properties and troubleshoot connection issues, follow these steps:
1. Close Steam and ensure it is not running in the background.
2. Right-click on the Steam icon on your Desktop and select “Properties” from the context menu.
3. In the Properties dialog box, go to the “Compatibility” tab.
4. Check the box next to “Run this program as an administrator” and click “Apply” and then “OK”.
5. Launch Steam again and try connecting to the Steam servers.
If the issue persists, try the following:
1. Check your Internet connection settings and ensure they are configured correctly.
2. Disable any firewall or antivirus programs temporarily, as they may be blocking Steam’s connection.
3. Reset your home network equipment, including your modem and router.
4. Verify that your UDP ports 27015-27050 are open for Steam.
5. Make sure your system’s date and time settings are accurate.
If you continue to experience trouble connecting to Steam servers, retry the connection or refer to the Steam support guide for further assistance.
Allow Steam through Windows Firewall
To allow Steam through Windows Firewall and troubleshoot connectivity issues, follow these steps:
1. Press the Windows key + R to open the Run dialog box. Type “firewall.cpl” and press Enter to open the Windows Firewall settings.
2. Click on “Allow an app or feature through Windows Firewall” in the left-hand menu.
3. Click on the “Change settings” button. If prompted, enter your administrator password or confirm the action.
4. Scroll down and locate “Steam” in the list of allowed apps and features.
5. Ensure that both “Private” and “Public” boxes are checked for Steam.
6. If Steam is not listed, click on the “Allow another app” button.
7. Click the “Browse” button and navigate to the Steam installation folder (usually located in C:\Program Files\Steam).
8. Select “Steam.exe” and click “Open” to add it to the allowed apps list.
9. Check both “Private” and “Public” boxes for the newly added Steam entry.
10. Click “OK” to save the changes and close the Windows Firewall settings.
Note: Remember to also check your router and antivirus/firewall software settings, as they may be blocking Steam connections. Retry connecting to the Steam servers after making these changes.
Run Steam as Administrator
If you’re having trouble connecting to Steam servers, running Steam as an administrator can often resolve the issue. Here’s how:
1. Close the Steam application completely.
2. Right-click on the Steam shortcut or executable file on your desktop or in your Steam installation folder.
3. Select “Run as administrator” from the context menu.
4. When prompted, enter your administrator credentials.
5. The Steam client will now launch with administrative privileges, which can help overcome certain connectivity issues.
By running Steam as an administrator, you ensure that the application has the necessary permissions to establish a stable network connection. This can be particularly helpful if you’re experiencing errors like “Steam cannot connect to the Steam network” or “Could not connect to Steam servers.”
Remember to retry the connection after running Steam as an administrator. If the problem persists, you may need to troubleshoot other factors such as your network connection, firewall settings, or Steam client updates.
Add exception for Steam executables
If you are experiencing trouble connecting to Steam servers and have already tried other troubleshooting steps, you may need to add an exception for Steam executables in your system’s firewall or antivirus software.
To do this, follow these steps:
1. Open your firewall or antivirus software settings.
2. Look for an option to add exceptions or allow specific applications.
3. Add the following Steam executables to the list of allowed applications: steam.exe, steamerrorreporter.exe, and steamwebhelper.exe.
4. Save your changes and exit the settings.
By adding these exceptions, you are ensuring that your firewall or antivirus software does not block Steam’s connection to the internet. This can help resolve issues with connecting to Steam servers and accessing your Steam account and games.
If you continue to experience problems, you may also want to check if your router or home network equipment is causing any issues. Restarting your equipment or contacting your internet service provider for assistance can sometimes help resolve connectivity problems.
Remember to always retry the connection after making any changes or adjustments.
Add launch option to Steam executable
If you’re having trouble connecting to Steam servers, adding a launch option to the Steam executable can help fix the issue. Here’s how you can do it:
1. Right-click on the Steam shortcut or executable and select “Properties.”
2. In the “Target” field, add -tcp at the end of the path. For example, it should look like: “C:\Program Files (x86)\Steam\Steam.exe” -tcp
3. Click “Apply” and then “OK” to save the changes.
By adding this launch option, Steam will use TCP instead of UDP for its connection. This can resolve certain Internet errors and improve connectivity.
If you’re still experiencing issues, you can also try restarting your computer, checking your Internet connection, or temporarily disabling any firewall or antivirus software that may be blocking Steam.
Remember, troubleshooting connectivity issues can be frustrating, but don’t worry.
Reinstall Steam
If you’re having trouble connecting to Steam servers, reinstalling the Steam application might help resolve the issue. Here’s how:
1. First, make sure Steam is completely closed. Exit the application by right-clicking the Steam icon in the system tray and selecting “Exit”.
2. Next, open the “Control Panel” on your computer and navigate to “Programs” or “Programs and Features”. Look for “Steam” in the list of installed programs and select it.
3. Click on the “Uninstall” or “Remove” button and follow the prompts to uninstall Steam from your computer.
4. Once Steam is uninstalled, visit the official Steam website and download the latest version of the Steam application.
5. After the download is complete, run the installer and follow the on-screen instructions to reinstall Steam.
6. Once the installation is finished, launch Steam and log in with your account credentials.
7. Try connecting to the Steam servers again. If you’re still experiencing issues, you may want to check your internet connection or contact Steam support for further assistance.
Reinstalling Steam can often fix connectivity issues and get you back in the game. Give it a try and see if it resolves your problem.
Change Steam’s Internet Protocol
If you’re having trouble connecting to Steam servers, one possible solution is to change Steam’s Internet Protocol (IP) settings. This can help resolve any connectivity issues or errors you may be experiencing.
To change Steam’s IP, follow these steps:
1. Launch the Steam client and go to “Steam” in the top-left corner.
2. Select “Settings” from the drop-down menu.
3. In the Settings window, click on the “Downloads” tab.
4. Under the “Download Region” section, select a different region from the drop-down menu. Choose a region that is geographically close to your location for optimal performance.
5. Click “OK” to save the changes.
Changing the IP can sometimes fix Steam network errors and allow you to connect to the servers without any issues. If you continue to experience problems, you might also want to try restarting your router or checking your internet connection.
Remember to retry the connection after making these changes. Hopefully, this will resolve your connectivity troubles and get you back to enjoying your Steam account and games.
Delete/alter ClientRegistry.blob
If you’re having trouble connecting to the Steam servers, one potential solution is to delete or alter the ClientRegistry.blob file. This file contains information about your Steam login and can sometimes become corrupted, causing connection issues.
To fix this problem, you can follow these steps:
1. Close the Steam client completely.
2. Locate the ClientRegistry.blob file on your computer. It is usually found in the Steam installation folder, which is typically “C:\Program Files\Steam” or “C:\Program Files (x86)\Steam”.
3. Rename the file to something like “ClientRegistry_old.blob” to keep a backup.
4. Restart the Steam client. It will generate a new ClientRegistry.blob file.
5. Try connecting to the Steam servers again and see if the issue is resolved.
If you’re still unable to connect, there may be other factors at play, such as Internet errors or Steam server issues. In such cases, it’s recommended to retry the connection or visit the Steam support website for further assistance.
Troubleshoot internet connection
If you’re having trouble connecting to Steam servers, there are a few troubleshooting steps you can try to get back in the game. First, check your internet connection to ensure it’s stable. If you’re using a wired connection, make sure the cable is securely connected and not damaged.
Next, try restarting your router and modem. Sometimes, a simple reboot can resolve connection issues.
If that doesn’t work, you can try clearing the Steam download cache. To do this, go to the Steam settings, click on the “Downloads” tab, and then click the “Clear Download Cache” button.
If you’re still having trouble, you can try changing your Steam server. Sometimes, certain servers can experience issues. To do this, go to the Steam settings, click on the “Downloads” tab, and then click the “Download Region” dropdown menu. Choose a different server and click “OK.”
If none of these steps work, you may want to try disabling any firewalls or antivirus software temporarily, as they can sometimes interfere with Steam’s connection.
Remember, if you’re still experiencing issues, you can always reach out to Steam support for further assistance.
Temporarily disable antivirus/firewall
If you’re having trouble connecting to Steam servers, temporarily disabling your antivirus/firewall software may help resolve the issue.
1. Disable Antivirus
Open your antivirus software and locate the option to temporarily disable it. This will vary depending on the software you are using. Check the software’s documentation or website for specific instructions.
2. Disable Firewall
Open the Windows Control Panel and navigate to the Firewall settings. Disable the firewall temporarily or create an exception for Steam. Again, specific steps may vary, so refer to the Windows documentation for more information.
3. Retry Connection
After disabling your antivirus/firewall, try connecting to Steam again. If the issue persists, try restarting your computer and repeating steps 1 and 2.
Remember to re-enable your antivirus/firewall once you have successfully connected to Steam.
Use another network
If you’re having trouble connecting to Steam servers, you can try using another network to resolve the issue. Sometimes, network problems can prevent Steam from connecting properly. Here’s what you can do:
1. Disconnect from your current network and connect to a different network, such as a mobile hotspot or a different Wi-Fi network. This will help determine if the issue lies with your current network.
2. Restart your computer after connecting to the new network. This will refresh your network settings and may resolve any temporary issues.
3. Launch Steam and attempt to log in again. If the problem persists, you can try restarting your router and modem to ensure a clean network connection.
4. Check your firewall and antivirus settings to make sure they are not blocking Steam’s access to the internet. Temporarily disable them if necessary and see if that resolves the issue.
Remember, if you continue to experience trouble connecting to Steam servers, you may want to seek further assistance from Steam support or their community forums.
Update Windows
If you’re having trouble connecting to Steam servers, there are a few steps you can take to resolve the issue.
First, make sure that your Windows operating system is up to date. Go to the Start menu, click on Settings, then select Update & Security. From there, click on Windows Update and select Check for updates. Install any available updates to ensure that your system is running smoothly.
Next, check your internet connection. Make sure you are connected to a stable and reliable network. If you’re using a wireless connection, try switching to a wired connection for better stability.
If the issue persists, you can try resetting the Steam client. Close Steam completely, then navigate to the Steam installation folder on your computer. Look for a file named “ClientRegistry.blob” and delete it. Restart Steam and try connecting again.
If none of these steps work, you can try disabling any antivirus or firewall software temporarily. Sometimes these programs can interfere with the connection to Steam servers.
If you continue to experience trouble connecting to Steam servers, it may be worth reaching out to Steam support for further assistance. They can provide more specific troubleshooting steps based on your specific situation.
Rename/move some Steam folders
If you’re having trouble connecting to Steam servers, you may need to rename or move some Steam folders. Follow these steps to fix the issue:
1. Close Steam completely. Make sure it’s not running in the background.
2. Open the Steam installation folder. This is usually located in C:\Program Files\Steam or C:\Program Files (x86)\Steam.
3. Look for the “userdata” folder and rename it to something like “userdata_old”. This folder contains your login information and game settings.
4. Restart Steam and try logging in again. This will create a new “userdata” folder with fresh login info.
5. If you still can’t connect, try moving the “SteamApps” folder to a different location temporarily. This folder contains your game files.
6. Launch Steam again and go to Steam > Settings > Downloads > Steam Library Folders. Add a new library folder and select the new location where you moved the “SteamApps” folder.
7. Restart Steam and let it update. Your games should appear in the library again.
Remember to retry the connection after each step. This should fix most connection issues with Steam servers. If you’re still experiencing problems, it may be related to your network or other software on your computer.
Disable firewall and antivirus
If you’re having trouble connecting to Steam servers, one potential solution is to disable your firewall and antivirus temporarily. While these security measures are important, they can sometimes interfere with Steam’s connection.
To disable your firewall, follow these steps:
1. Press the Windows key + R to open the Run dialog box.
2. Type “control panel” and hit Enter to open the Control Panel.
3. In the Control Panel, search for “Windows Defender Firewall” and click on it.
4. Click on “Turn Windows Defender Firewall on or off” in the left sidebar.
5. Select the “Turn off Windows Defender Firewall” option for both private and public networks.
6. Click “OK” to save the changes.
To disable your antivirus, the process may vary depending on the software you’re using. Generally, you can right-click on the antivirus icon in your system tray (usually located in the bottom right corner of your screen) and look for an option to disable or pause the antivirus temporarily.
Remember to re-enable your firewall and antivirus after troubleshooting the connection issue. Disabling these security measures should only be done temporarily and with caution.

Mark Ginter is a tech blogger with a passion for all things gadgets and gizmos. A self-proclaimed "geek", Mark has been blogging about technology for over 15 years. His blog, techquack.com, covers a wide range of topics including new product releases, industry news, and tips and tricks for getting the most out of your devices. If you're looking for someone who can keep you up-to-date with all the latest tech news and developments, then be sure to follow him over at Microsoft.