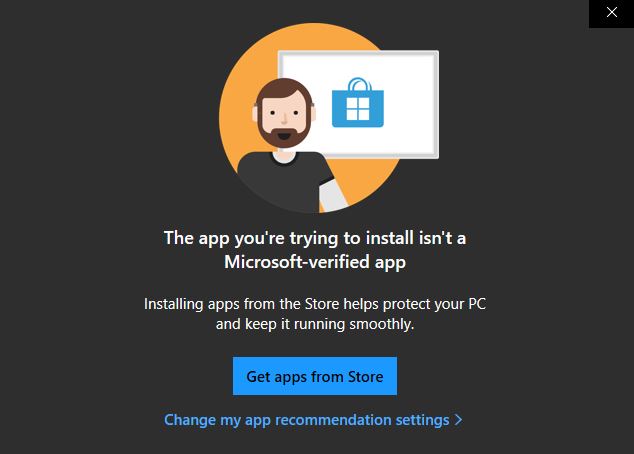
- Microsoft introduced a new feature in Windows 10 Build 15042 that allows you to install apps only from the Windows Store.
- Microsoft does this to protect your computer from suspicious applications that could damage your system.
- Unverified applications may contain malware, bugs, and anomalies that can harm your PC.
- If you cannot uninstall an application in Windows because it has not been verified by Microsoft, the easiest way to solve this problem is to adjust the Microsoft Store settings.
Unlocking the full potential of your device often requires downloading and installing various applications. However, encountering an app install that is not Microsoft-verified can be frustrating. In this article, we will explore effective troubleshooting techniques to overcome this obstacle and ensure a seamless app installation experience.
Disabling App Recommendations to Troubleshoot Installation Issues
To troubleshoot installation issues with non-Microsoft verified apps, you can disable app recommendations on Windows 10. This can help resolve any conflicts or errors that may be preventing the installation process.
1. Open Settings by tapping “Start” and selecting the gear icon.
2. Go to “Apps” and then “Apps & features”.
3. Scroll down and click on “Microsoft Store”.
4. Under “App recommendations”, toggle the switch to disable it.
Disabling app recommendations can prevent any unwanted suggestions or interference during the installation process. Once disabled, you can proceed with the installation of the app without any disruptions.
If you encounter any further issues, we recommend checking the Microsoft Support Knowledge Base or reaching out to our support team for further assistance.
Changing Microsoft Store Settings for App Installation
To change Microsoft Store settings for app installation, follow these steps:
1. Open Settings by tapping Start and selecting the gear icon.
2. In the Settings page, click on “Apps” to access the Apps & features settings.
3. Scroll down and click on “Microsoft Store” under the “Apps & features” section.
4. In the Microsoft Store settings page, you’ll see an option labeled “App Install.” By default, it is set to “Allow apps from anywhere.”
5. To change this setting, click on the drop-down menu and select the desired option. For example, if you want to only install apps from Microsoft, select “Install apps only from the Microsoft Store.”
6. After making your selection, close the settings page.
7. Now, when you try to install an app that is not Microsoft-verified, you will see a warning message. To proceed with the installation, click on the “Install anyway” button.
Note: Changing the app installation setting can have an impact on the security of your PC. Be cautious when installing apps from sources other than the Microsoft Store.
That’s it! You have successfully changed the Microsoft Store settings for app installation. Remember to switch back to the default setting if you encounter any issues or need assistance from a Microsoft technician.
Switching Out of Home S Mode for App Installation
If you’re experiencing issues installing apps that are not Microsoft-verified on your Windows 10 PC in S mode, here’s how you can switch out of S mode and resolve the problem.
1. Tap the Start button and select “Settings.”
2. In the Settings menu, click on “Update & Security.”
3. Navigate to the “Activation” tab.
4. Under the “Switch to Windows 10 Home” section, click on the “Go to the Store” link.
5. This will take you to the Microsoft Store, where you can select the “Get” button to switch out of S mode.
6. Follow the on-screen instructions to complete the switch.
7. Once out of S mode, you’ll be able to install apps that are not Microsoft-verified from outside the Microsoft Store.
Note: Switching out of S mode is a one-way process, and you won’t be able to switch back. Ensure that you understand the implications before proceeding.
Pro-tip: Before switching out of S mode, it’s recommended to run a security check on the app you want to install to ensure its safety.
If you still encounter any issues, contact Microsoft support or refer to their knowledge base article for further troubleshooting instructions.
Using Command Line to Install Microsoft Unverified Apps
If you encounter an issue with installing an app on your computer that is not verified by Microsoft, you can use the command line to proceed with the installation. Here’s how:
1. Tap the Start button and search for “Command Prompt” to open the command line.
2. In the command line, navigate to the directory where the installation file is located. You can use the “cd” command followed by the path to the directory.
3. Once in the correct directory, enter the command “AppInstaller.exe -install
4. Press Enter to execute the command and initiate the installation.
5. If a security check message appears, review it carefully to ensure you trust the source of the app. If you’re confident in its safety, click on the “Install anyway” button to proceed.
6. Follow any on-screen prompts or instructions to complete the installation.
Remember, installing unverified apps can pose security risks, so exercise caution and only install from trusted sources. If you’re unsure about an app, it’s always a good idea to consult Microsoft’s support knowledge base or seek assistance from a qualified technician.

Mark Ginter is a tech blogger with a passion for all things gadgets and gizmos. A self-proclaimed "geek", Mark has been blogging about technology for over 15 years. His blog, techquack.com, covers a wide range of topics including new product releases, industry news, and tips and tricks for getting the most out of your devices. If you're looking for someone who can keep you up-to-date with all the latest tech news and developments, then be sure to follow him over at Microsoft.