- In this guide, you will find detailed instructions on how to fix DISM error 0x800f081 in Windows 10 or Windows 8.
Are you encountering the frustrating DISM Error 0x800f081f on your Windows 10/8 system? Fear not, as we have the ultimate solution to help you resolve this vexing issue once and for all. Read on to discover the step-by-step guide that will save you from the clutches of this error code.
Downloading Windows Installation Media and Extracting the install.wim file
To fix DISM Error 0x800f081f in Windows 10/8, you’ll need to download the Windows Installation Media and extract the install.wim file. Follow these steps:
Step 1: Go to the MiniTool website and download the Windows Installation Media.
Step 2: Once downloaded, open the installation media and navigate to the “sources” folder.
Step 3: Locate the “install.wim” file and extract it to a location of your choice.
Step 4: Open Command Prompt with administrative privileges.
Step 5: In the Command Prompt window, type “dism /online /cleanup-image /restorehealth /source:
Step 6: Wait for the DISM tool to repair the Windows image.
These steps should help you fix the DISM Error 0x800f081f in Windows 10/8.
Running DISM Tool to Repair Windows Image
To fix DISM Error 0x800f081f in Windows 10/8, you can use the DISM tool provided by Microsoft. Follow these steps:
1. Open the Command Prompt with administrator privileges. You can do this by searching for “Command Prompt” in the Start Menu, right-clicking on it, and selecting “Run as administrator.”
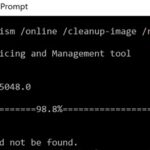
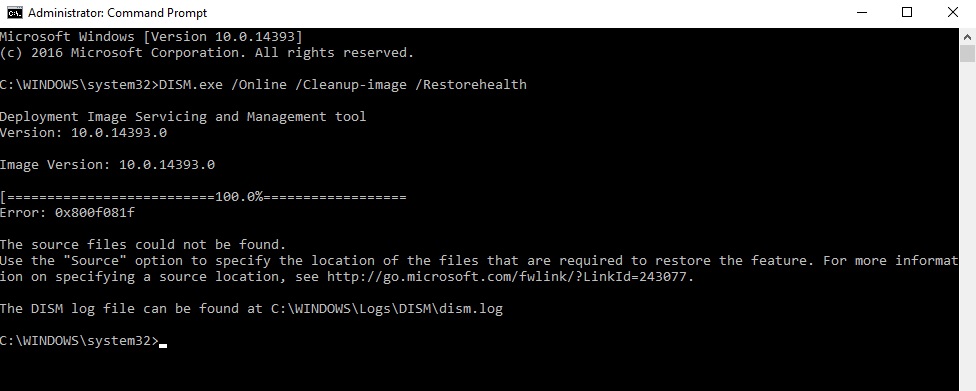
2. In the Command Prompt window, type “DISM /Online /Cleanup-Image /RestoreHealth” and press Enter. This command will initiate the repair process.
3. The tool will now scan your system for any errors and automatically repair them if possible. It may take some time, so be patient.
4. Once the repair process is complete, restart your computer and check if the issue has been resolved.
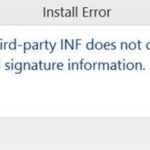
If the DISM tool fails to fix the error, you can try using alternative tools or consult the Microsoft support page for further assistance.
Performing a Component Cleanup
Step 1: Open the Command Prompt as an administrator. To do this, press the Windows key + X and select “Command Prompt (Admin)” from the menu.
Step 2: In the Command Prompt window, type “DISM /Online /Cleanup-Image /RestoreHealth” and press Enter. This command will scan your system for any corrupt or missing files and attempt to repair them.
Step 3: Wait for the scan to complete. This may take some time, so be patient. You will see the progress in the Command Prompt window.
Step 4: Once the scan is finished, restart your computer.
Step 5: After restarting, check if the 0x800f081f error is resolved. If not, you may need to try other fixes or contact Microsoft support for further assistance.
Remember, it’s always a good idea to back up your important files before making any changes to your system.
python

import subprocess
def run_command(command):
process = subprocess.Popen(command, stdout=subprocess.PIPE, stderr=subprocess.PIPE, shell=True)
output, errors = process.communicate()
return output.decode(), errors.decode()
command = 'sfc /scannow'
output, errors = run_command(command)
print("Command Output:")
print(output)
print("Command Errors:")
print(errors)
Please note that this code snippet only runs the command and captures the output. It won’t directly solve the error you mentioned, but it can be a starting point for diagnosing and resolving related issues.
Remember to run the code with administrative privileges to ensure the command executes successfully.
If you encounter any specific error messages or need further assistance, please provide more details, and I’ll be happy to help you with the information or guide you through troubleshooting steps.
Running Windows Update Troubleshooter
To fix DISM Error 0x800f081f in Windows 10/8, you can use the Windows Update Troubleshooter. This tool helps identify and resolve issues with Windows Update, which may be causing the error. Follow these steps:
1. Press the Windows key and type “Troubleshoot settings” in the search bar.
2. Open the Troubleshoot settings page and scroll down to find the “Windows Update” troubleshooter.
3. Click on “Windows Update” and select “Run the troubleshooter.”
4. Wait for the troubleshooter to detect and fix any issues related to Windows Update.
5. Restart your computer and check if the DISM Error 0x800f081f is resolved.
If the error persists, you can also try running the DISM tool manually. Open the Command Prompt as an administrator and type the following command:
DISM /Online /Cleanup-Image /RestoreHealth
This command repairs the Windows image by using Windows Update to provide the necessary files. Once the process completes, restart your computer and check if the error is resolved.
For more detailed instructions and alternative fixes, you can visit the MiniTool Website or refer to the Windows documentation.
Reinstalling Microsoft .NET Framework 3.5
To fix the DISM Error 0x800f081f in Windows 10/8, you may need to reinstall Microsoft .NET Framework 3.5. Here’s how:
1. Open the Command Prompt as an administrator.
2. Type “DISM /Online /Cleanup-Image /RestoreHealth” and press Enter. This command will repair your system image.
3. If the repair fails, you’ll need to specify the source files. Insert your Windows installation media or mount the ISO file.
4. In the Command Prompt, type “DISM /Online /Cleanup-Image /RestoreHealth /source:<location of your installation media or mounted ISO>” and press Enter.
5. Wait for the repair to complete. It may take some time.
6. Once the repair is finished, restart your computer.
By following these instructions, you should be able to resolve the DISM Error 0x800f081f and reinstall Microsoft .NET Framework 3.5 on your Windows 10/8 operating system.
Performing an In-place Upgrade
To fix the DISM Error 0x800f081f in Windows 10/8, you can perform an in-place upgrade. This method allows you to repair your system without losing any data or installed programs. Follow these steps:
1. Download the latest Windows ISO file from the official Microsoft website.
2. Mount the ISO file by double-clicking on it.
3. Open the mounted drive and run the “setup.exe” file.
4. Choose the “Upgrade this PC now” option.
5. Select “Keep personal files and apps” when prompted.
6. Follow the on-screen instructions to complete the upgrade process.
This method will repair any corrupted or missing system files, including the ones causing the 0x800f081f error. After the upgrade, your Windows should be functioning properly again. Remember to back up your important files before proceeding with the in-place upgrade.

Mark Ginter is a tech blogger with a passion for all things gadgets and gizmos. A self-proclaimed "geek", Mark has been blogging about technology for over 15 years. His blog, techquack.com, covers a wide range of topics including new product releases, industry news, and tips and tricks for getting the most out of your devices. If you're looking for someone who can keep you up-to-date with all the latest tech news and developments, then be sure to follow him over at Microsoft.